BWHeader

Lichen Growth on Sculpture and Mold on an Orange

The sculpture was made while an undergrad at Ohio State University in the 80s. Unfortunately, the top rim of the smaller piece was chipped during a move. The pieces were designed to be placed in different positions while still having a dialogue. They were fired multiple times using lithium and lead glazes.

Sculpture on Deck

Grey Lichen

Grey and Orange Lichens

Orange Lichen

Red Lead Glaze and Orange Lichen

Lady Bug on Lithium Blue Glaze

Naturally Occurring Blue-Green Found on Orange
Orange Mold

Orange Mold

Orange Mold

My choice of glaze surfaces occurred before my interest in mold and lichen growth.


What Happened?

I found the bits next to the tissue box in the bathroom.

Flaking Results

When I looked up, I realized one of my pieces was damaged.

This was the piece. It is part of my Cleanse Your Palate Series, No Guilt.

Bird Head

The image was taken by Sharon Tetly when the work was on display at Western Nevada College.

The piece has pit-fired components. The bird head is hanging from a strand of pit-fired beads. Of course there is code in how the beads were strung. The beaded piece references chaplets. The idea was to remove the chaplet, hold it, and repeat, “forgive yourself” for whatever perceived wrong.

The piece is hung in the guest bathroom. It actually has been in the same location for several years.

There are a few of the same pit-fired beads in my stash of beads for comparison. Maybe tests.

Pit Fired Beads

The pit-fired beads and bird head have all fallen apart.

Damaged Pit Fired Beads

Damaged Pit Fired Beads

I removed the chaplet, but haven’t yet warmed to how the piece looks without it.

Damaged Pit Fired Beads

Why did the beads fall apart? My initial thought…the flaking off of the surface is the result of humidity. Why now? Most likely it was a gradual process until the point that flaking occurred.

Am I upset? No, more curious about how the damage occurred, how to prevent it in the future, and how to make it occur if I want to age a piece.


Patina Gone Crazy

Patina

Patina

Patina

After a short time this occurred–

Patina

Patina

Patina

What was the patina used for? I strung together 3 kinds of shiny steel washers in code for a 3-bunny gravemarker.

Memorial Piece

This is what the washers looked like when they were removed from the solution.

Memorial Piece

And now as part of the grave marker–

Memorial Piece

Memorial Piece

Eventually the piece should become rustier, more aged, a bit more similar to the oxidized bunny marker.

This is another memorial for a bunny burial space.

Mr Smith Memorial Piece

Used the same washers to make the coded memorial piece. I suspect that they have oxidized because the area of the garden gets watered frequently and the little inlaid ceramic cup does not have a drainage hole.

How many bunnies do I have buried in my courtyard? Eight. That sounds like a lot of bunnies. Eight bunnies have lived with me during the past 25 years. My oldest bunny lived a long, but not long enough 13 years.

The simple rust promoter formula found online.

Patina Formula


Time to Retire My Rabbit Mug?

This has been an annoying allergy season. Had been taking loads of antihistamines, now on Sudafed and Aleve. Symptoms often wake me in the middle of the night. Sometimes I need to take addition doses of Sudafed.

Tuesday evening I left my rabbit mug half filled with water on the bathroom counter, the top covered with a kleenex. Wednesday night the mug was still waiting to be used. As I removed the kleenex I noticed the exterior of the mug looked odd, stained.

Rabbit Mug Exterior

When I looked inside the mug, the glaze looked stained.

<Rabbit Mug Interior

And what happened to the water?

<Rabbit Mug Interior

When I held the mug it felt cold. If water can be pulled through the small fractures in the glaze surface, what else might the mug contain? Was the glaze fired to maturity? Is it possible that some of the glaze ingredients are toxic? What have I been drinking with my orange juice?

Yep, time to retire the mug.


Lichens and Glazes

When my chosen medium was clay, I used a lot of layered, often gritty glazes. In the back of my mind always thinking lichens.

Today when I was sweeping the deck, to my delight I found this piece has actual lichens growing on the surface.

Sculpture on Deck

Sculpture on Deck with Lichens

The piece was made in a class at Ohio State in the early 80s. The clay is a buff colored sculpture body with some nice aggregate. The piece was bisque fired to cone 5. A cone 05 lithium blue glaze was applied for the base color. Then low-fire lead glazes were applied. The last fired to cone 015.

The piece has been on the deck since 1994. It looks so much better with the addition of lichens.

Sculpture on Deck with Lichens

If interested in viewing lichen glaze surfaces, check out Lana Wilson’s work. Lana’s text, Ceramics: Shape and Surface has some great information for the beginner; and it also has loads of information on how to achieve gorgeous glaze surfaces. The text is available on Lana’s website.


A note about my use of lead glazes. Yes, they are gorgeous low-fire glazes. But lead is potentially dangerous. I haven’t been used lead glazes for several years. Since I have been attempting to use safer materials and processes, I reluctantly decided to remove all potentially toxic ceramic materials from my studio. I had quite the stash. I was fortunate that during the yearly clean-up, the materials were accepted for disposable without cost.

Did I really remove all of the lead from my studio? Well, I did keep a small bag of a leaded frit, just in case. I also found a small sheet of lead that I kept. It is a lovely soft material. I used it to line and wrap portions of boxes.

Lead Detail

Detail of a piece in my Make Your Own Luck series.
The vertical section is wrapped in sheet lead.
The nest-like material is lead wool.
The three objects are whole nutmeg.
Nutmeg was used for luck.
If consumed it could be deadly.


Eroded Contours

Some 20 plus years back I made a series titled, Eroded Contours. It was a process oriented series. The pieces were meant to be hung on the wall, but one of the pieces found a home in my garden.

Eroded Contours

The Process–

1. Made a plaster mold of a large philodendron leaf. Used it dry as a press mold for a mid-range stoneware body. Pulled several pieces. Fired them in a high bisque, cone 5. Broke them into pieces.

2. Used the same plaster mold wet to pull waxes.

3. Inserted some of the broken ceramic pieces into the waxes keeping in mind that the ceramic pieces could shift when the wax burns out.

4. Gated, then invested the lot.

5. Sent the investments through the burnout.

Potential problems–
1. Would there be a shift in the position of the ceramic pieces as the wax burned out?
2. What would happen to the ceramic pieces when hit with molten bronze?
3. What would happen when the bronze and ceramic pieces cool?
4. What would happen to the ceramic pieces embedded in bronze during the breakout?

Everything went quite well. Better than anticipated. Some of the fired ceramic pieces did fracture. A few bits were lost in the process.

When the fracture was more than I wanted, I mixed up a batch of Egyptian Paste to use as a filer. The plan was to glaze and fire the lot, so the addition of a cone 016 paste was compatible with the glaze temperature.

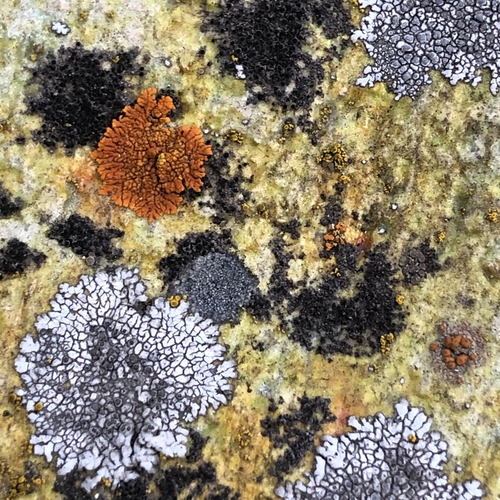
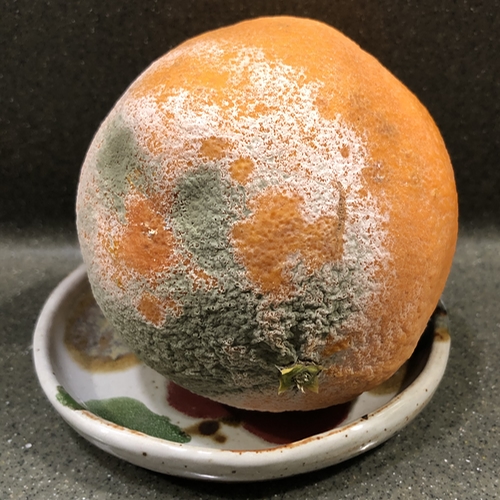
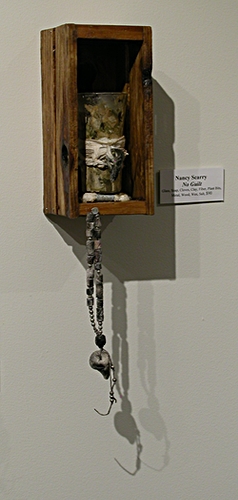
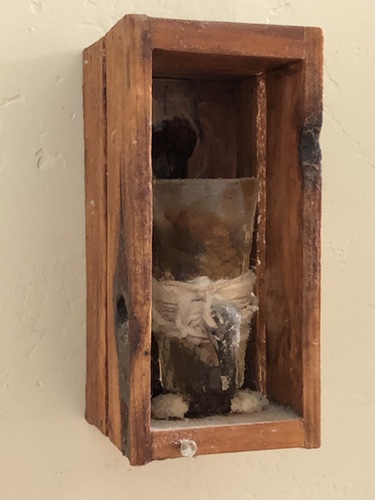
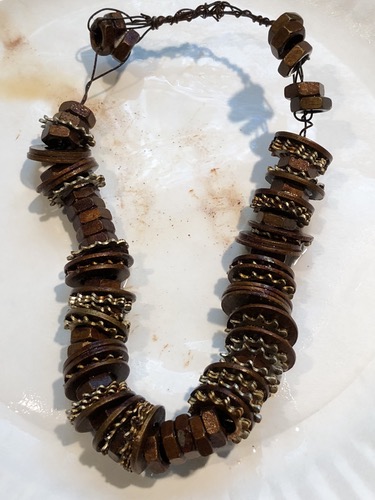
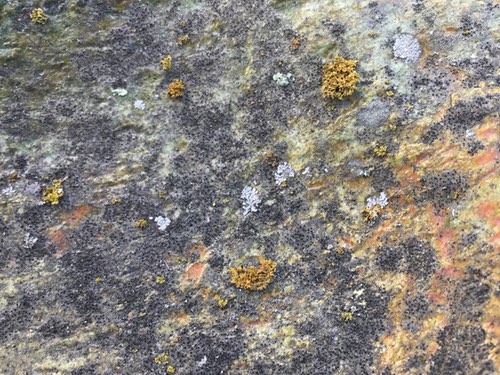
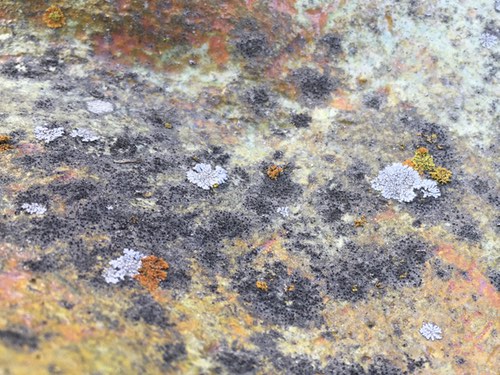
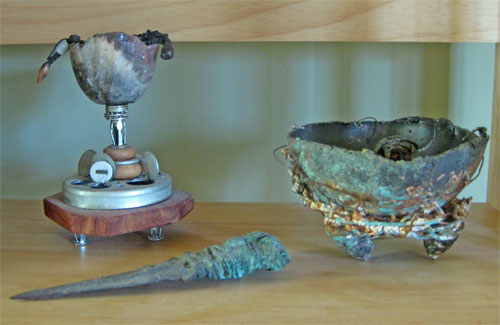
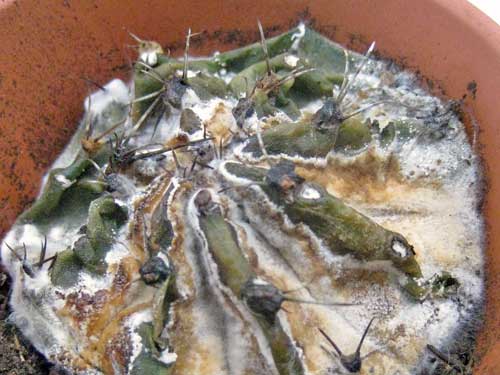
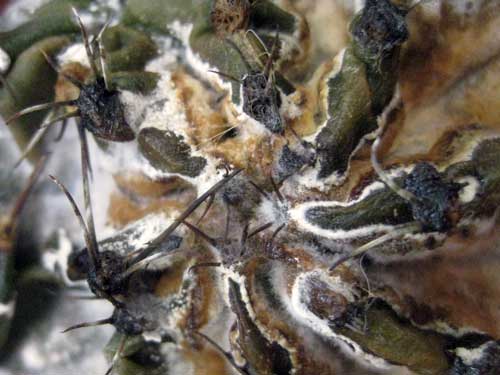
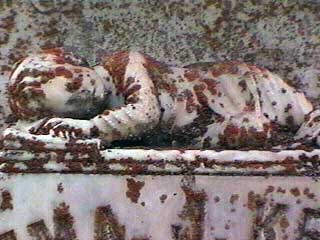
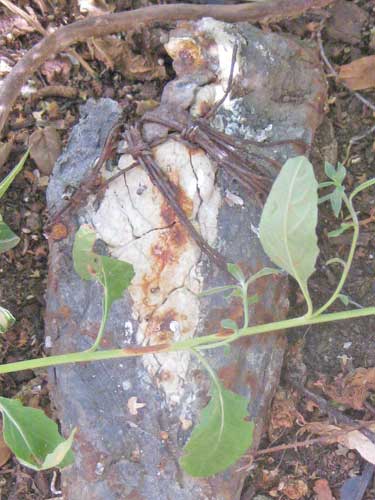
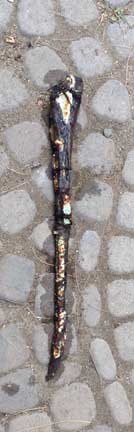
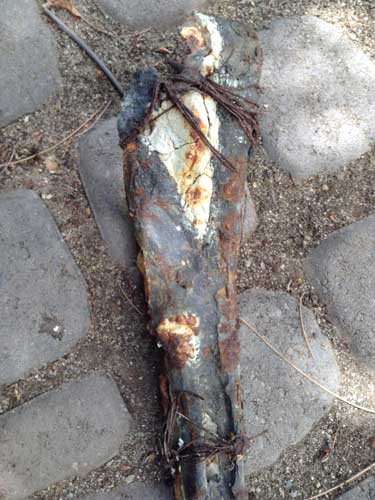
This is how the piece looked when removed from the garden. The pieces are long and quite narrow so a bit difficult to get a decent image.

Eroded Contours

The majority of the piece is bronze. The whitish areas stained with rust from the oxidized wire. I had forgotten that some of the pieces also had wire. The wire was bound on prior to the glaze fire. Firing the wire made it a bit fragile and after years in the garden, some of the wire was broken and missing.

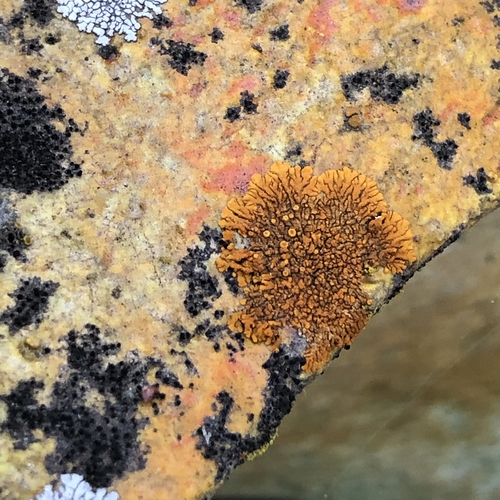
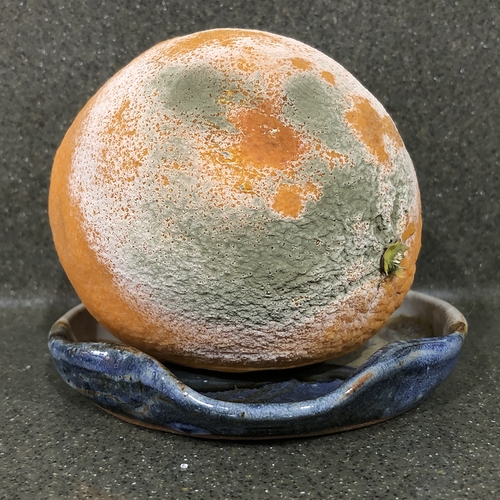
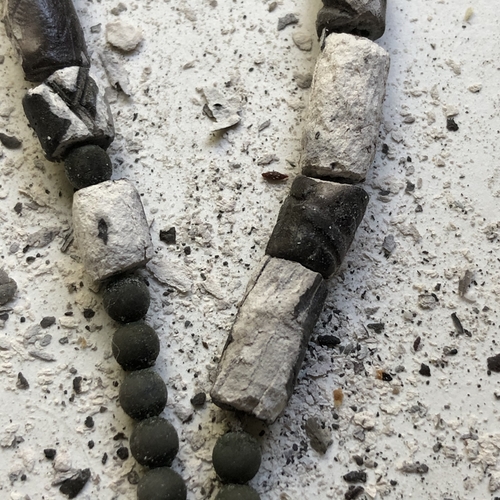
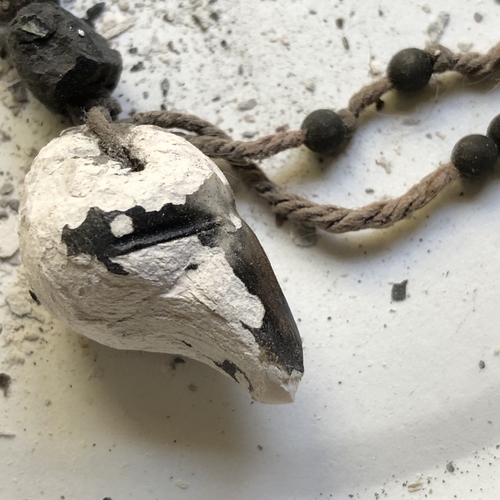
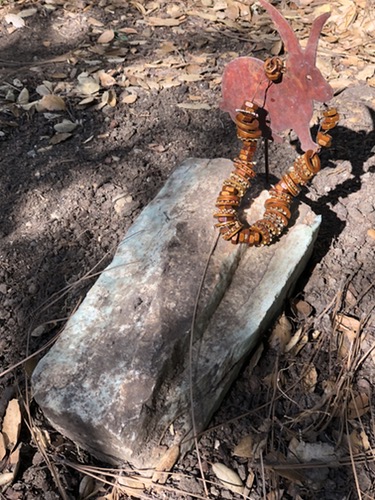
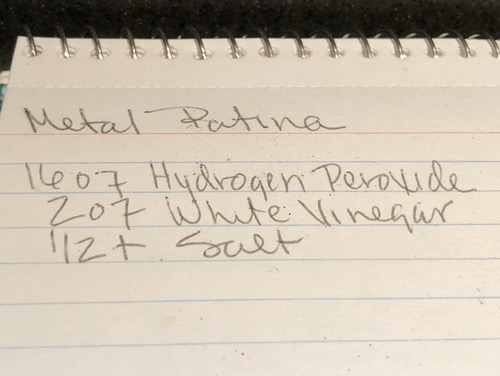
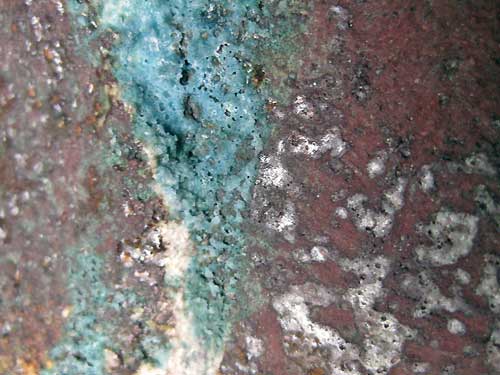
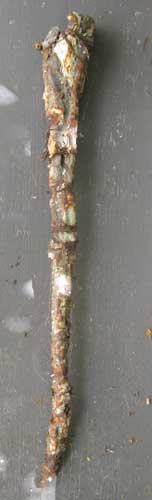
I was curious if the rust stain was permanent, so I washed the piece with a solution of water and epsom salt.

Washed Piece

Washed Detail 1

Washed Detail 2

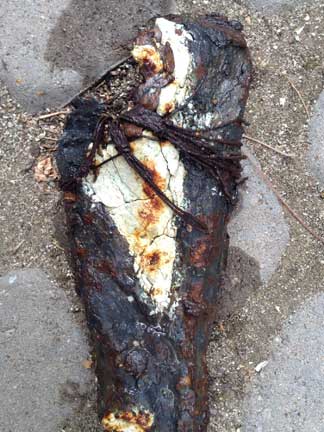
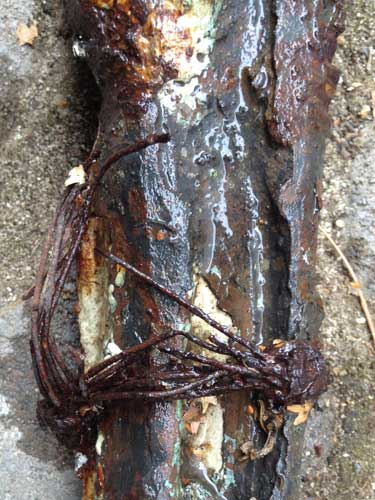
Some of the wire has vanished, but left its mark.

Washed Detail 3

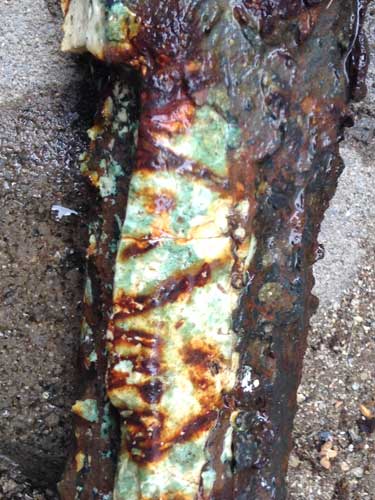
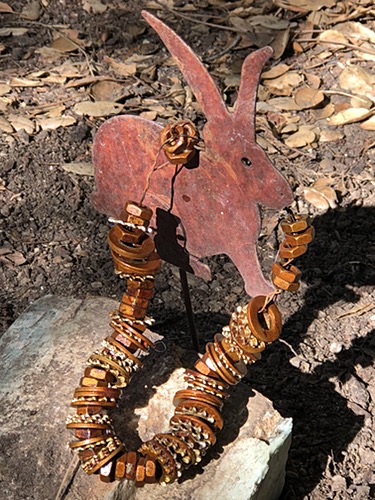
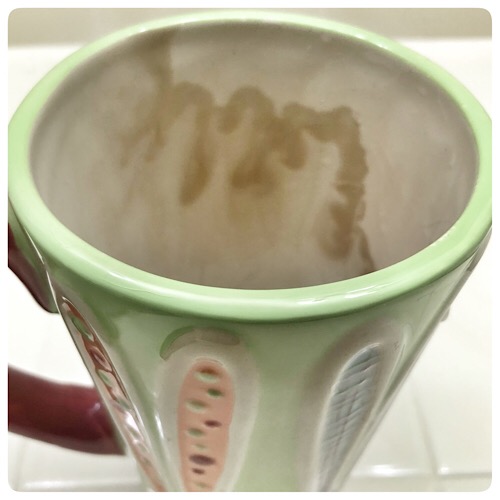
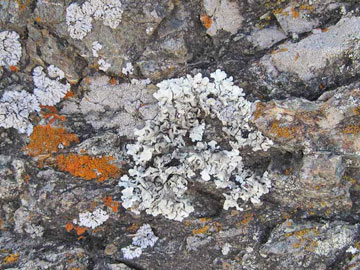
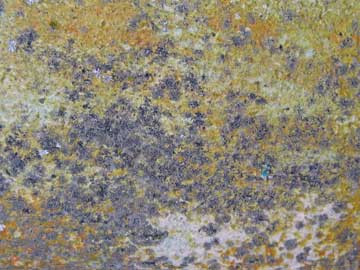
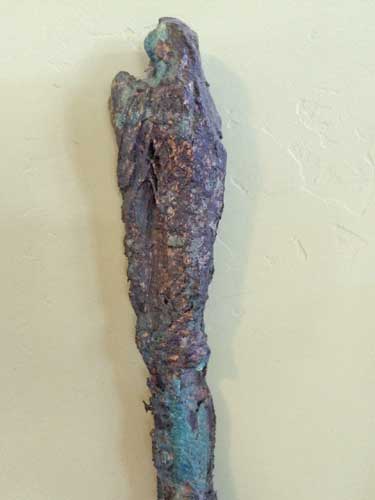
This is how the piece looks after it dried overnight.

Dried

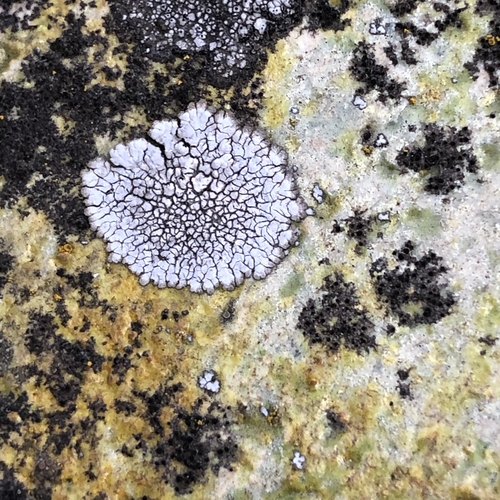
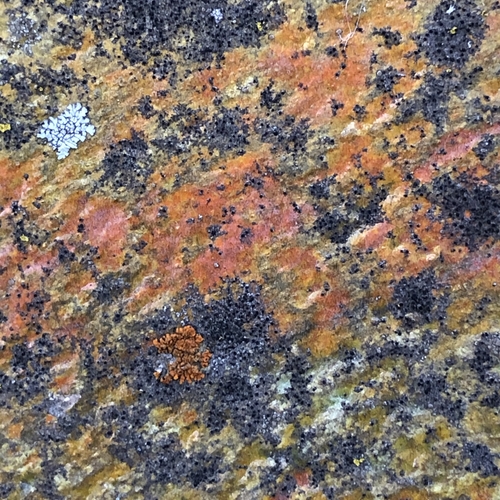
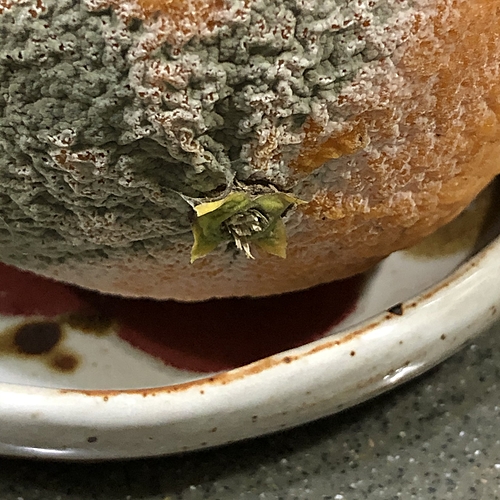
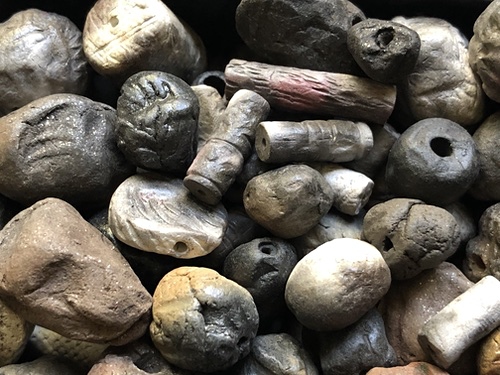
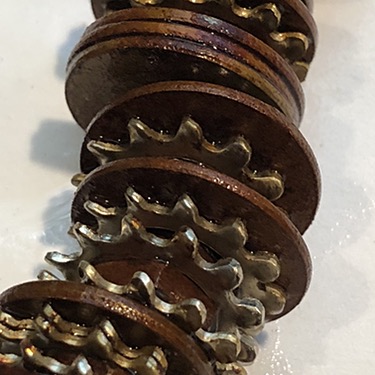
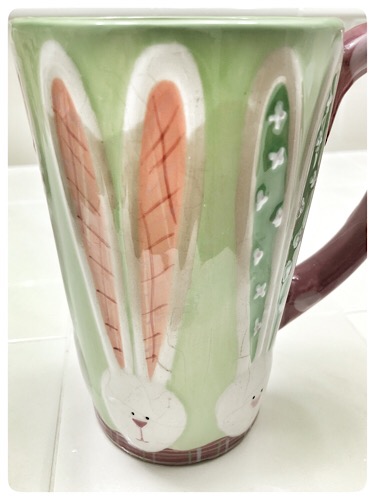
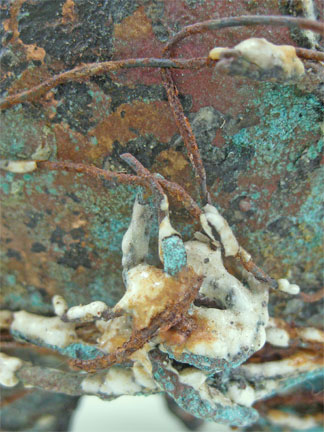
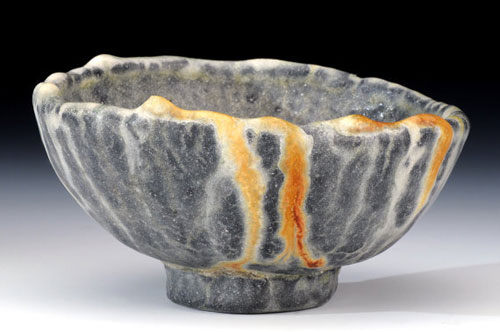
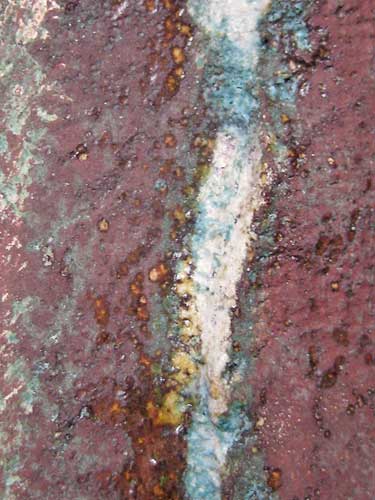
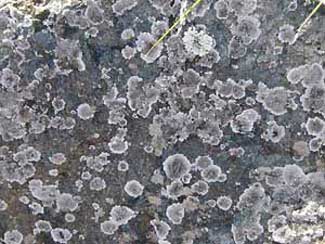
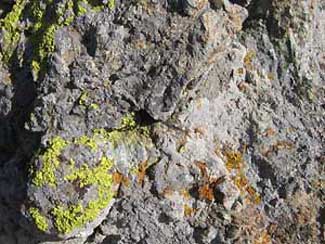
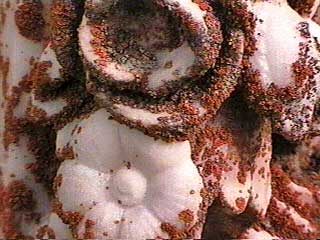
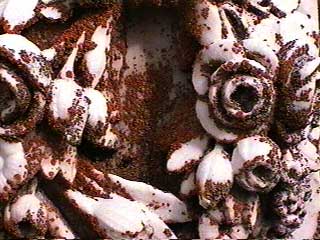
This is the detail of another piece in the series–

Blue Piece Detail


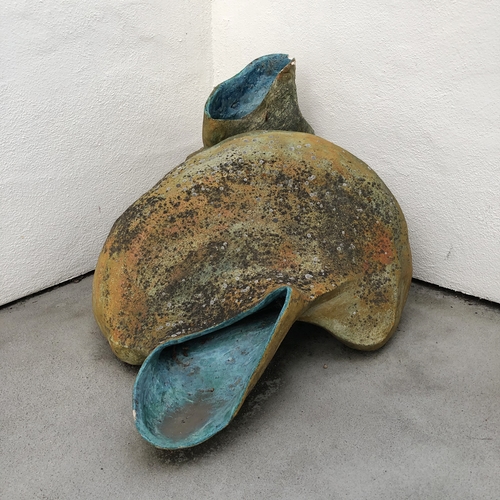
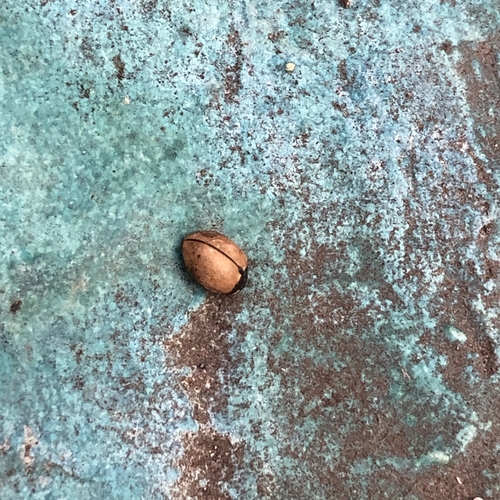
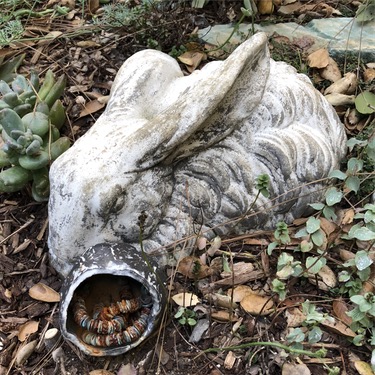
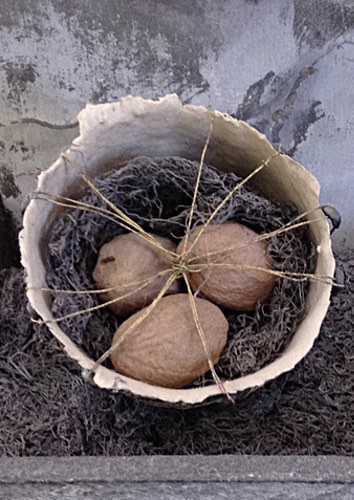
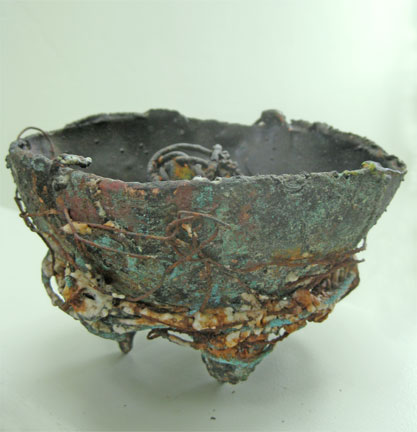
This bronze vessel has been moved around in my garden several times. Can’t quite figure out where to put it. It was constructed of palm cuttings and jute twine. Waxed the twine, then gated and invested the piece.

Bronze Vessel

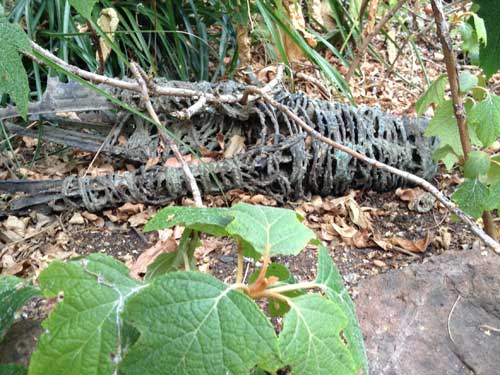
There is always the possibility when doing a direct burn-out that some of the material will not burn-out completely or some ash will remain and prevent a good pour.

After the pour and break-out, a low-fire glaze was applied. Then the piece was fired to cone 015.


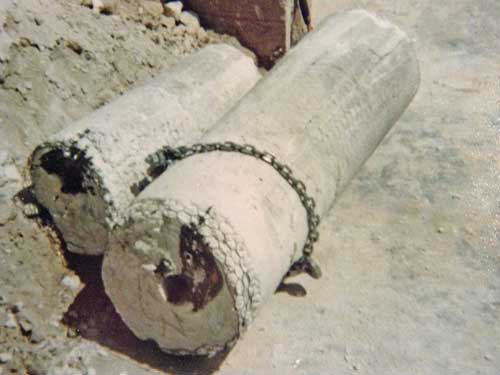
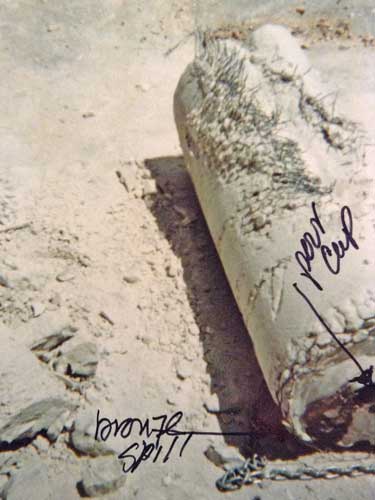
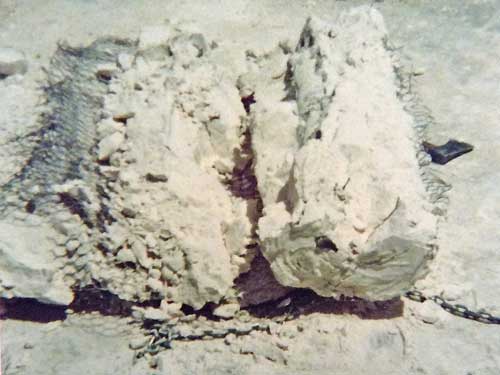
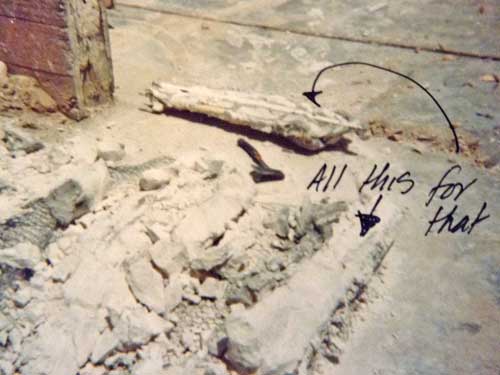
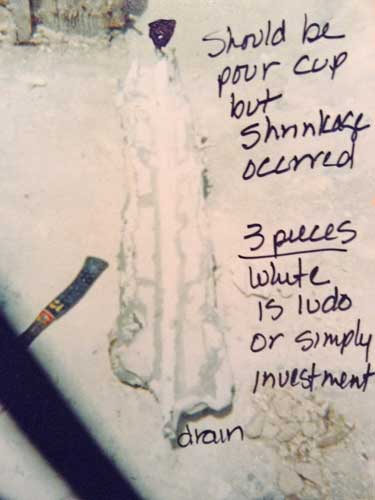
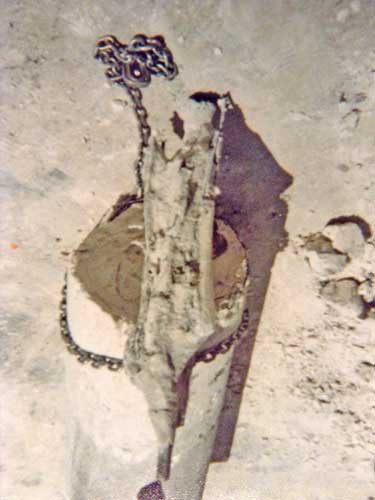
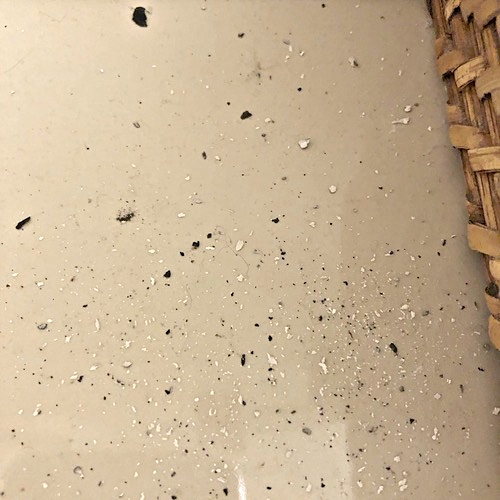
These are a few of the photos that I took the day of the Eroded Contours pour and break-out. A chain was used to pull the investments from the pit. And a fork lift was used to remove them from the foundry.

The length of the largest piece was 4.5′.

Investments

Investments

Break-out

Break-out

Break-out

Break-out


A Forgotten Work–Little Bronze Bowl with Magnolia Pods

Today while looking through boxes in storage, I found a box labeled “early work”. Each piece I unwrapped brought memories of the time when I made it. Then I came to the little bronze bowl with magnolia pods.

Bronze Bowl with Magnonlia Pods

This wasn’t actually an early piece. I made it before attending grad school. While looking at it, I had mixed feelings. What would have happened to my work had I not gone to grad school? I could have stayed in the Bay Area and continued to make work. Instead I went to grad school and wasn’t permitted to use the foundry until near the end of my second year. It was a complicated situation that I have tried to forget.

The is a detail of the interior of little bronze bowl with magnolia pods.

Detail Bronze Bowl with Magnonlia Pods

After the piece was cleaned up a bit, I bound it with wire. I then applied some of my low-fire glazes. Then fired the lot. I knew that the wire would oxidize and the blue glaze would be matte, the other glaze would be oozy white.

Detail Bronze Bowl with Magnonlia Pods

The bowl is now sitting next to a couple of pieces–a dagger and a poison cup. The dagger was made in the late 90s and the poison cup was made a few years back.

Bronze Bowl with Others


Unexpected Connections To The Past

Tim and I went to grad school at WSU in Pullman. Friday He rang me to say he was on his way to Pullman. One of his former students was having their thesis show. We caught up and reminisced. I can’t believe that it has been 20 years since I had my thesis show.

On Saturday I received a letter and the following newspaper clipping from Mark, my friend from my days at Ohio State. He saw the article and remembered how excited I would get whenever I opened a kiln to see what the kiln gods gave me.

Soda-Fired Article

Hearing from Tim, reading Mark’s letter, and seeing Dustin Harris’ soda-fired piece brought back memories of my own past firing experiences and my year as a research assistant working for Ann Christenson on her vapor glazing project.

Phone call and letter, coincidence and connections. I am fortunate to have such thoughtful friends.


Ann’s Work

More of Ann’s work can be viewed on her website.


Tim’s Work

An image from Tim’s Figures in Landscape series. You can see more on his website.


Dustin Harris Piece

More of Dustin Harris’ work can be seen here.


The Death of a Sad Plant or Sad Death of a Plant

There are plants that live with us for years. Their beauty brings joy and perhaps even a sense of well being.

After I get past the death aspect of the plant, I start to see the textures and color combinations.

Death Sad Plant

Can’t help first thinking about textured ceramic glazes.

Glaze Detail

Multiple Glaze-Fired Detail

Glaze Detail

Multiple Fired Glaze-Fired Piece With Egyptian Paste.

Then how can I make a similar surface on wood and metal. I generally do not think about how to use the actual plant in my work.

There is beauty to be found in so many things, even a dying, rotting plant. And I do love sharp and pointy things that act as protection.

Death Sad Plant Detail


I did a bit of research today regarding diseases of cactus and found some information on cactus disease on The Cactus Museum site. Then to my surprise there is a cactus moth.

What is it with moths? Have they always been around and I never paid them much attention? There are moths that pollinate my Brugmansia, so some moths are good for the garden.

The Cactus Museum

Arizona-Sonora Desert Museum

Texas Parks & Wildlife– Cactus Moth Poses New Invasive Species Threat to Texas Biodiversity


Lichen Amble

My husband and I enjoy hiking. Today he decided that we don’t actually hike we amble because I tend to make frequent stops to look at and document lichens, rocks, plants, and critters.

Lichens5

Today I was particularly interested to see how the lichens were doing since there has been a few inches of rain. Lichens add such lovely color and texture to the rock surfaces. In a few months there will be more growth and variety of texture and color.

Lichens1Lichens2


Lichens3Lichens4


When I travel I visit old cemeteries to view sculptural grave markers. I am fond of carved markers that visually reflect the life of the individual being remembered. And if those markers also have beautiful lichen colonies, even better.

Lichens Baby

Lichens on Flowers 1 Lichens on Flowers 2


Ceramicists have imitated lichen surfaces in their work. For several years I used low fire lead glazes resulting in great textural surfaces. Now that I am older and after working in medical practices for a number of years, I try not to use things that I know are potentially dangerous. Substituting leaded frits worked for a time until I read lead is lead whether fritted or not. Still potentially dangerous.

This is a detail of a lead glaze that I used several years back. It is on a piece that is situated on a balcony in full sun nearly all day. What I hadn’t anticipated was the fading of the glaze.

Glaze Detail

There are numerous ways that to make textural glazes without using lead. Glazes can be underfired or overfired, formulas altered, aggregates added… A great book to read is Lana Wilson’s Ceramics: Shape and Surface Handouts for Potters. She is generous with glaze formulas and handbuilding tips. The book can be purchased directly from her website.


The California Lichen Society (CALS)

SLO Species List

Lichens of North America

British Lichen Society

Lichens of Ireland Project