BWHeader

Rust on Paper Test

It is easy peasy to make red /brown rust, but green, blue, and grey and a little tricky. Not all wire that appears to be copper works. Not all copper coated wire works.

I used a copper garden mesh that is meant to keep varmints and wormy guys away from plants. I purchased a box of the mesh years ago, but it was too thin to use as a base for embroidery.

The paper is the green mask paper typically used for house painting. I cut a long strip, accordion folded triangles, and inserted a hair pin in every crease. The result was areas of pale brown to pink with large splotches of the original green.

Today I replaced the hairpins (two holes for them to slide through) and sandwiched the paper between layers of the copper mesh. Wrapped the lot with a cotton cord. 12:33pm

Rust Tests

Rust Tests

Placed the lot in a solution of white vinegar, peroxide, and salt.

Rust Tests

I flipped the bound paper several times.

Rust Tests

Added more salt after each flip. 12:48pm

Rust Tests

Removed the bound paper from the solution. 1:20pm

Rust Tests

The copper is oxidized nicely. 2:41pm

Rust Tests

Rust Tests

Ready to view the result. 5:03pm

Rust Tests

Rust Tests

Rust Tests

The dark brown lines are the hair pins.

Rust Tests

Rust Tests

Unrolled
Rust Tests

Some lovely results.

Rust Tests

Rust Tests

Rust Tests


Memory Bowl Tests

Gone back to working on my knitted Memory Bowls. Ran into a problem with the bowls not being sturdy enough. Put them on hold.

The bowls are fiber with some negative spaces within the patterns, a stiffener is in order. In the past I used sugar, shellac, corn starch, liquid starch, floor wax, microcrystalline wax, salt, and miscellaneous other stuff in the past. Wanted to spend some time thinking about how to finish the bowls.

Serendipity?

I have been following Maria Amélia Mendes’ YouTube channel. Her concrete tutorials are easy to follow, with loads of good tips. I really want to make some concrete pieces. Recently she posted a video–How to make baskets with wood sawdust. Thought I would test out her glue formula on a couple of knitted pieces.

The glue was combined with wood shavings and pressed into a form. After the pieces dried and hardened she added an application of her Finishing Glue. It is the same formula as her glue, with the addition of 100 ml of PVA.

Maria Amélia Mendes’ Homemade glue recipe:
1 liter of water
1 cup of cornstarch
50 ml of white vinegar

I made the Finishing Glue for my test pieces. I had forgotten that heated corn starch and water solution can suddenly become thick. Applied the glue to the test pieces. The thickness made it a tad challenging. If the pieces had been fragile, wouldn’t have been able to apply the glue. I refrigerated the left over glue. May try diluting it a bit if/when I use it in the future.

The first bowl is linen with a little plant fiber.

Test Bowl 1

Test Bowl 1

Test Bowl 1

Test Bowl 1

Test Bowl 1

Because the glue was a bit thick, after I applied the glue I gave it a rinse with the kitchen faucet spray function. The bowl was placed over a form to dry.

The second bowl is cotton with plant fiber.

Test Bowl 2

Test Bowl 2

Test Bowl 2

Test Bowl 2

The bowls were placed over forms and left in the sun to dry.

Test Bowls Drying

Both bowls are firm and the appearance of fiber hasn’t been altered too much.

Bowls China Cabinet

My next test will be with wool. Wool can be tricky. My first test using molten wax on wool changed its appearance to a plastic-like surface. Definitely ugly.

Check out Maria Amélia Mendes’ Youtube channel and her excellent concrete videos.


Completed–Be Yourself

Quote Used–Be Yourself; everyone else is already taken.
On a bazillion sites the quote is attributed to Oscar Wilde. According to Wilde folks, he did not write it or say it.

Code

Top Portion–Be Yourself;>
I layout out the code multiple ways to make sure that I really want to use it. I often use an old version of Flash to layout my projects. I like Flash because I make symbols and it is easy peasy to replace them.

The code is based on Morse Code.
Morse Code

Morse Code

Left to Right–Dot, Spacer, Dash

Wikipedia–MorseCode

Top

Center Section is Bargello Embroidery
Center

Bottom Portion–Everyone else is already taken.
Bottom

Completed Piece
Be Yourself

Border in rust yarn is based on tap code. The code is–Not an Oscar Wilde Quote

Tap code is a 5 x 5 code with k and c the same code.

Tap Code

Be Yourself Border and Hanger

The hanger is not a rod it is a piece of tubing that showed up after my husband did an annual on his Cessna. I believe is used for the brake lines.

Be Yourself Border and Hanger
I stitched on a layer of grey felt to the back of the piece to prevent seeing the wall through, but also to add a sleeve for the hanger (based on quilt hangers), and to add a pocket. The pocket is for notes on the piece. It is common for me to forget the quote used in a piece. Find myself needing to read the code to figure out the quote. The plan is to pop the information on the code and decisions made into the pocket.


Bowiea

For nearly two months my Bowiea was just a bulb. No growth. In the past before one section died back another was sprouting.

This morning the bulb looked like this–

Bowiea New Growth

Removed Plant from Medium 2020 July 27

Bowiea Removed From Pot

Bowiea Removed From Pot

Bowiea Roots

Bowiea Repotted

Eraser Used to Clean Up

Eraser for Clean Up

Spent Stems
Bowiea Stems

Used the Spent Stems With Tan Wool Yarn to Make an Icord
Bowiea Icord

Stitched the Icord Together to Make a Small Vessel

Bowiea Icord Vessel

Bowiea Icord Vessel Detail

The plant is vining so I rotate it a couple of times a day.

Bowiea

The Bowiea flowers are quite small, but lovely.
Bowiea Flower

New Growth 2020 October 26

Bowiea New Growth

Pacific Bulb Society–Boweia

Wikipedia–Boweia

South African National Biodiversity Institute–PlantZAfrica


Pause to Let Your Eyes Adjust

Every time I walked by this piece, I couldn’t remember the name and code used.

Pause Piece

I looked through my files and found the piece support materials. The title and code is Pause to Let Your Eyes Adjust.

The Code
Pause Piece Code

The Code in Color (tan yarn is used in place of cream)
Pause Piece Color Code

Upper Layout
Pause Piece Upper

Pause Piece Upper

Detail of Broken Triangle Bits of Mirror
Pause Piece Mirror

Middle Section
Pause Piece Middle

Lower Layout
Pause Piece Bottom

Pause Piece Lower

Signature–Perforated Disk

Pause Signature Disk

Materials List
Birch branches and twigs–symbol of health, wisdom, safety, public office.
Other materials–1/4″ hardware cloth (45×99 squares), wool yarn, mirror, cotton duck for back. Bargello embroidery patterns.


Truth Piece in Progress

The Truth piece consists of two pieces that will be mounted on a wood panel and framed.

Truth

After looking at the image of the larger piece, I think wrapping all of the exposed hardware cloth with cream yarn is needed. Bumped up the contrast to see the wire more clearly.

Truth Wire Exposed

Wrapped Hardware Cloth Wire

Truth Wire Wrapped

Center Shapes are Code for the Word Truth

Truth Layout

Brown shapes are Dots, Tan shapes are Dashes, Cream shapes are Spacers.

Truth Blocks
The same colors are used for code throughout the pieces.

The right border of the larger piece has the code–Be Told. It begins with the top right square of the hardware cloth.

Truth Be Told

The left border of the larger piece has the code–Will Out. It begins with the bottom left square of the hardware cloth.

Truth Will Out

The center portion of the smaller piece has the code–Half the truth is, with the right border continuing the text–a great lie.

Half Truth Great Lie

I thought about adding an application of wax, but it changes the fiber a bit too much. Will either add an application of starch or a solution of salt.

Truth

The pieces will be attached to a 5″ x 7″ wood panel with tacks. If the tacks don’t work I may use velcro. Then a frame will be added.


In Progress–Thoughts

Maybe I shouldn’t attempt working when I am feeling unwell and functioning without proper sleeping.

The plan was to run a folded piece of jute twine from the bottom of the piece to the top. The excess at top is to become the hanger for the piece.

Thoughts

Today, I was feeling bette, but apparently not good enough. I started work on the right side of the piece. Unfortunately, I wove the jute twine through from top to bottom, leaving excess twine at the bottom.

Thoughts

Tomorrow I will be removing all the columns that I wove incorrectly. The mistake will add at least two hours to my work time.


Work in Progress–Thoughts

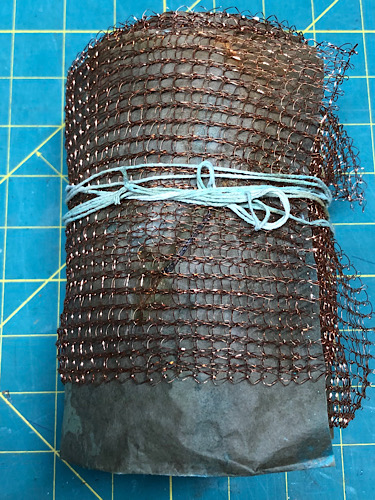
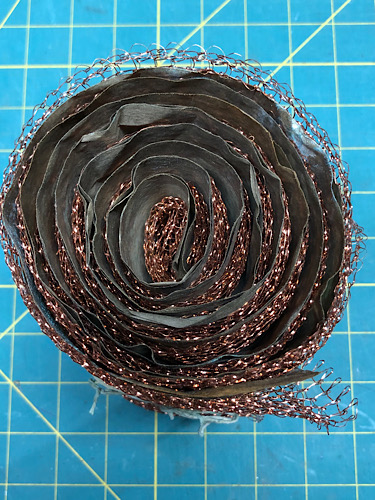
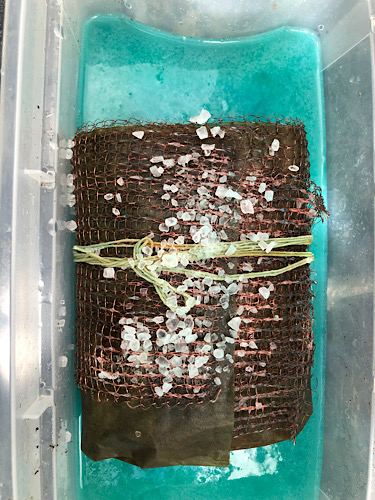
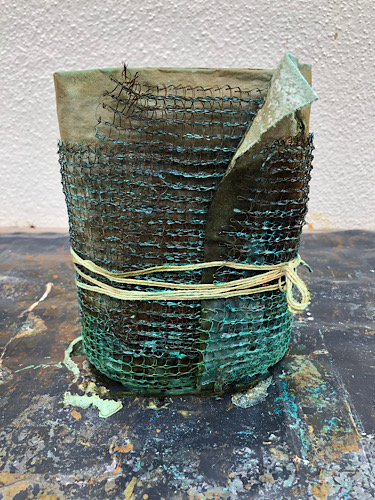
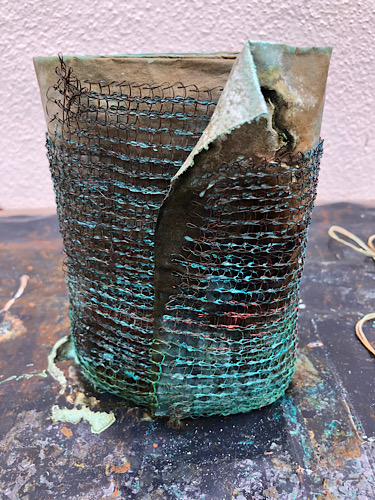
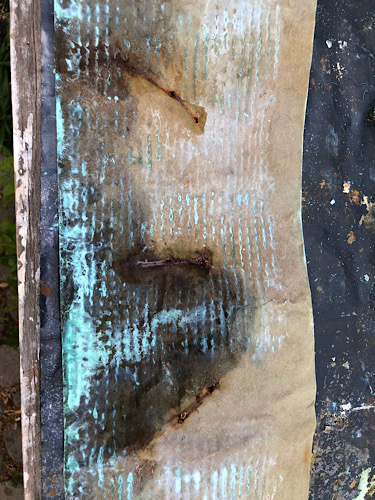
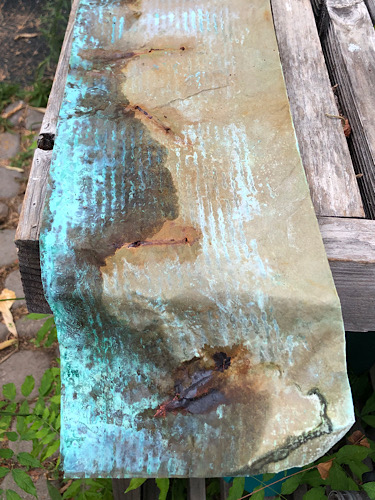
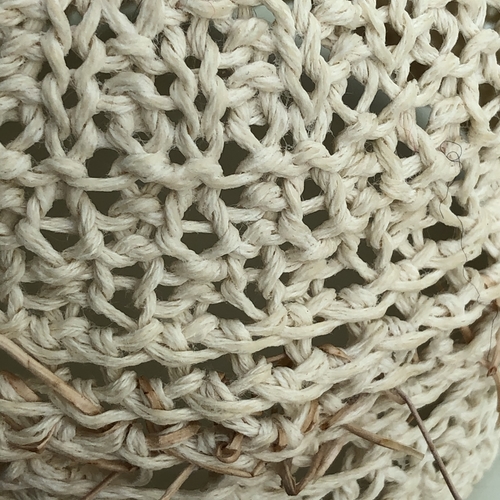
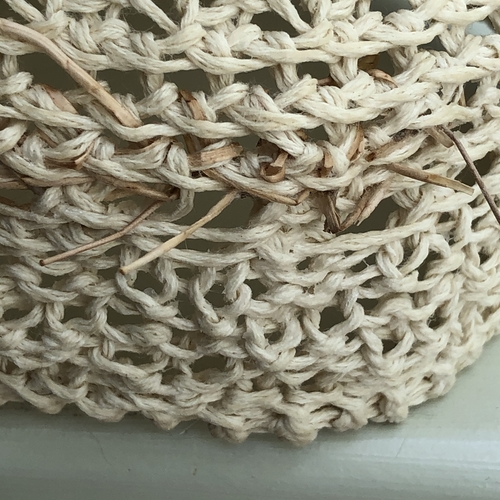
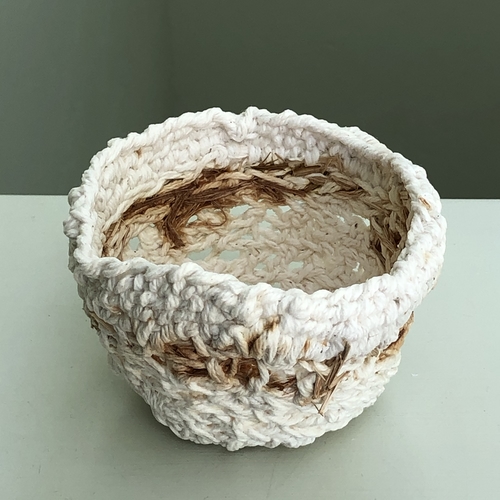
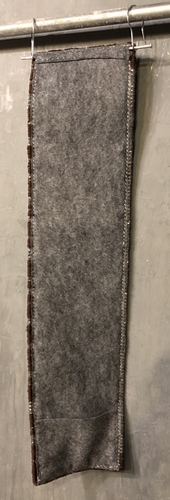
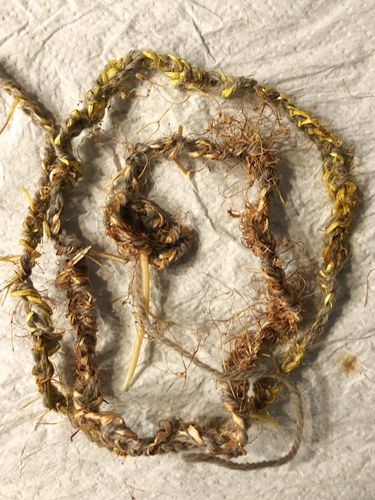
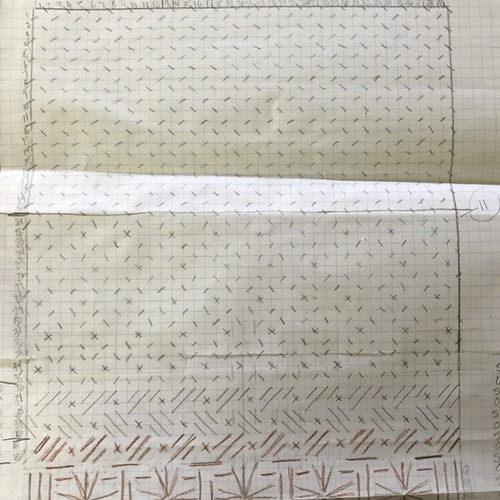
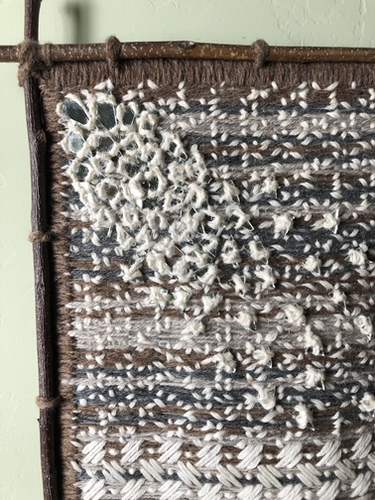
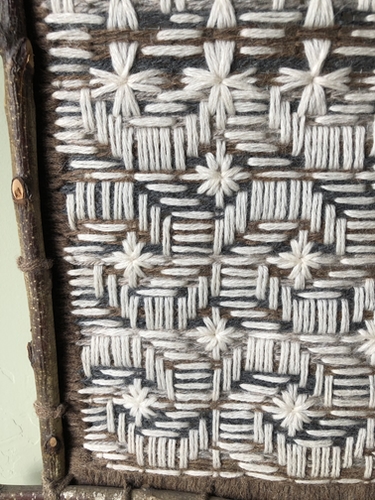
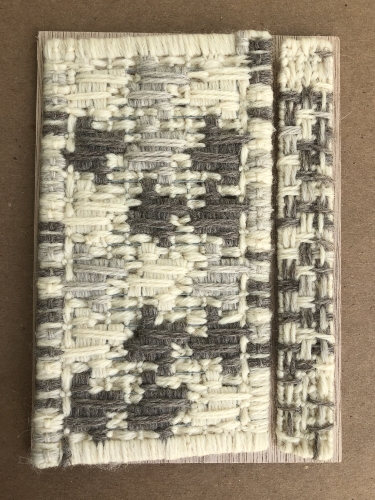
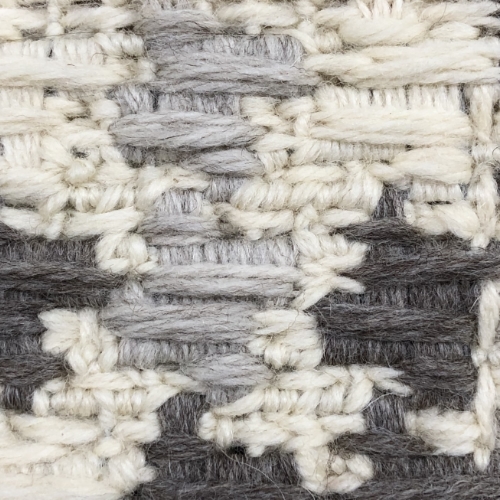
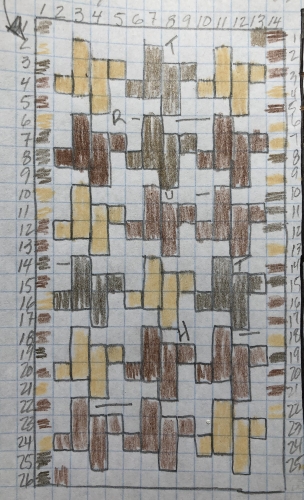
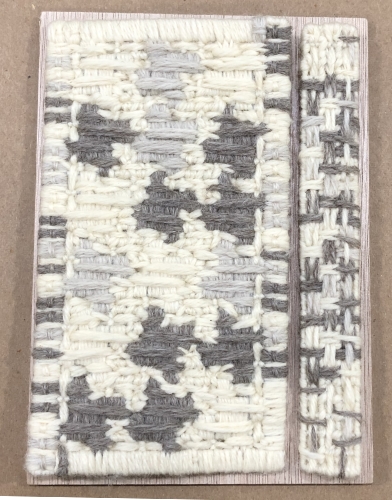
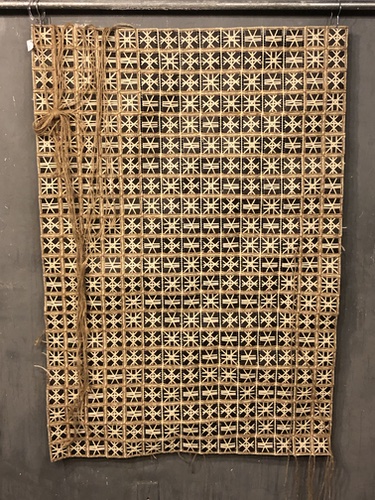
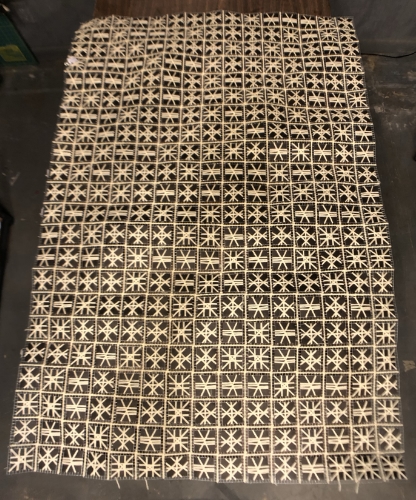
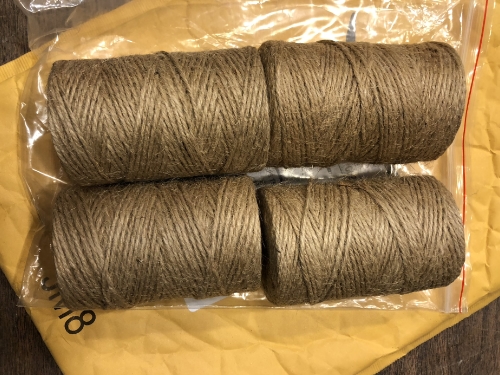
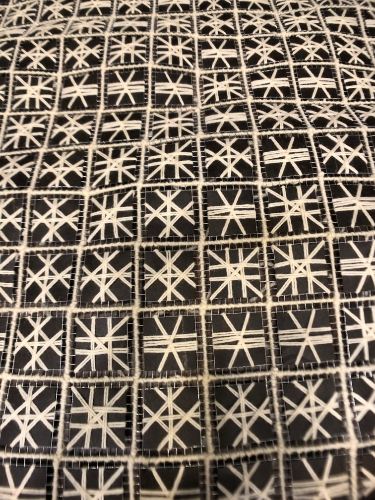
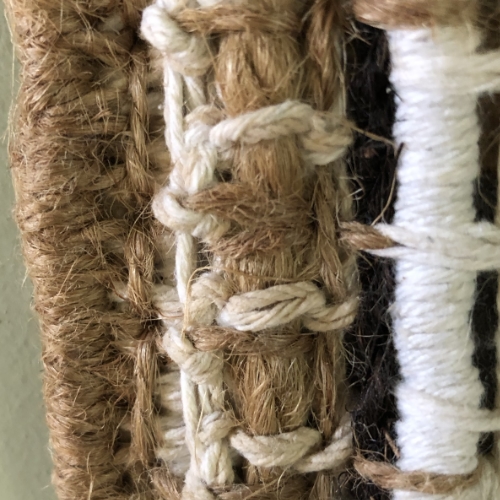
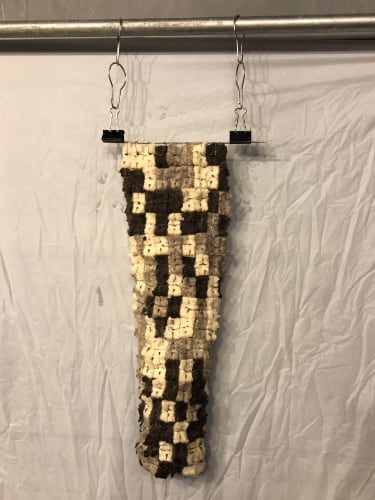
Thoughts is now bound together. Started adding jute twine for warp.

Thoughts Together

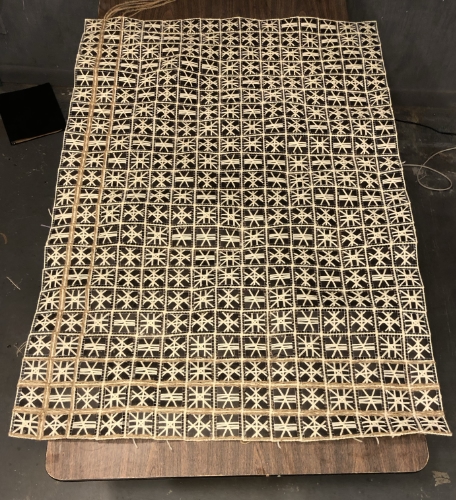
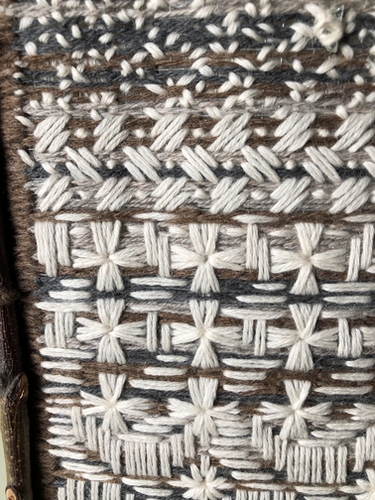
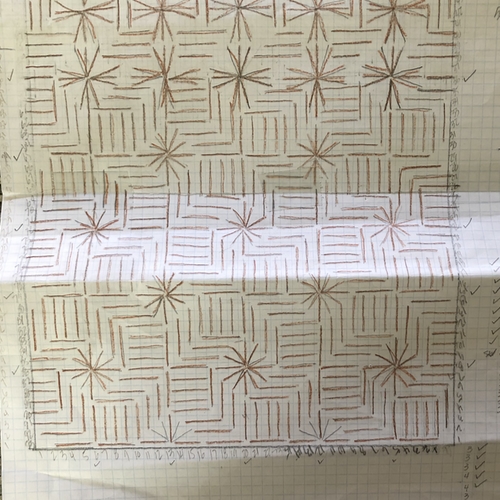
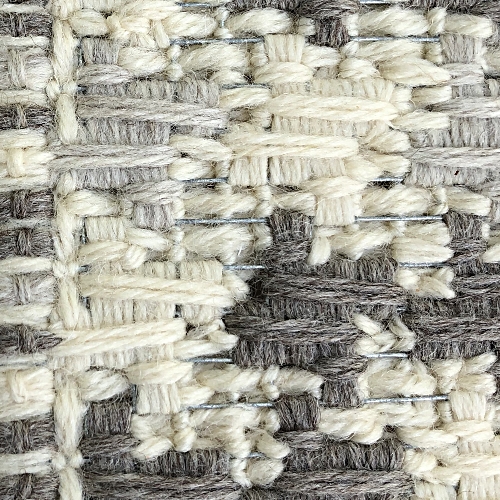
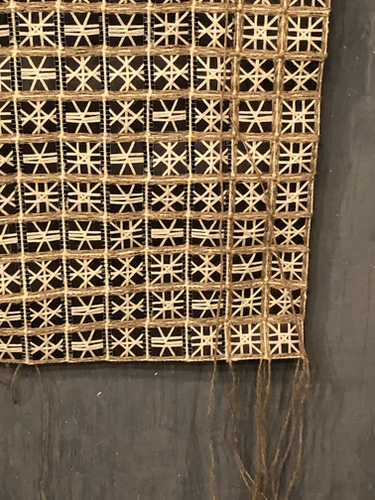
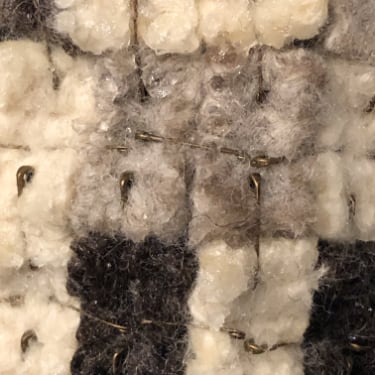
Also decided to fill the horizontals. Decided to first add horizontals, then they can be locked in with the vertical warp and crosses at the block joints.

Thoughts Intersections

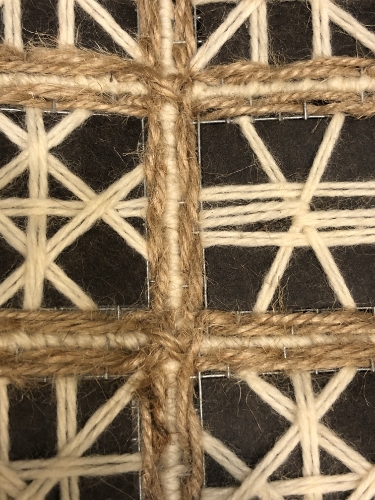
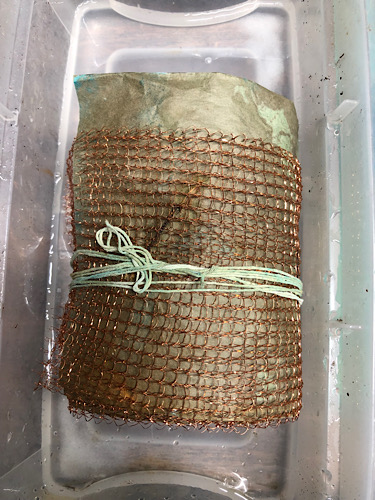
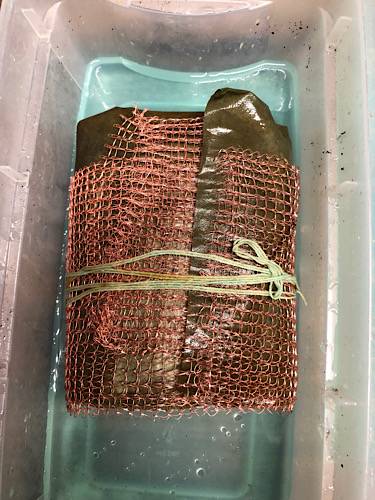
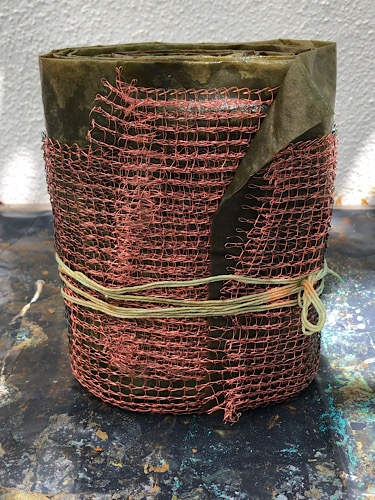
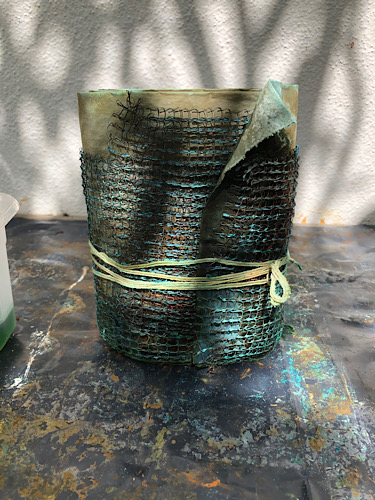
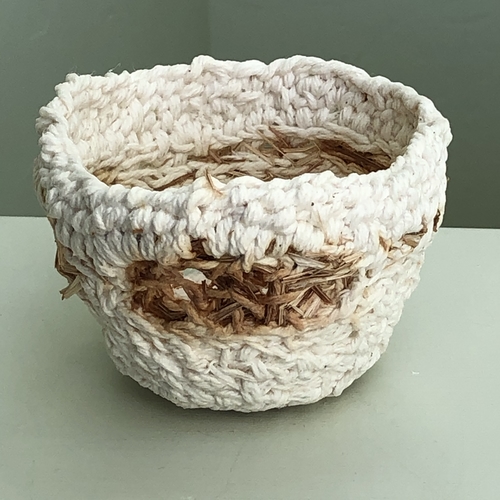
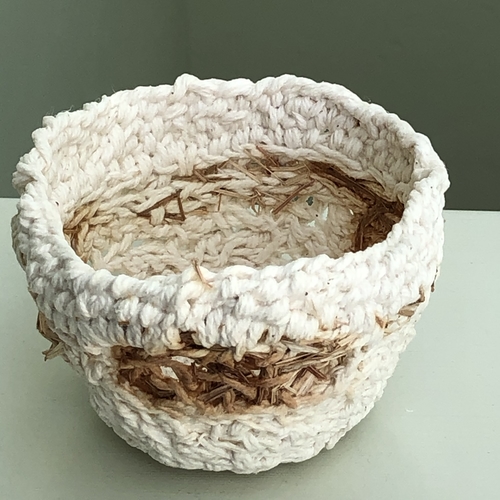
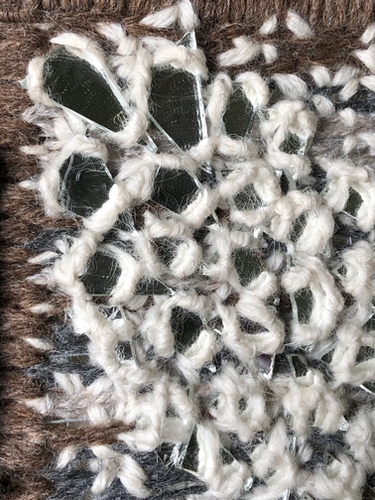
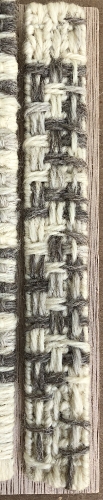
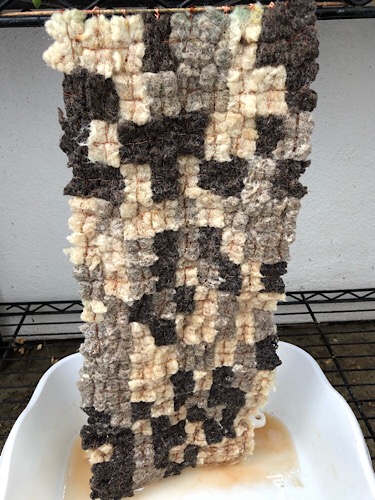
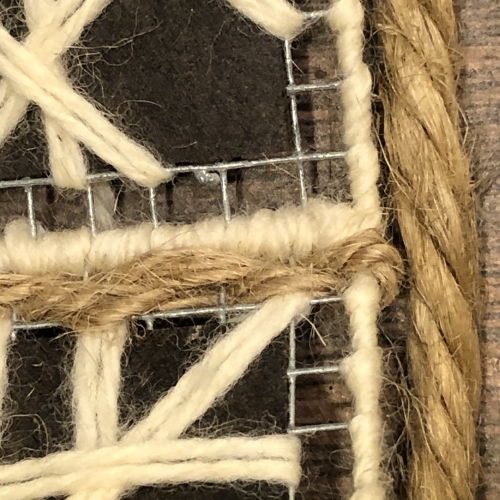
Considered using jute-wrapped rope for border.

Thoughts Wrapped Border

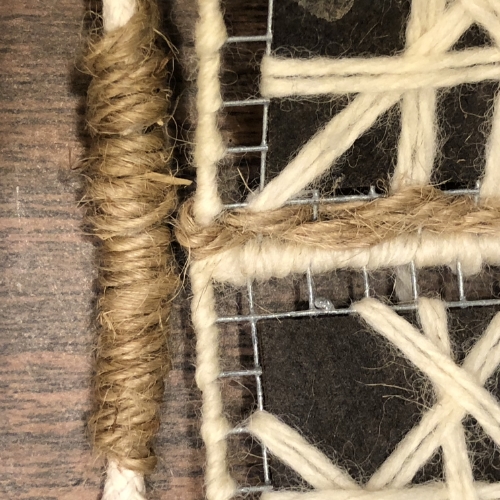
Decided to use jute rope for two reasons–I like the twist of the rope, and it will be less work and stress on my hand.

Thoughts Rope Border


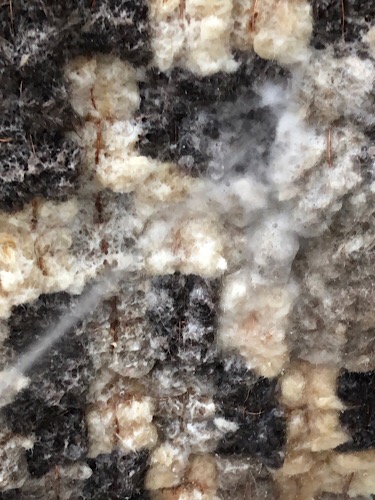
When I am working with yarn and twine, I always wrap my hands with waterproof medical tape. The areas that seem to get ripped up and sliced the most are the joints of fingers.

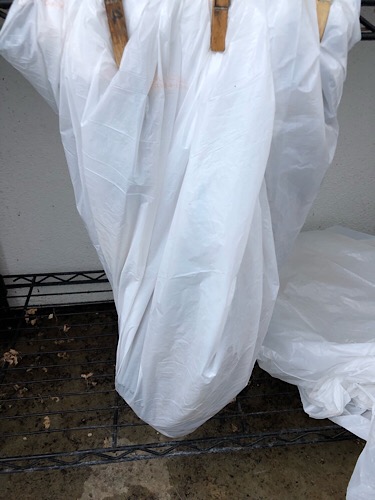
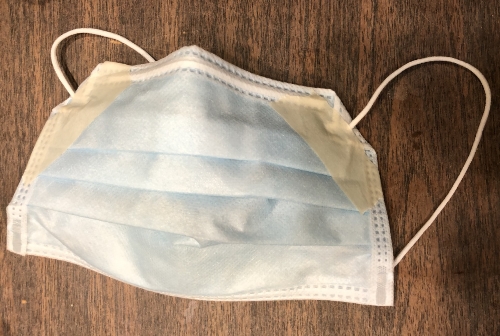
After months of illness, last year I was diagnosed with interstitial lung disease. It is important for me to protect my lungs from further damage. I tried using a medical mask, but it didn’t fit properly. It kept poking me in the eye. I taped the corners to prevent poking, but the mask was still uncomfortable.

Mask With Tape

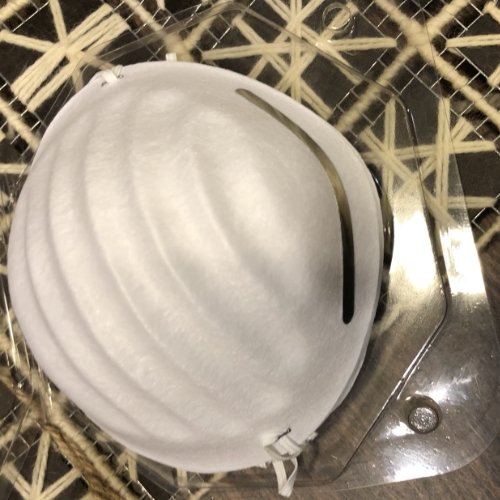
Then used an inexpensive dust mask for most of my working session. It was okay, but still did not fit quite right.
It is better to use a mask that has two elastic bands or a respirator. I have a great two cartridge respirator that fits well, but is heavy and bulky while looking down for my stitchwork.
Thin Dust Mask

I stopped by Harbour Freight to pick up a better dust mask. They were sold out because of the Coronavirus scare. Then stopped by Home Depot. First looked in the building section, the area with concrete. Found a package of masks. They weren’t what I really wanted, but better than the other two I used yesterday. I found empty shelves in the paint section where masks should have been. There was a sign that stated there was a limit 10 per customer.

Are people being over cautious purchasing mask to possibly protect them from a virus in China?

There have been seven confirmed cases in California.

The best place to acquire correct information is the CDC website.

CDC 2019-nCoV Update

From the CDC site–

2019-nCoV is a betacoronavirus, like MERS and SARs, all of which have their origins in bats. The sequences from U.S. patients are similar to the one that China initially posted, suggesting a likely single, recent emergence of this virus from an animal reservoir.

Early on, many of the patients in the outbreak of respiratory illness caused by 2019-nCov in Wuhan, China had some link to a large seafood and live animal market, suggesting animal-to-person spread. Later, a growing number of patients reportedly did not have exposure to animal markets, indicating person-to-person spread.


Work in Progress–Thoughts

2020 Goal

Complete all work in progress.

Completed stitching together Thoughts piece. Today I will be adding cream wool stitching around entire piece.

Thoughts

Read a couple of weaving books over the holidays and liked the idea of warp threads used to hang woven pieces.

Planning to twine jute twine vertically through the hardware cloth. Yes, I meant to use the word twine twice. Currently thinking attaching the jute warp threads to a thin metal rod. I like the visual of a couple of nail heads holding the lot on the wall.

Jute

Thoughts

Also will add a piece of jute-wrapped rope for the border. Should help to integrate the materials and nicely finish the piece.

This is the border on See a Penny.

Border See a Penny

Previous Posts on Thoughts Piece

Thoughts in Progress, Tuesday, May 14th, 2019

Thoughts in Progress, Thursday, May 16th, 2019

More wallpieces to complete.

Work in Progress

Also have a stash of small 3-D work in progress that needs to be realized.


Weaving on a Little Loom by Fiona Daly

Weaving Within Reach by Anne Weil


In the post I use the words twine and twice. The words look similar. Not just because they start and finish with the same letters, but because the figure-ground is nearly identical. I authored a CD, Appearances can be Deceiving that focuses on figure-ground relationships in a variety of customizable settings.
The CD is available for purchase through Learning Fundamentals.

Work in Progress–Who Is Left…

Who is Left… is a piece that has felted wool blocks stitched together with copper wire. The copper wire was removed from a mixer that caught fire.

Who Is Left

The wire replaced safety pins that I had hoped would patina green.

Who Is Left

That didn’t happen, because they weren’t bronze. They became a lovely textural brown.

Who Is Left Brown Safety Oins

Not the result I wanted, but the safety pins will find their way into a future piece.

Solution to patina pennies green
2.0 parts white vinegar
.5 parts salt (non iodized)
1.5 parts clear detergent (free of ammonia)

Solution Instructions
Spray on solution and allow to set for 1 hour. Reapply.
Allow patina to dry to green powdery finish
Patina will set permanently
Allow to set overnight.

I used Sea Salt and All Clear Free. The solution became thick and white, not a sprayable solution. I dipped the piece in the thick solution and squeezed it through the blocks.

Who Is Left

The piece was hung to drain over a plastic bin. Sprayed it multiple times with water. The detergent made a bit of foam. Suspect I will soak the piece in the morning to remove excess detergent.

Who Is Left Water Application

I wrapped the piece in plastic for the night.

Who Is Left in Plastic

Also wrapped the bin with excess solution in plastic to keep it clean for possible application tomorrow.

Now I wait.