The test piece is still a bit damp and continues to change.
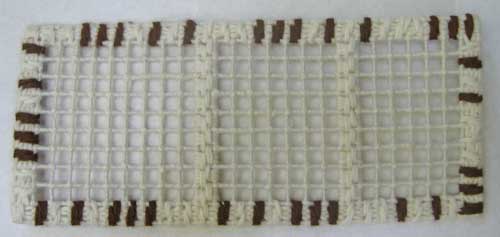
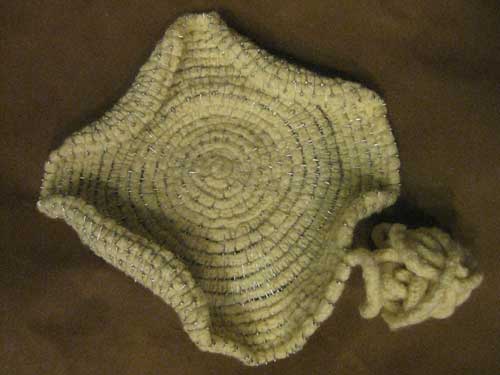
This is how the test appeared yesterday–
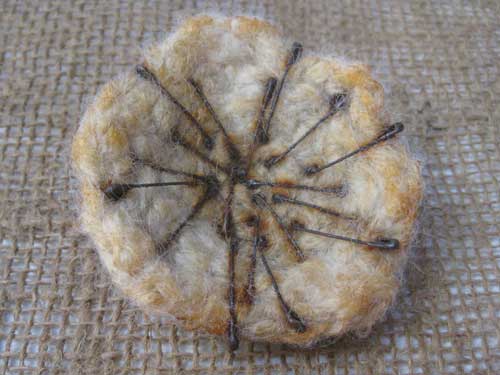
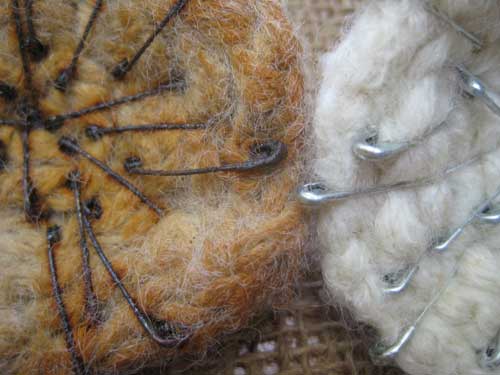
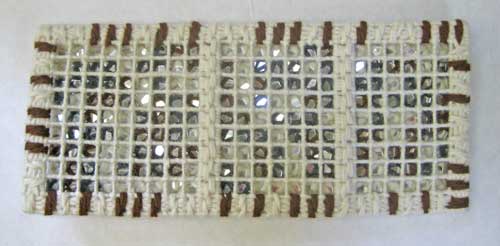
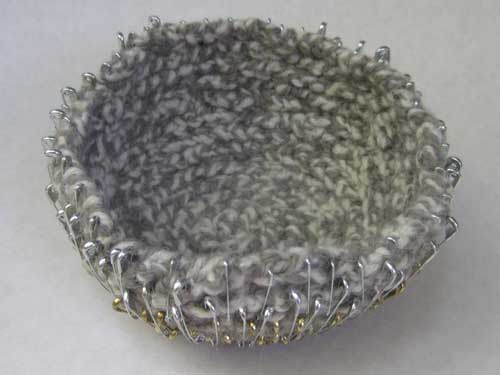
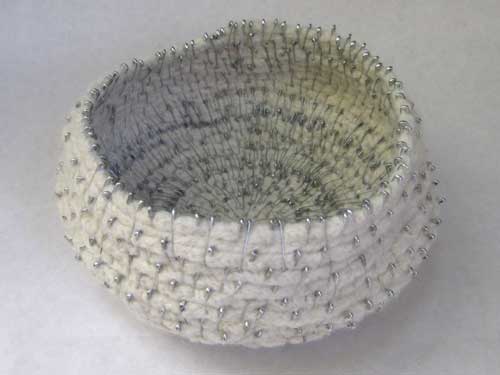
This is an image of how the test looks today. The piece next to it shows the original color of the cream wool yarn and the safety pins.

The test piece is still a bit damp and continues to change.
This is how the test appeared yesterday–
This is an image of how the test looks today. The piece next to it shows the original color of the cream wool yarn and the safety pins.
I started the Don’t piece after watching Blink one of my favorite episodes of Doctor Who. The episode introduces the Weeping Angels, sculpture that isn’t really sculpture. When you blink or look away the Weeping Angels move. When they move they are dangerous.
In the episode Weeping Angels also known as the Lonely Assasins are explained:
“You die in the past, and in the present, they consume the energy of all of the days you might have had-and your stolen moments. They live off potential energy.”
What if you approached viewing art in the same way? Well, not with the fear that you might be sent back in time to die, but to really look. To see what is there, you must look. Not give the art work a passing glance, but really look at it. What about being a version of the Weeping Angels by snagging some of the energy put into the work by the artist…
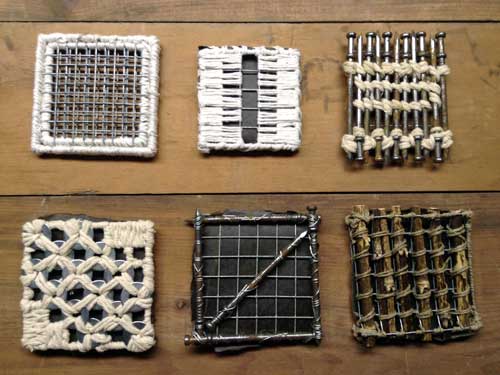
I started a piece that has coded into it, “Don’t turn your back, Don’t look away, Don’t blink” some of the warnings in the episode.
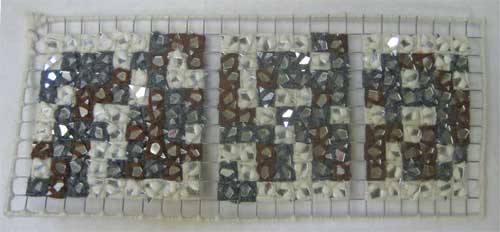
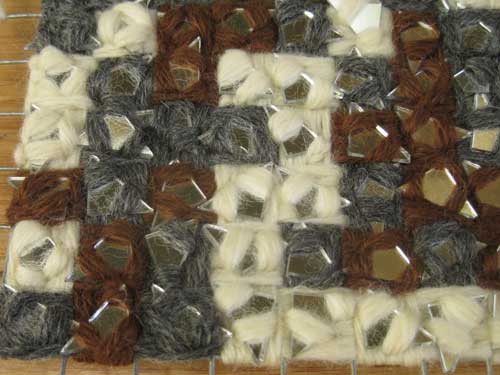
I used color for the dots and dashes of Morse Code–rust yarn for dots, gray for dashes, and cream for spacers.
I cut the squares of mirror in half because after wrapping the hardware cloth with cream wool they were too large. And I like the idea of sharp edges.
The frame will be bound to the coded piece. Actually the frame has code as well. The frame has the repeated word, see.
The plan is to age and wax the coded piece and the frame. Then bind the two pieces together and the binding.
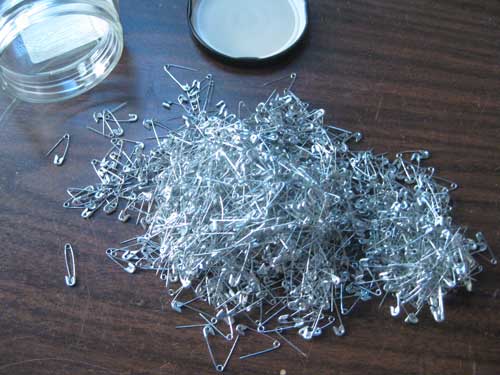
What happens when you find a stash of safety pins? What do you do with them?
Had just make a rope and wool yarn bowl for a birthday present.
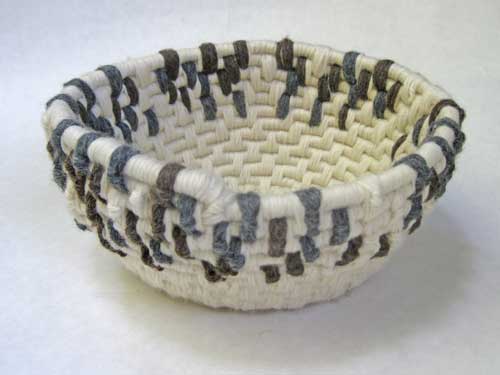
I enjoyed making the bowl. A nice break from making wall pieces. I wrapped rope with cream wool yarn so the cotton rope would not peek through.
Formed the bowl by binding it with cream wool. Added additional binding in cream, gray, and brown. It is code for the person’s name and their date of birth.
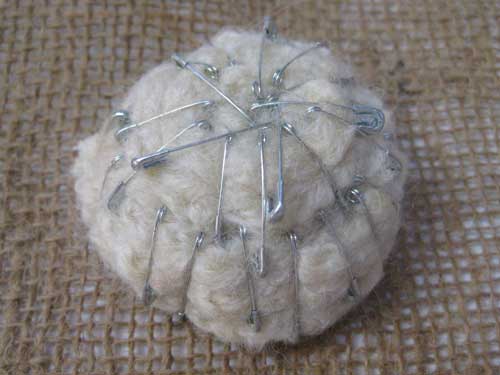
Back to the safety pins–I decided to make I-cords, full them, and then pin them together to make a bowl. I pinned the cream wool I-cord together and took it apart 3 times. Just couldn’t get it quite right.
While I was working on putting the cream bowl together and taking it apart, I made two smaller pieces.
The I-cord is made of gray and cream wool yarn.
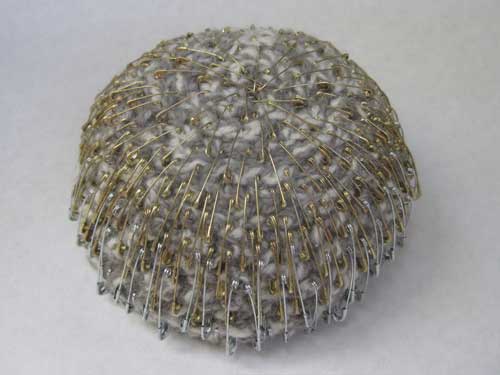
The exterior of the bowl.
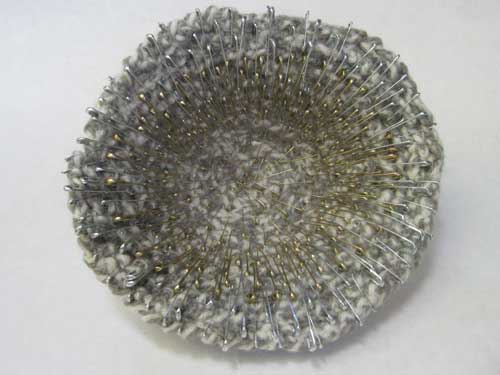
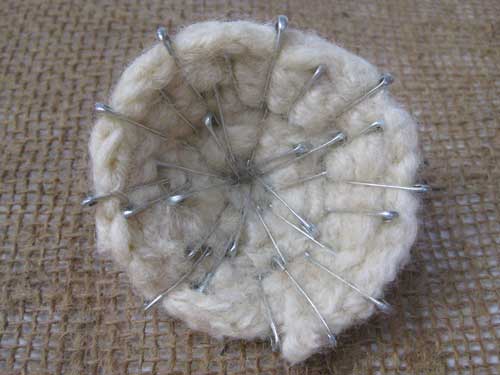
Then I flipped it inside out.
I tried the same process using two kinds of brown wool yarn.

Exterior of the bowl.

Flipped inside out.

Flipping the bowl inside out was the solution. After finishing the pinning of the cream bowl, I flipped it inside out.
Once the bowl is aged and then stiffened I think it will be done.
How to age the bowls?
Test 1 Rust Promoter
4.0 parts white vinegar
1.0 part peroxide
.5 part salt
Test 2
1 Tablespoon epsom salt in boiling water. Submerged the piece. Then added another tablespoon of epsom salt.
This really did not work. It seems to have cleaned the oxidation off of the safety pins. The result brought to mind the ugly surface of silicon bronze when it is sandblasted.
Rust and bleeding onto the wool is definitely necessary.
When I finish adding some age to the bowls, I will most likely add an application of faux beeswax. Adding an all over application tends to help integrate the materials.
After the wax is applied a heat gun can be used. With some wax a hair dryer can be hot enough. It takes longer but, it is worth it to keep the integrity of the wool. I have found that microcrystalline wax requires a higher temperature and the wool can appear plastic.
I have attempted making cold wax, but still need to heat the piece to smooth out thick areas.
Rust Promoter Formula
It occurred to me that I did not give credit to the person who posted the rust promoter formula. I found the formula several years ago. I looked through my notes and sketchbooks, but I could not find reference to the formula or the fellow’s name. He made beautiful bells and used the rust promoter to give the appearance of age.
While writing this post, I googled bells and rust promoter, but did not find his site. When I find it, I will post a link.
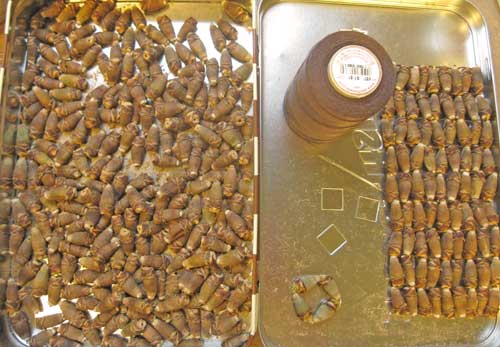
I have a great stash of palm nuts. Different sizes and colors. I was wondering what to do with them. Kept looking at them. Touching them. They are such beautiful little bits of nature.

Sunday I drilled holes vertically through the nuts, inserted wire. I bound four together to make a frame.
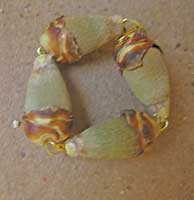
Even if I used patina on the brass wire, I still don’t think I will like wire with the palm nuts.
I stitched a 9×9 using brown Egyptian cotton. The thread is barely noticeable, but when it is, looks natural.
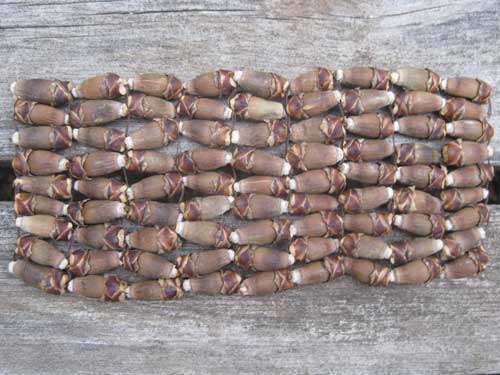
Last night I drilled holes in 240 nuts. I need 218, but always make extra just in case. Tonight I will begin stitching them together with the Egyptian cotton.
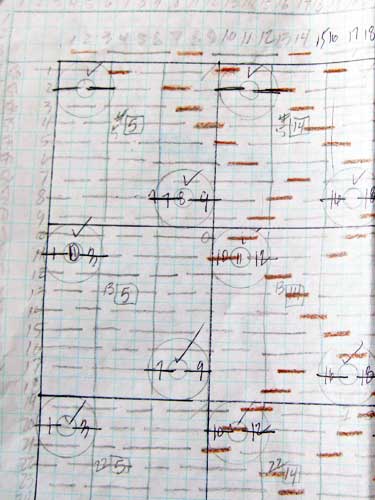
There will be 99 connected little frames with a mirror in the center of each frame. Yep, I am making a grid using palm nuts.
I am not sure if the cotton thread will be strong enough to support the weight of 218 palm nuts and 99 pieces of mirror. I will address that problem if it becomes an issue.
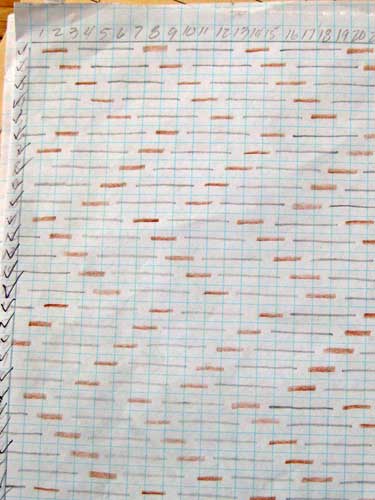
Of course there will be a coded message. This time the message will be: another mirror held up to me.
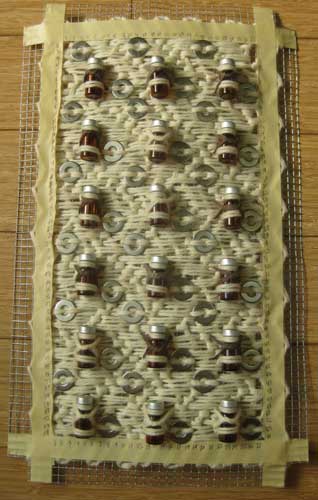
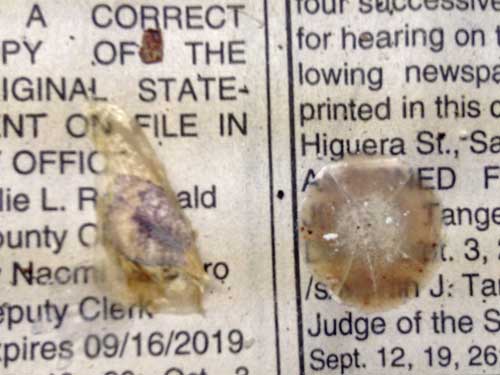
I was diagnosed with Pernicious Anemia several years back. Each month I receive an injection of B12. I have been saving my B12 vials and syringes thinking that they might become art materials. Now, maybe some of the vials have found a place.
I was working on a design for a woven piece to cover a bathroom window. I looked at several materials that would be the least likely to mold. While looking through my materials I ran across the B12 vials. Unfortunately, I did not have enough for the window design. Got to thinking about the importance of those little vials, each vial represented a month in my life.
For whatever reason I tend to use certain numbers: 3, 5, 9, 11, 18, any grouping of 3 or 9. When I looked at coding the word life, I could use 18 vials. Each vial would be bound in a square that 9 spaces by 9 spaces.
Recently ran across the Medieval Mosaic embroidery stitch and liked it quite a lot, but it is four long, 4 short. Not one of my numbers. I added an additional to each.
The stitch would cover nicely if I had not planned to use waxed linen. This is a work in progress using waxed linen.
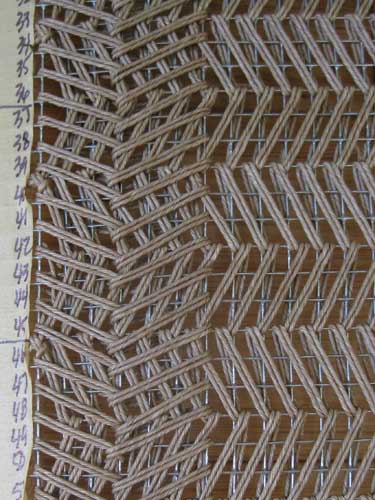
Waxed linen didn’t feel right with the vials. so, got out a skein of cream wool. I laid in a background of a zig zag stitch, then added the Medieval Mosaic stitch over it. This is the result–
And a detail–
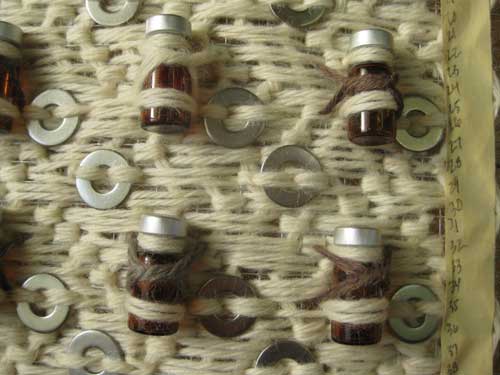
There needs to be more of a difference between the yarn color used for the dots and dashes. I have some lovely bamboo yarn that might work better.
I suspect that when the border code is completed the current yarn binding the vials will be more apparent. The border code will be: One and a Half Years. The code will start at space 17 on the top, and procede clockwise each space a dot, dash, or spacer. The rest of the border will be stitched in cream wool. There is also a 3/4″ border that will either be bent and stitched to become a frame or bent the opposite direction to elevate the piece from the wall.
When the stitching is finished, it will be time to age the piece.
Some information on pernicious anemia:
National Institutes of Health–National Heart, Lung, and Blood Institute
Two years ago I made fire starters for folks who have woodburning fireplaces. I used pinecones from my garden, cedar shavings (result of running cedar planks through a planer), wax, twine, and cinnamon sticks.
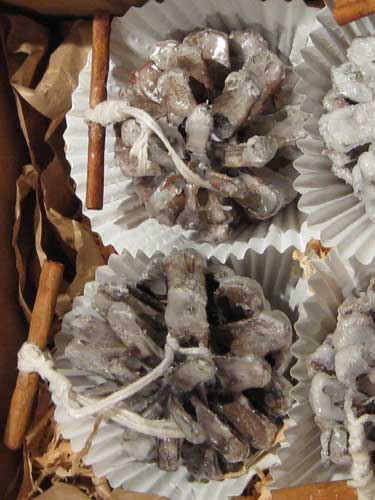
This year I thought I would try something a bit different. I have boxes of dried plant materials from my garden. I collected and dried them to use in my work. I haven’t found a need for them. I had thought about tossing them in the recycle bin, but decided to use them for fire starters.
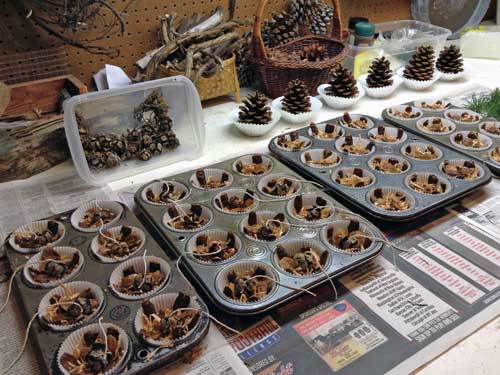
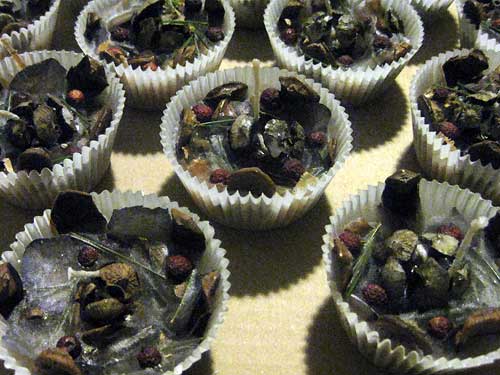
I lined some old muffin tins with cupcake papers and filled them with dried materials and cedar shavings. Then used cotton twine for wicks. The wicks are bound around cypress pods. Then the lot was topped with paraffin.
I also made a few pinecone fire starters.
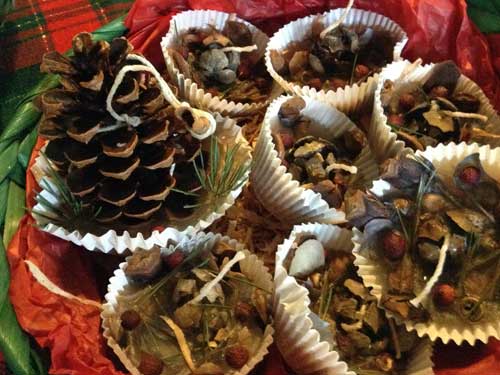
Placed the fire starters in baskets lined with tissue and filled with cedar shavings. Everything can be used for starting fires, including the baskets.
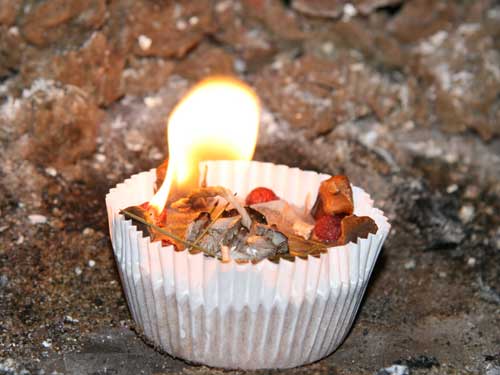
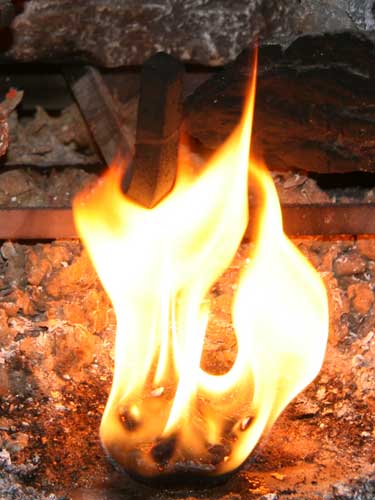
I was curious how the fire starters would work, so, I set some alight.
First a cupcake fire starters–
Then a pinecone–
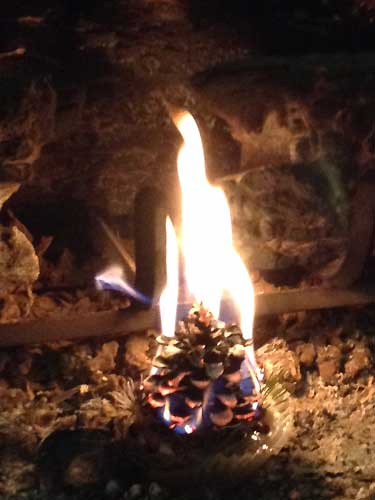
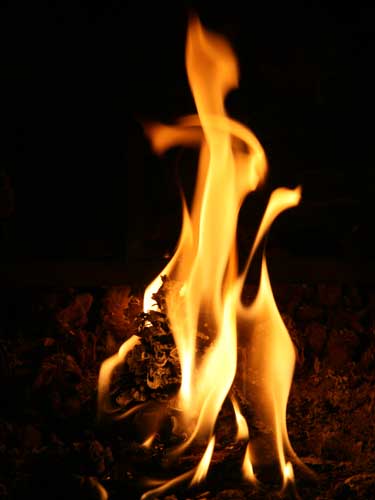
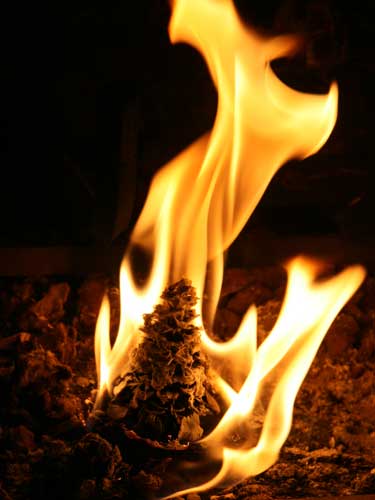
I had more fun watching them burn than making them!
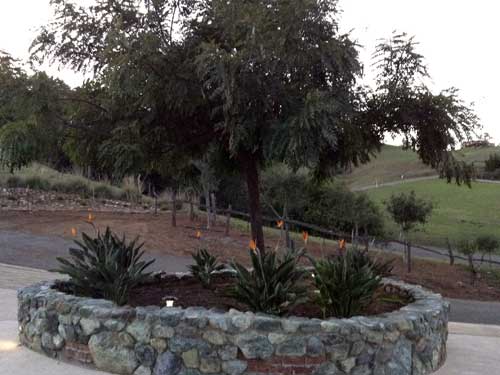
While visiting family on Christmas, I scored some great pods.
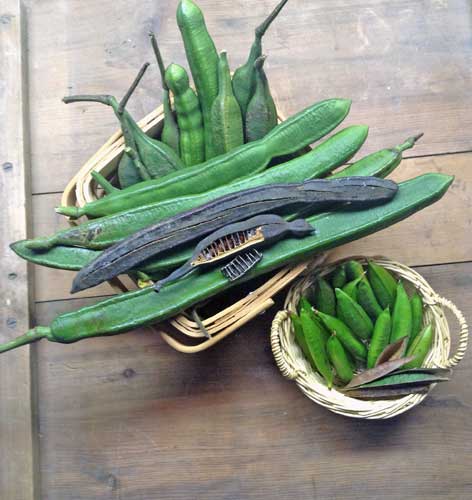
Apparently the large pods are from a type of Cassia tree. It is also known as the Golden Medallion tree. It was nearly dark when I took the photo so difficult to tell what it really looks like.
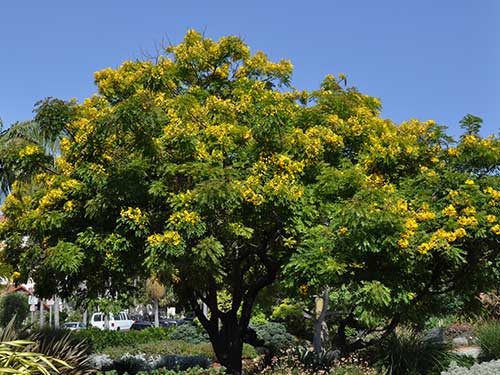
This is an image from the Urban Forest Ecosystems Institute site at Cal Poly.
Detail image of the pods–
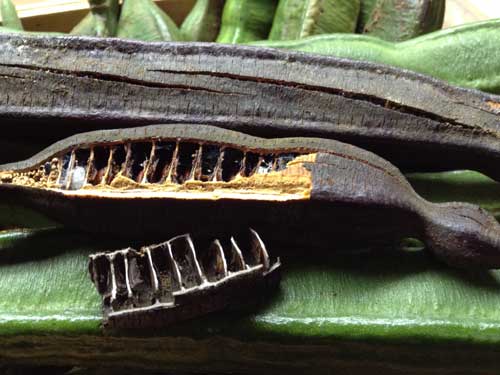
The pods are beautiful! They have little woody shelves for the seeds. And according to the Urban Forest Ecoosystems the Cassia seeds are poisonous. That is so great. Another material to use in my work!
I snagged these Cassia pods during Thanksgiving. When I hung them in my studio they were green then, now they are not.
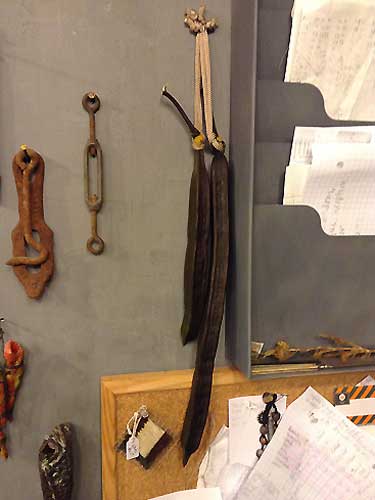
I also collected some pods from a vine that grows on the wall around the pool.
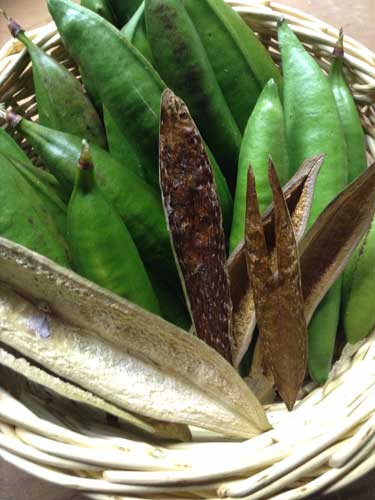
The flat interior piece brings to mind an African shield.
In the process of completing a series using these pods. “Change” is the working title of the series, but that could change.

Leaning toward constructing concrete structures for the pods to live in.
I have been making concrete tests to determine if that is the correct direction.
These are a few of the test results. I used concrete and hypertufa mixtures. Then cast them in silicone molds.
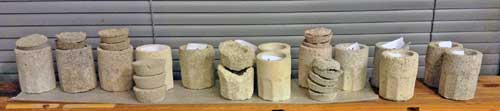
My hope is to find a nice concrete mix that works for me. Then to use some of my ceramic aggregates and oxides to add texture and color.
Also constructing mixed media panels that will be coated with concrete, then aged. If I find materials that work well with a concrete mix I will construct a structure for each of the pods.
This is just a fun thing that I noticed in my studio. I had been using wax to made fire starters and candles to give for gifts. A seed from the pool pods landed next to a drop of wax.
Today while looking through boxes in storage, I found a box labeled “early work”. Each piece I unwrapped brought memories of the time when I made it. Then I came to the little bronze bowl with magnolia pods.
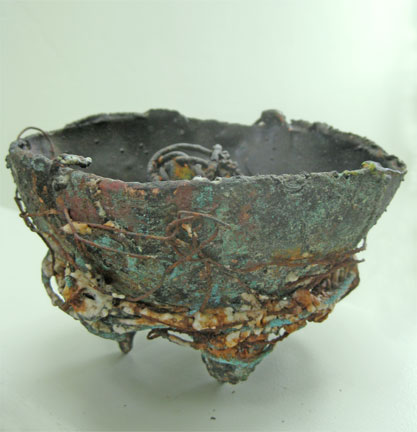
This wasn’t actually an early piece. I made it before attending grad school. While looking at it, I had mixed feelings. What would have happened to my work had I not gone to grad school? I could have stayed in the Bay Area and continued to make work. Instead I went to grad school and wasn’t permitted to use the foundry until near the end of my second year. It was a complicated situation that I have tried to forget.
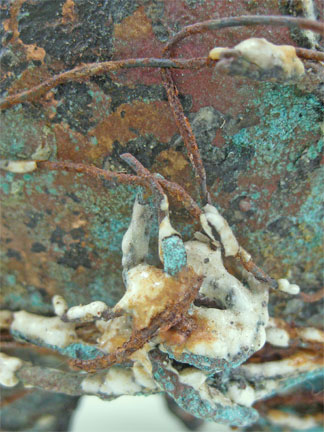
The is a detail of the interior of little bronze bowl with magnolia pods.

After the piece was cleaned up a bit, I bound it with wire. I then applied some of my low-fire glazes. Then fired the lot. I knew that the wire would oxidize and the blue glaze would be matte, the other glaze would be oozy white.
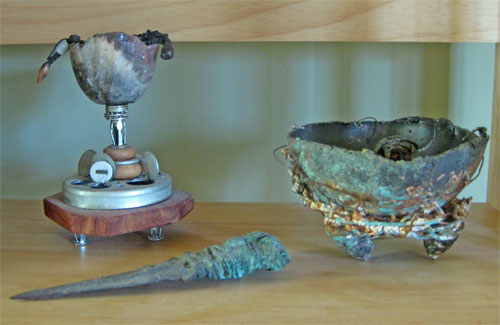
The bowl is now sitting next to a couple of pieces–a dagger and a poison cup. The dagger was made in the late 90s and the poison cup was made a few years back.
I bought soy wax flakes when I was attempting to use wax on wool. I didn’t use the wax molten. I added a solvent to it. Then I applied the cold wax to the wool pieces. I wasn’t happy with the results so I thought that it would be fun to use the soy wax to make candles.
After reading several tutorials on making soy candles I thought that I could make easy peasy gifts for the holidays. I was looking forward to binding cinnamon sticks and pine greens to the jars.
I found a great tutorial on Hello Natural.
I followed the instructions. Poured the candles. Everything went well or so I thought. Then an interesting thing happened. The soy wax started to change and grow as it was cooling. Looks a bit like mold growth which I actually like, but not good for a gift.
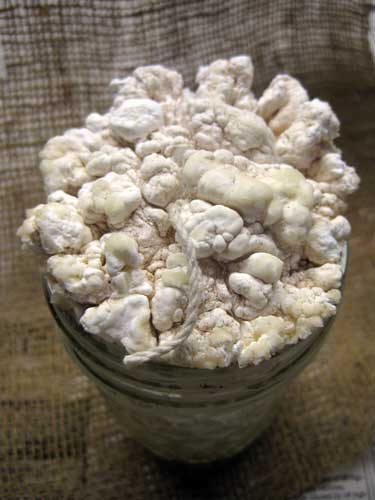
I googled the results, but couldn’t find an explanation as to why the soy wax changed. Probably it was a temperature issue. Perhaps the wax was too warm when it was poured. I was working in my studio space in the garage. While it was not cold, the jars were definitely much cooler than the wax. But maybe it had something to do with the addition of the spices. Could the oil in the spices that I added have altered the wax?
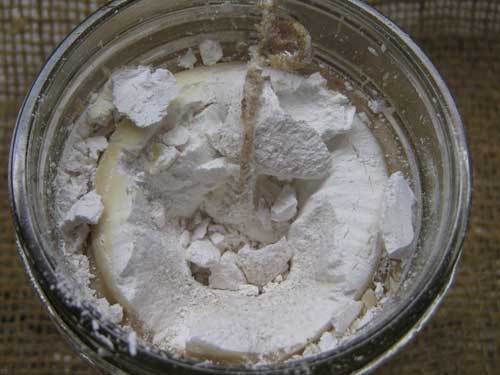
I broke off a chuck of the wax. The interior was very dry and powdery.
I have used a variety of waxes over the years and have never experienced anything peculiar. I used wax for prototypes, as molds for dried plant parts, casting, and molten wax to integrate and age materials.
I don’t look at the result as a failure. It is a problem to be solved. More research is needed. Maybe in the future I will have a need for wax that looks a bit like mold.
I have been so busy working on the data base for our software company that I have not had much studio time or time for gardening.
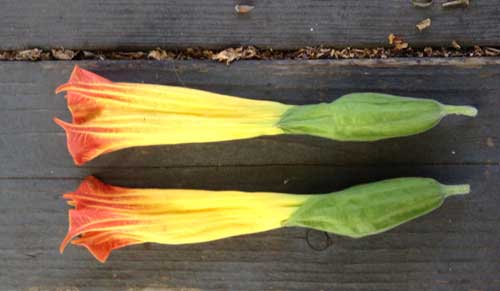
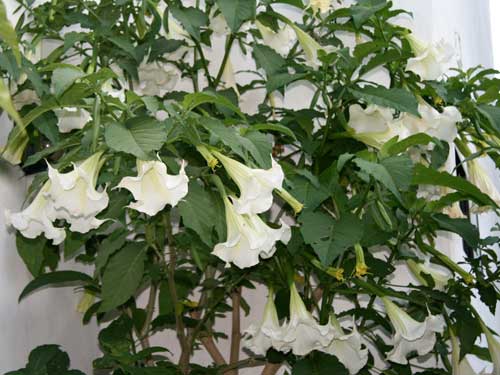
Today we found a surprise in the yard. Our neighbor who is a garden designer, left some large Brugmansia cuttings. My neighbor knows that I collect Brugs. And I am sure knew how excited I would be to have a new addition to my collection.
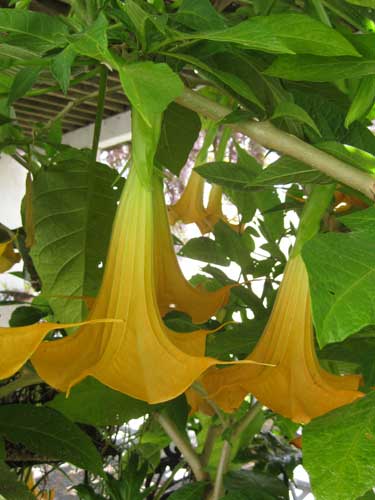
This is an image of the flowers that were on the cuttings.
Many of my Brugs were grown from seed. When I started my collection it was sometimes difficult to find Brugs. Now it is not uncommon to find potted Brugs at neighborhood garden centers.
I love Brugs because they have large beautiful flowers that smell delicious in the morning and in the evening.
I also grow Datura. The flowers are lovely and smell equally delicious.
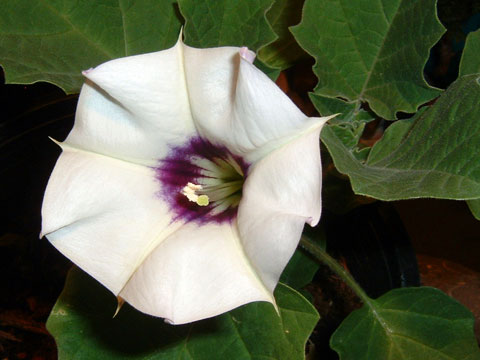

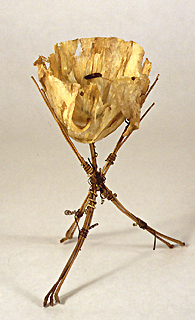
Both Brugs and Datura are poisonous and I use bits in my work. This is one of my poison goblets. All parts are made of poisonous plants. The bowl of the goblet was made by laying dampened flower petals in a wax mold.
Brugmansia Growers International
My favorite places to purchase Brugmansia and Datura seeds–