BWHeader

Amazingly Beautiful Naturally Occurring Bronze Patina

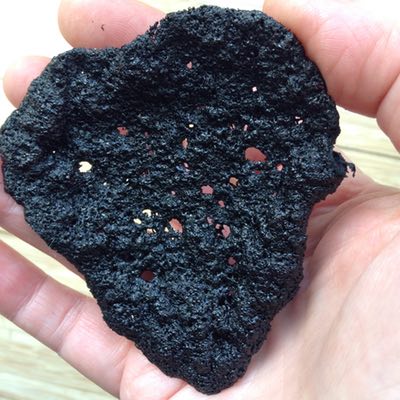
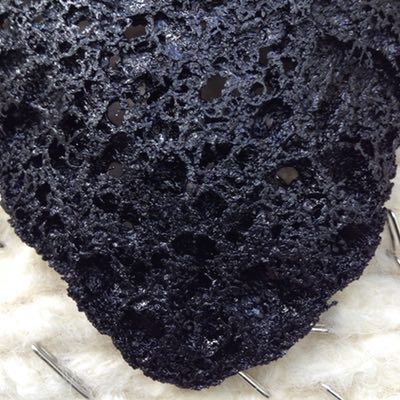
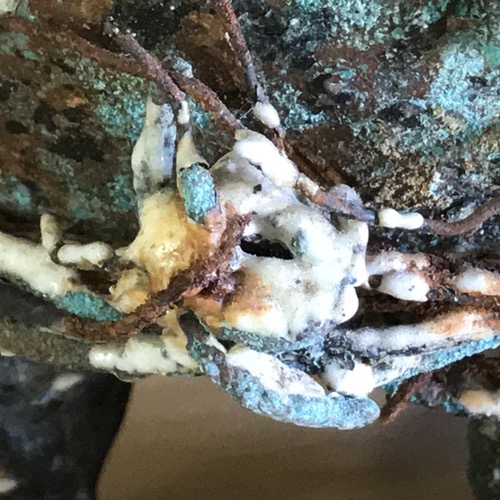
Now I know how to achieve gorgeous textural surfaces on bronze. You must submerge the piece in the ocean for centuries!

Bronze Antikythera Shipwreck Arm

When I saw the images of the bronze arm found during the archaeological expedition of the Antikythera Shipwreck, it reminded me of my research to create thick textural surfaces on bronze.

Detail

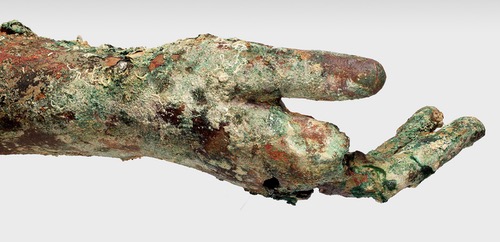
Antikythera Shipwreck Expedition, Detail of the Hand

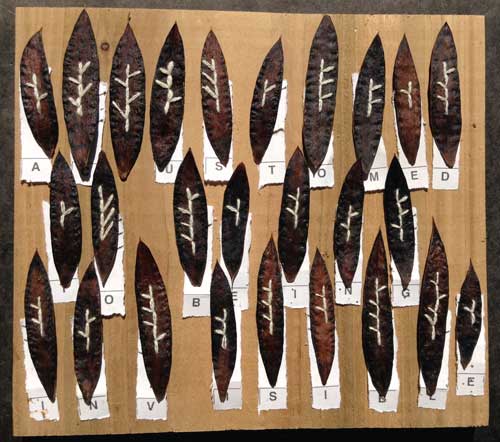
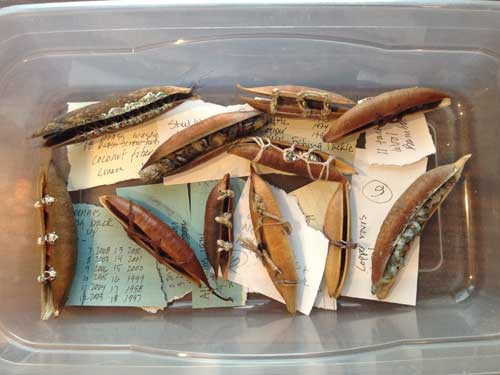
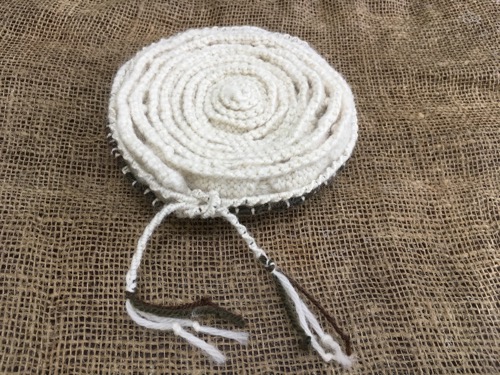
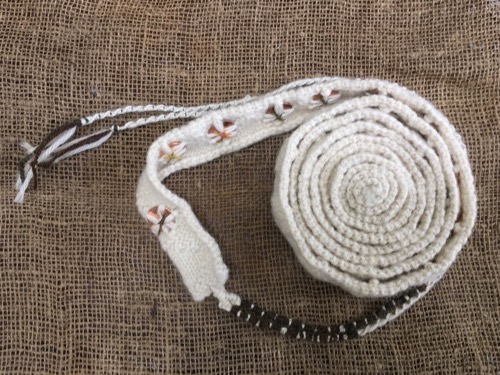
I buried my bronze pieces with sodium mixtures and chemicals. I applied chemicals to my pieces and then set them on fire. I saturated burlap with chemicals, wrapped it around my pieces, then enclosed work in a plastic container. I applied low-fire ceramic glazes to bronze pieces and then fired them. And I did a combination.

Bronze Bowl Detail

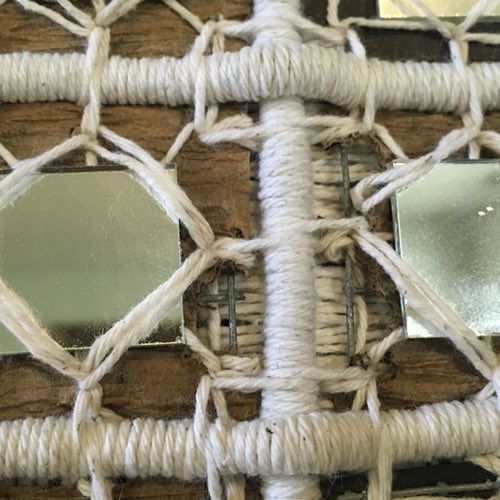
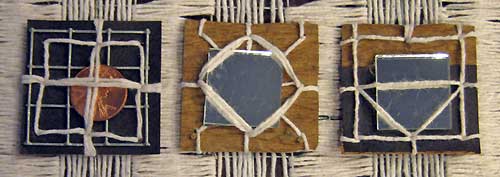
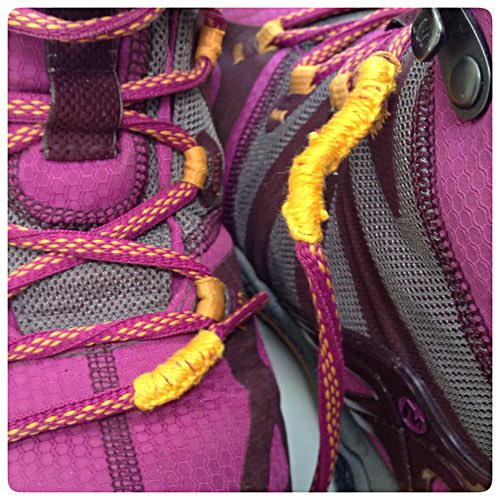
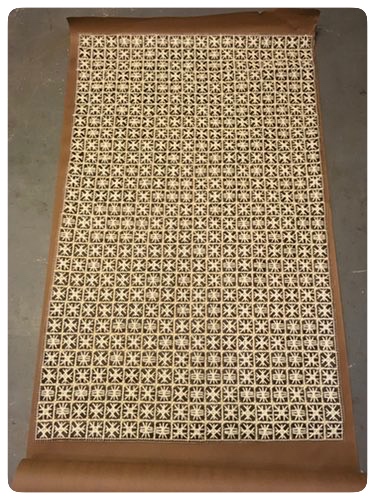
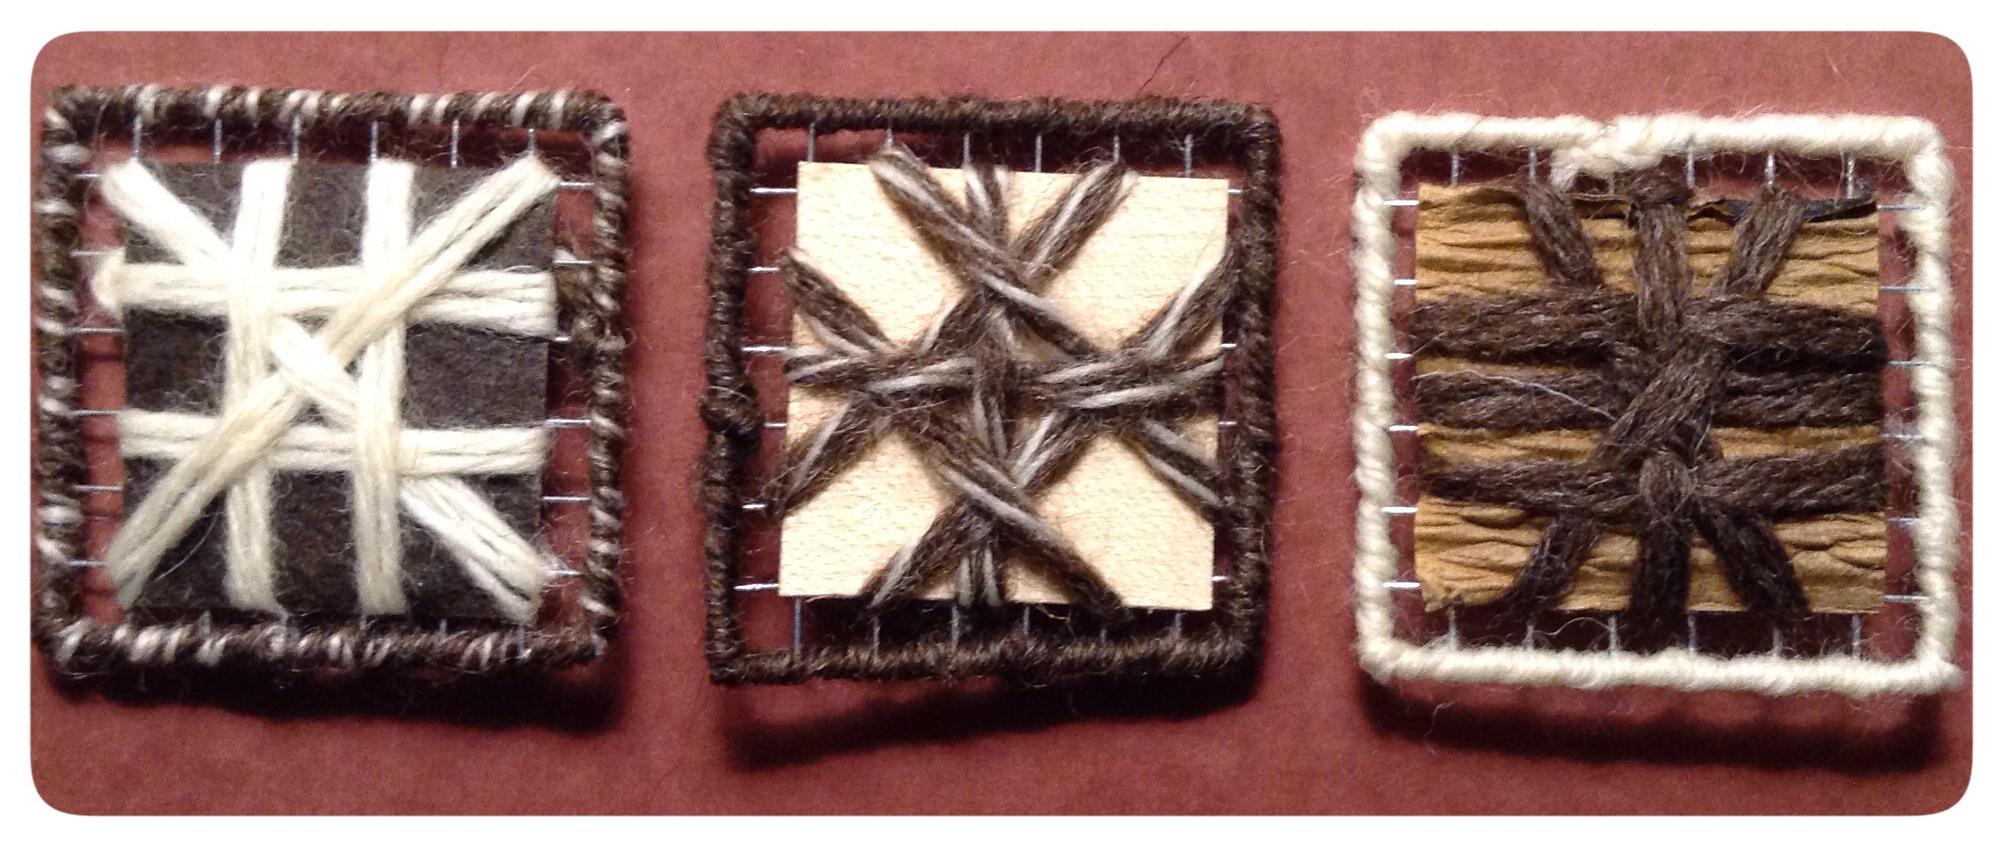
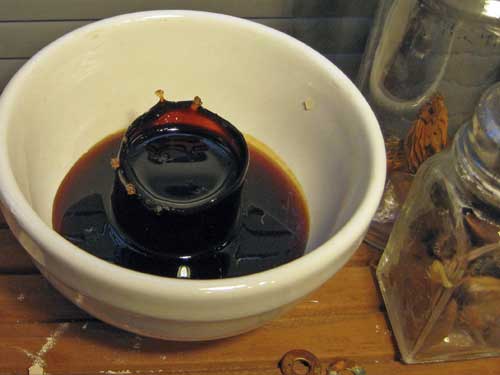
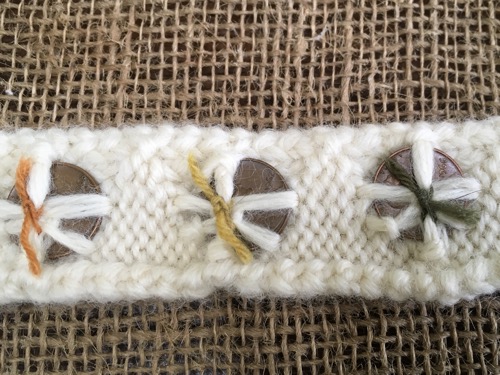
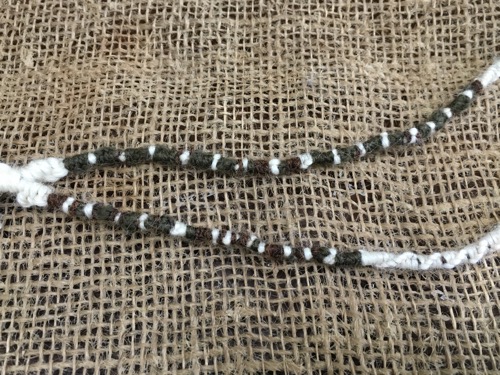
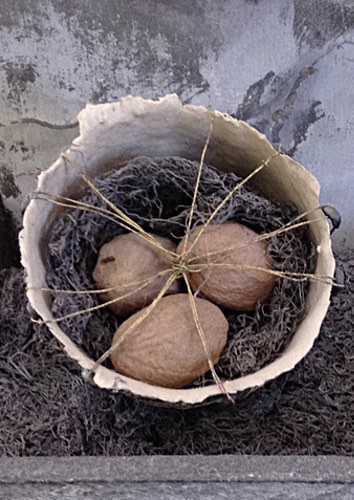
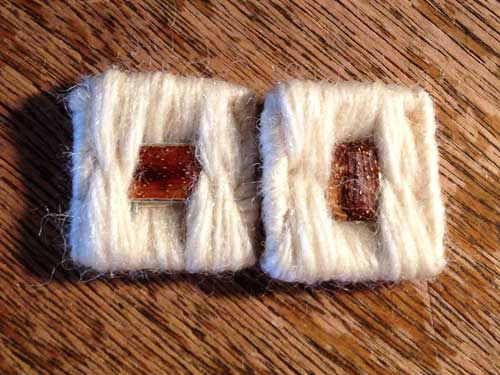
This is a detail of a little bronze bowl that was bound with wire.
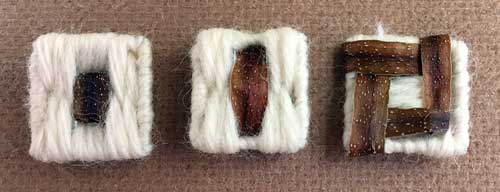
I applied Egyptian paste, low-fire glazes, and the lot was fired hot enough for
paste and glaze to mature, but not hot enough for the bronze and steel wire to become molten.

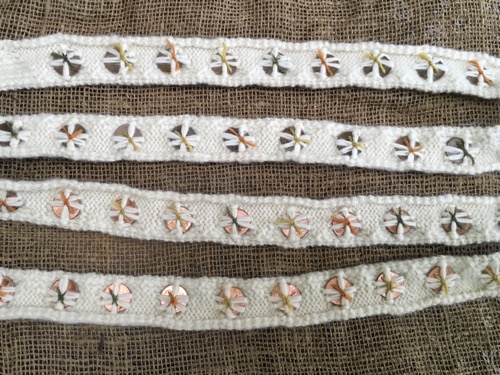
Egyptian paste is a self-glazing clay body. I have used it in a variety of ways, even as a self-glazing spackle when something needs to be filled.

Egyptian Past Vessel

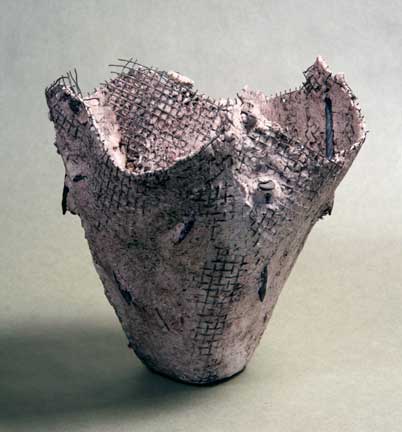
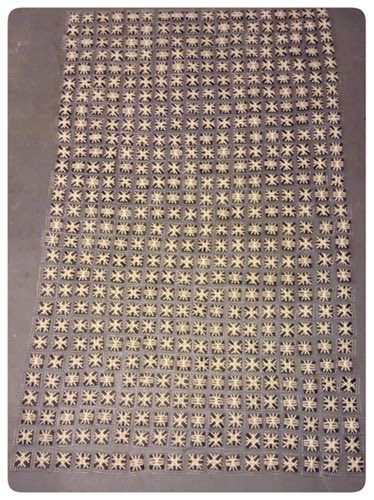
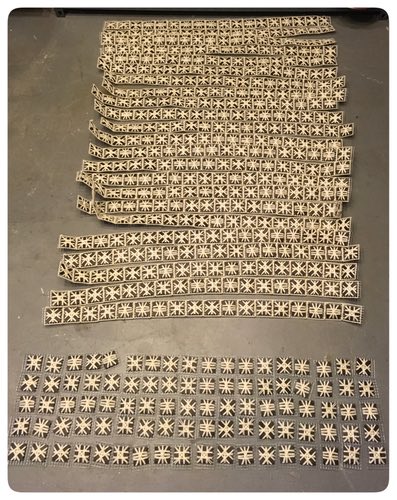
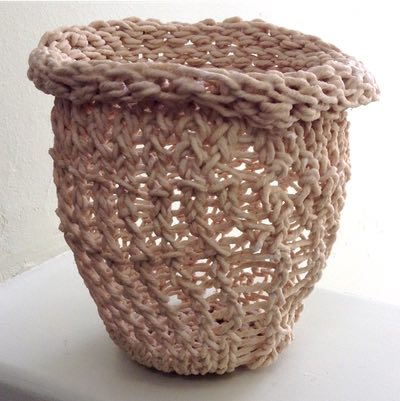
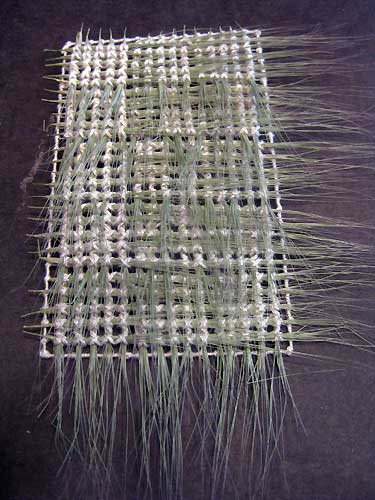
Hardware cloth formed into a vessel and held in place with nails. Egyptian paste was applied and the lot was fired. The pink color is the result of the addition of red iron oxide added to the paste dry batch.


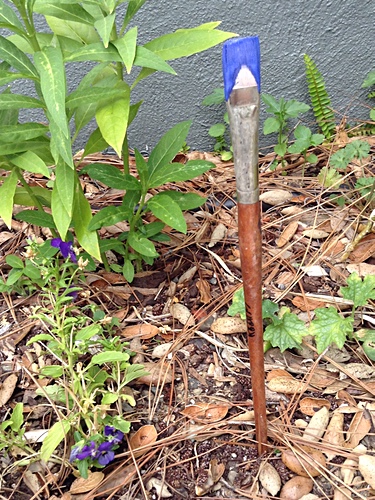
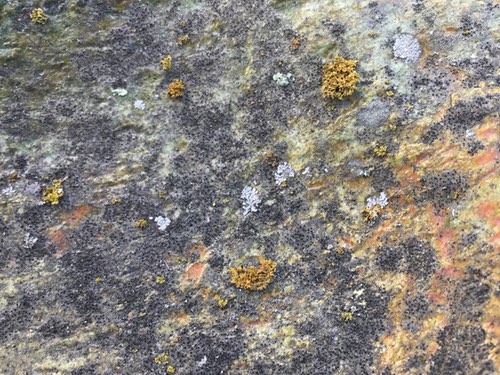
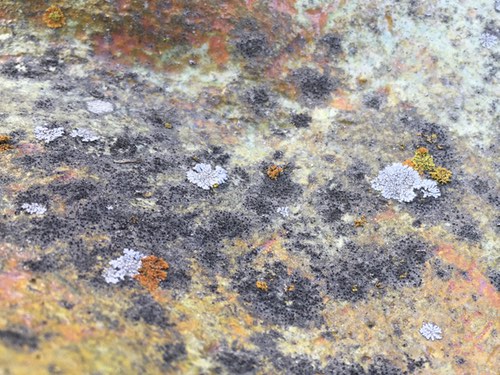
Post of Eroded Contours
My series that combined ceramic and bronze processes.


Antikythera Shipwreck Excavation

It appears that the Antikythera Shipwreck excavation photos I used in my post were taken by Brett Seymour/EUA/ARGO.

Found: A Giant Bronze Arm From the Antikythera Shipwreck

Antikythera shipwreck yields statue pieces and mystery bronze disc

Greece Ministry of Culture and Sports


Planted Seedlings From Unidentified Seeds

Seedlings

Seedlings From Unidentified Seeds

Seedling

A Seedling Prior to Planting

In order to quickly see the seedlings after planting, I added a small bamboo marker. The markers seemed to disappear into the garden, so I decided to add a bit of color.

Marker

Dipped the Top of the First Bamboo Marker in Paint
Result–Messy

Marker

Second Marker–Applied Paint With Brush Below Top to Allow for Finger Hold

Brush

Popped Brush in Ground to Prevent Contamination

Seedling

Three Days after Planting
Most of the Seedlings Look Like This

Survivor

One of Two Survivors

Previous post on a recent attempt to grow plants from the mystery seed followed by a photo of the seed and a plant.

Seeds

Plants


Living With Bunnies and Birds

When you share a home with bunnies and birds, you must make loads of compromises. Bunny proofing means protecting or removing anything that can be chewed that is up to approximately 3 feet high, unless the bunny likes to climb on furniture. One of our bunnies runs laps on the back of the sofa.

It is incredibly difficult to bird proof a room. Removal of plants and anything that they might want to tear and shred is a given. But don’t forget about the thin iPad/iPhone power cables. They love to chew them.

One of my See a Penny pieces has been hanging on the dining room wall since I completed it in March of 2013.

See A Penny

Completed See a Penny piece prior to hanging in dining room.

Today I found one of the pieces of mirror on the floor. When I replaced the mirror, I noticed damage–

See A Penny Damage

and certain the culprit is either The Bird or Bob.

The Bird

The Bird

Bob

Bob

They both love landing and perching on the piece, but I didn’t realize chewing was involved.

I could attempt giving the birds a misting with water as a deterrent. Probably would not be a deterrent for Bob because he frequently takes a bath in Big Baby’s water dish.

Big Baby

Big Baby

Haven’t decided if I will be moving the wallpiece to a different location. Repair will be time consuming, but doable. The squares are constructed of roofing felt, tree wrap, mirror, hardware cloth, and cotton twine.

See A Penny

See a Penny, Squares Used for Code–Spacer, Dot, Dash

Slipping in a new square of tree wrap won’t work. They squares were perforated for ease of binding with the cotton twine.

So, what is the solution to prevent Elliot from chewing my shoe laces while I am wearing the shoes?

Laces

Repaired laces with embroidery floss.

Elliot

Elliot in the studio.


Hawthorne Piece Progress

The coded Hawthorne quote used:
Words – innocent and powerless as they are, as standing in a dictionary, how potent for good and evil they become in the hands of one who knows how to combine them.

Frame of Stitched Squares

January 11, Frame of Stitched Squares

Stitched Squares

Layout of Stitched Squares

Stitched Squares

January 24, In Progress–Squares in Each Row Stitched Together

Stitched Squares

January 28, Rows Stitched Together


To Do List:
Bind and Stitch Cotton Rope Border
Stitch Paper Backing to Piece Without Perforating the Paper


Work in Progress: Hawthorne

One of the reasons I write about projects is to work through details and to have a record of choices and decisions.

I have been thinking about making a piece to hang over the fireplace in the family room/office for several years. Actually it is a bit of a funny story. During our house remodel that started in January of 2002, we removed the ugly shiny black tile that surrounded the fireplace. We had been living with concrete board, until last year when we finally installed tile.

The space above the fireplace is 68” wide and 64” high. I decided to make a piece that is roughly 36” wide and 58” high. The piece will be constructed of 522 embroidered hardware cloth squares (1.75″) that will be stitched together. Yep, quilt-ish.

As always as of late, I use coded messages or quotes. This piece will be a Nathaniel Hawthorne quote, Words – innocent and powerless as they are, as standing in a dictionary, how potent for good and evil they become in the hands of one who knows how to combine them.

The code for the Hawthorne piece contains 190 dots, 162 dashes, and 170 spacers.

Hawthorne Layout

These are some stitches that I tried. After trying all of these different stitches, backgrounds, and yarn colors…

Multiple Squares

my favorite stitch is the one in the lower right corner… I selected three stitches to use and spent several hours stitching these for the dashes…

Stitched Squares

Decided I would soon regret my choice and not enjoy working on the piece. I will save them for a future project.

Had the idea, rather than perforating the background material (roofing felt and tree wrap), which can tear and sometimes the holes could be seen, I decided to use stitches that would wrap around the background material.

Pretty sure I will be using these unless I decide to switch the dot and dash background and yarn. Have time to think about it while I am making the spacer pieces.

Three Squares

Spacer (roofing felt and cream wool)
Dot (veneer with brown and cream wool)
Dash (tree wrap with brown yarn)

Also an interesting thing happened. I had planned to use the same background material for the dots and dashes. While I was looking for safety pins in my studio I ran across the veneer business cards that I purchased from Lee Valley. Thought they were cool and maybe they would come in handy in the future. Today apparently is that future day. The veneer can be cut with scissors, but a blade would be better to prevent splitting. I can cut two pieces from each card, definitely plenty for the project.

I like the idea of three different backgrounds to make the code a bit clearer. Currently planning to stitch the squares together with three strands of yarn, one of each being used.


What is it? Sugar and Rodin Quotes

“To the artist there is never anything ugly in nature.” Auguste Rodin

When I started to clean the oven after a baking mishap, I paused to look at what I scraped up.

Burnt Sugar

It is burnt sugar from an apple spice cake. At fist glance it looks black, nearly ash. On closer inspection it has a lovely texture of holes and craters.

Burnt Sugar

In the past I used sugar as a stiffener and in molds. There is a history of folks using sugar as a stiffener for crochet. I had been using microcrystalline wax, shellac, and varnish to stiffen and age my work. Wondered if sugar might work as a substitute.

Sugar Twine Vessel

This is my first test piece, made in 2006. It is constructed of cotton baker’s twine. I immersed the cotton vessel in molten raw sugar. The sugar impregnated twine collapsed. I wrung it out and place it over a foil covered coffee can taller than the vessel. Placed the lot on a plate to collect the sugar run off.

The piece is still strong and not in the least bit sticky. And no insect activity.

I also made a series of cast sugar vessels. I used several recipes for sugar glass. One recipe was 3 1/2 cups of raw sugar, 1 cup corn syrup, 2 cups of water, and 1/4 teaspoon of cream of tartar. I used a silicone mold for the casting.

Melting Sugar Cup

Clearly I did something wrong. Raw sugar rather than granulated. Possibly the thickness. Temperature.

But it was fun to watch the sugar cup melt.

Will I try it again? Sure. Will I have success? Maybe.

“Nothing is a waste of time if you use the experience wisely.” Auguste Rodin


50th Birthday Gift for Tim

This is the 50th birthday piece I made for a friend from grad school.

I used cream wool to loom knit the band, 51 pennies (1966-2016), and fiber for binding and code.

Tim 50th Birthday Piece

50th Birthday Piece for Tim

Tim 50th Birthday Piece Untied

Birthday Piece Untied

Tim Birthday Piece Bound

Bound Pennies 1966-2016. Each Penny is bound as part of code for Tim’s Name.
Dashes-Yellow, Dots-Green, Spacers-Orange.

1966 Penny

1968, 1967, 1966 Pennies

2016 Penny

2016 Penny

Ties

Top tie code is 09091966 and 09092016. Bottom tie code is Happy Birthday.
Dots knots are rust yarn, Dashes knots are green yarn, and spacers are cream.

Triangle Pattern

Loom Knit Pattern


Lichens and Glazes

When my chosen medium was clay, I used a lot of layered, often gritty glazes. In the back of my mind always thinking lichens.

Today when I was sweeping the deck, to my delight I found this piece has actual lichens growing on the surface.

Sculpture on Deck

Sculpture on Deck with Lichens

The piece was made in a class at Ohio State in the early 80s. The clay is a buff colored sculpture body with some nice aggregate. The piece was bisque fired to cone 5. A cone 05 lithium blue glaze was applied for the base color. Then low-fire lead glazes were applied. The last fired to cone 015.

The piece has been on the deck since 1994. It looks so much better with the addition of lichens.

Sculpture on Deck with Lichens

If interested in viewing lichen glaze surfaces, check out Lana Wilson’s work. Lana’s text, Ceramics: Shape and Surface has some great information for the beginner; and it also has loads of information on how to achieve gorgeous glaze surfaces. The text is available on Lana’s website.


A note about my use of lead glazes. Yes, they are gorgeous low-fire glazes. But lead is potentially dangerous. I haven’t been used lead glazes for several years. Since I have been attempting to use safer materials and processes, I reluctantly decided to remove all potentially toxic ceramic materials from my studio. I had quite the stash. I was fortunate that during the yearly clean-up, the materials were accepted for disposable without cost.

Did I really remove all of the lead from my studio? Well, I did keep a small bag of a leaded frit, just in case. I also found a small sheet of lead that I kept. It is a lovely soft material. I used it to line and wrap portions of boxes.

Lead Detail

Detail of a piece in my Make Your Own Luck series.
The vertical section is wrapped in sheet lead.
The nest-like material is lead wool.
The three objects are whole nutmeg.
Nutmeg was used for luck.
If consumed it could be deadly.


Work in Progress: A Small Link to the Past

I was in the process of making a piece with grass that would have the coded message, A Small Link With the Past. As a test, I bound some grass to a piece of hardware cloth. The grass was a bit prickly, but I quite liked it.

Grass Piece

The plan was to bind grass to hardware cloth to make 3 pattern blocks…

Blocks for Pattern

then bind the blocks together to make a pattern.

Pattern

The pattern with the code will have 117 blocks, 81 will have the addition of a code component in the center square.

When I decided to use the 1/4″ hardware cloth the grass did not work. Instead, I am using Tecoma stans pods that have been soaked in a solution of glycerin and water.

Tecoma sans Pods

I wrote a post about collecting the Tecoma stans pods 12 November 2015.

Cream wool yarn will be used to complete the blocks.

Link Blocks

I just noticed when I shot the photo of the blocks, the one with the cream wool center should have been rotated for the stitch work to be vertical.

Unfortunately, making blocks in low light while listening to political news resulted in several mistakes. In order for the pattern to work properly, the grain of the pod must be bound vertically.

The right block works, the left one does not.

Link Block Mistake

The dozen that I consistently stitched incorrectly can be used for a different project. It will be easier, and less time consuming to replace the mistakes than to take them apart and rework them.

There is another issue with changing from grass to Tecoma sans pods. Grass fits with the idea of linking to the past, a childhood memory. Tecoma sans pods does not.

So, how will the pattern work as a connection to memory, or a link to the past? The pattern with the code will be a portion of the piece. Grass, hardware cloth, and wool will be woven together, most likely with the word memory in code, and the pattern with code will be bound to it. That is the current plan, but things can change during the process.