BWHeader

Mistake to Neglect Testing Before Using a New Material

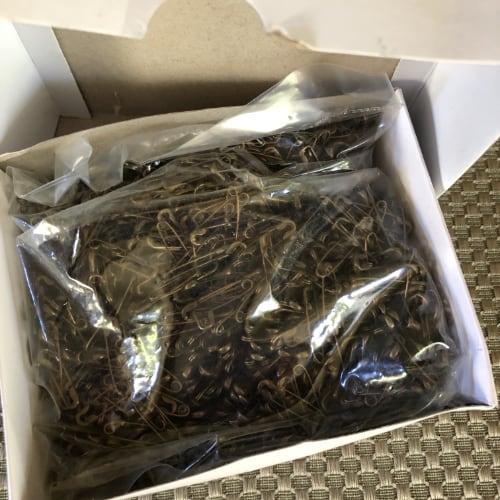
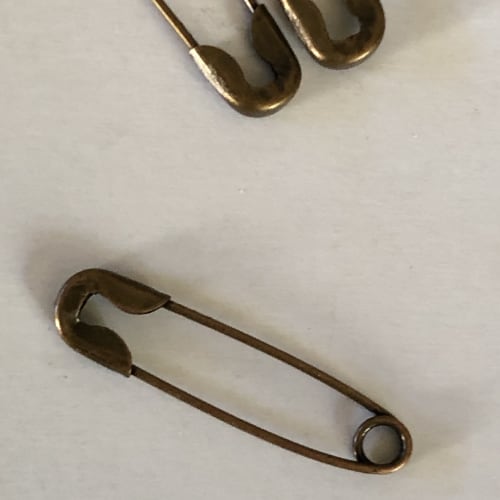
I ordered some truly beautiful safety pins from Amazon. This is the description–Household Mall 3/4-Inch Safety Pins, Bronze (1440 Pieces).

Read through the product information and not once did it state that the safety pins were not actually bronze.

Bronze Safety Pins

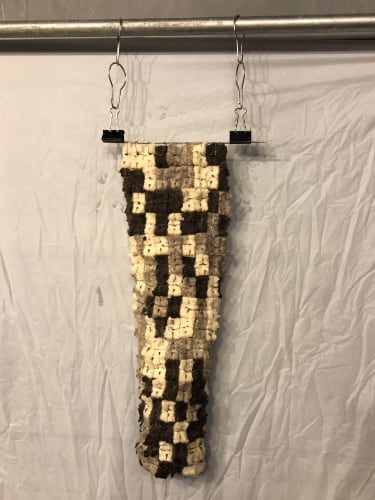
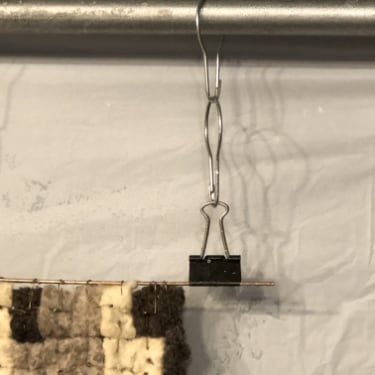
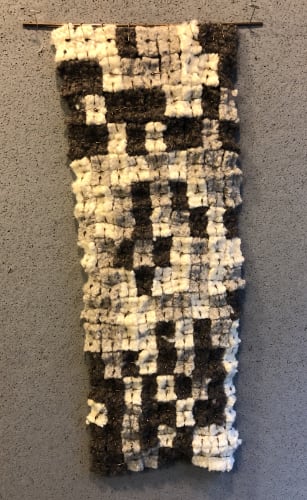
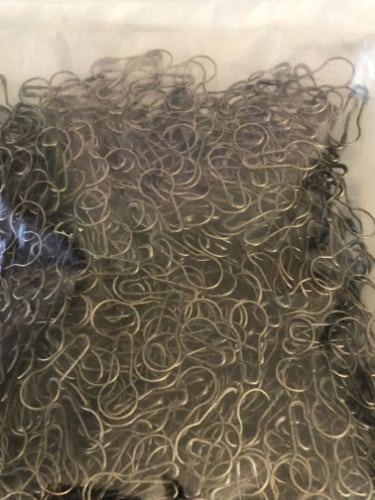
I was using the second type of safety pins to suspend Who is Left on a bronze welding rod.

Bronze Safety Pins

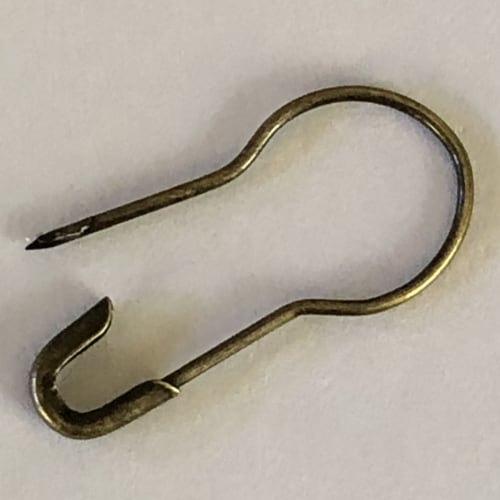
These were not bronze because the product description states–Firefly 1000 pcs Bronze Metal Gourd Pin/Calabash Pin/Safety Pins/Bulb Pin/Bead Needle Pins/Clothing Tag Pins DIY Home Accessories.

Material: Made of metal of good quality, hard and durable, not easy to break.

So, bronze colored, not bronze.

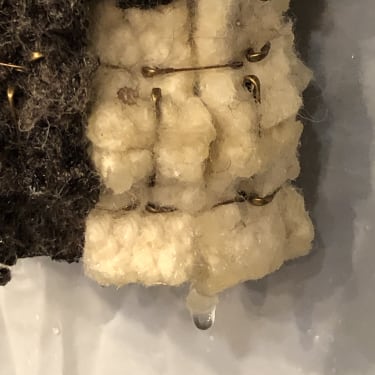
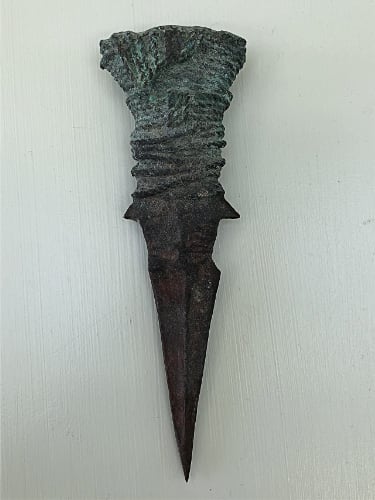
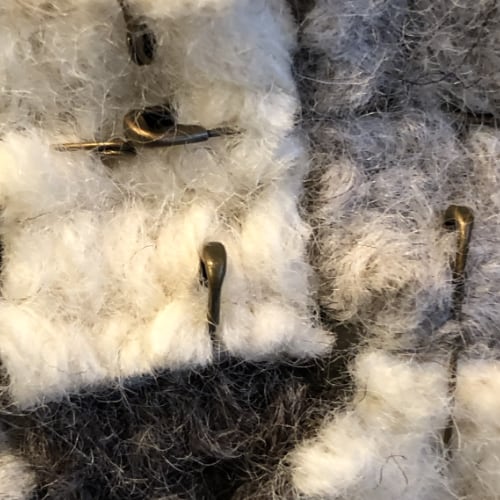
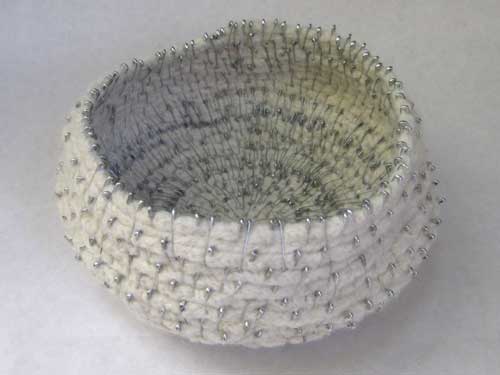
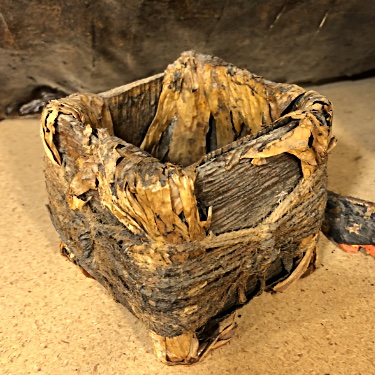
How did I find the bronze safety pins were not actually bronze? I used them to assemble the Who is Left. After an application of a patina solution, bronze would have developed a nice blue-green patina.

Who Is Left

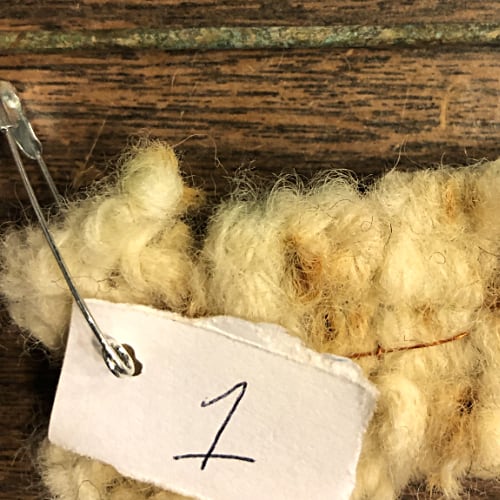
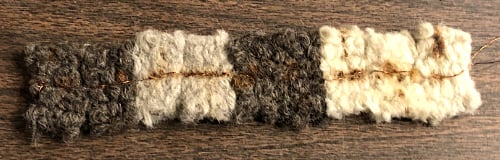
The bronze welding rod has developed the start of a nice blue-green patina, but not the safety pins.

Instead the result was basic rust. That would have been totally fine if the description of the safety pins had been steel. I would have anticipated the rust result.

In my excitement to use the new safety pins, I did not test the metal. Not all mistakes are a bad thing. The results can be informative and be perfect for a future project.

Who Is Left

Who Is Left

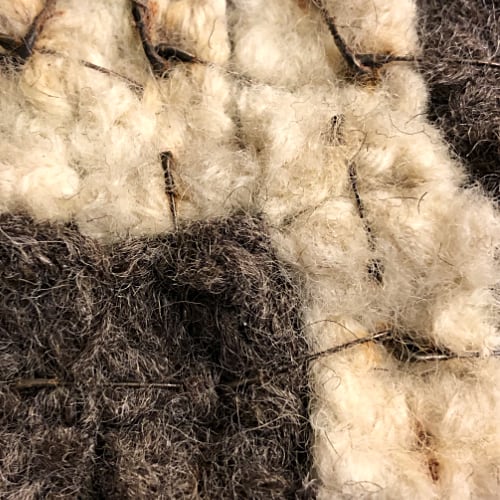
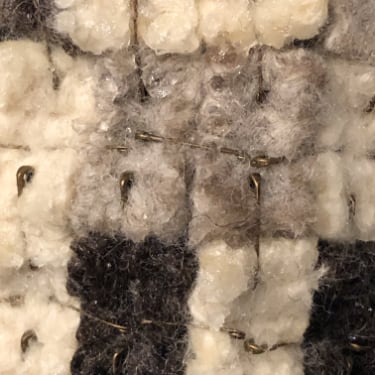
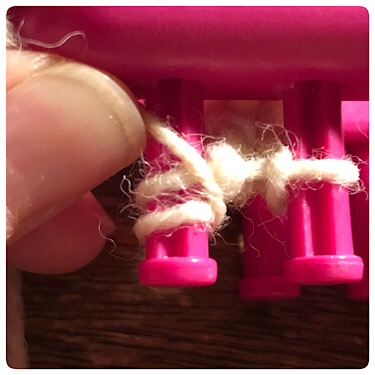
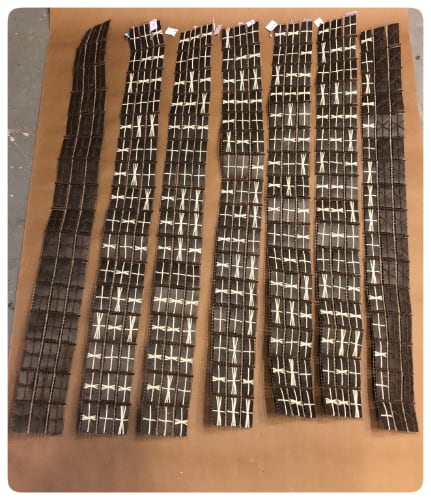
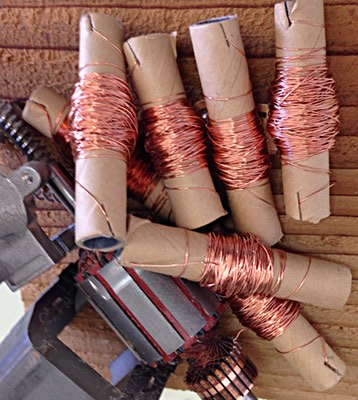
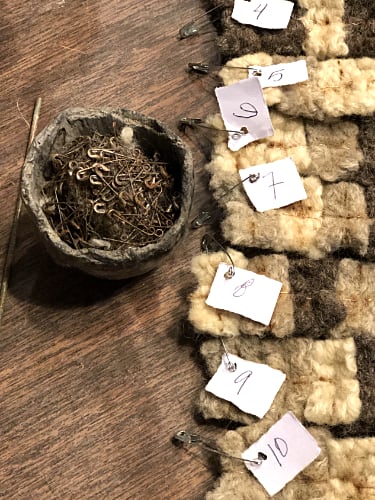
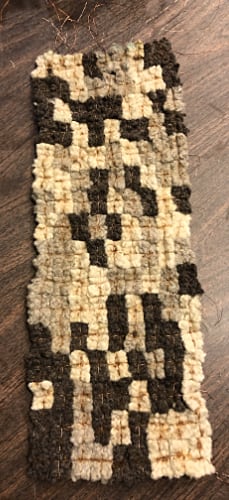
Since I am determined to add the blue-green patina staining and weeping down the piece, I removed the safety pins, row by row, and replaced them with copper wire.

That would be the copper wire I removed and saved from my hand mixer that caught fire.

Mixer Parts with Copper Wire

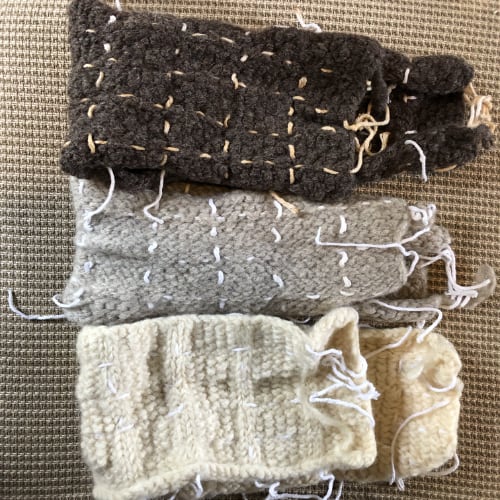
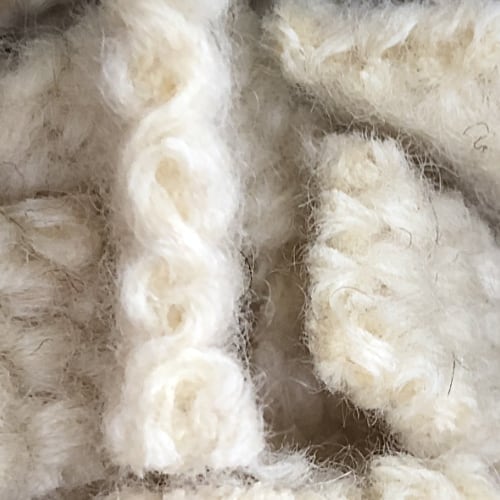
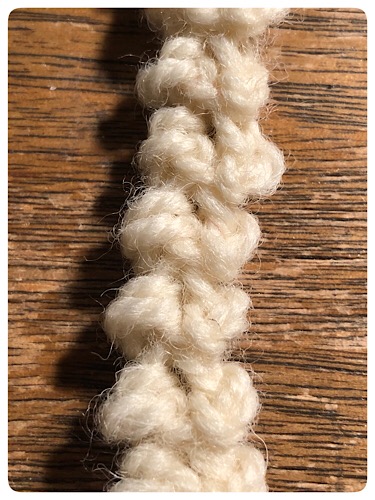
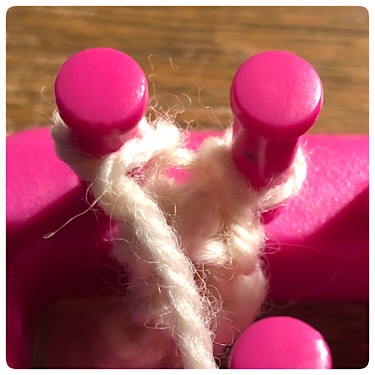
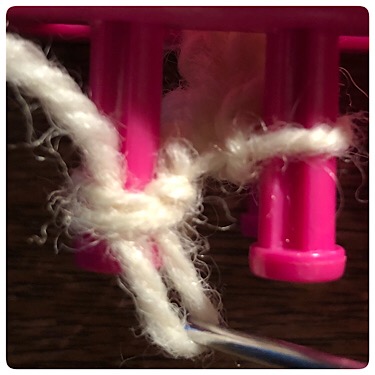
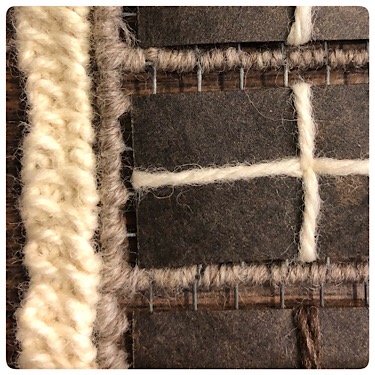
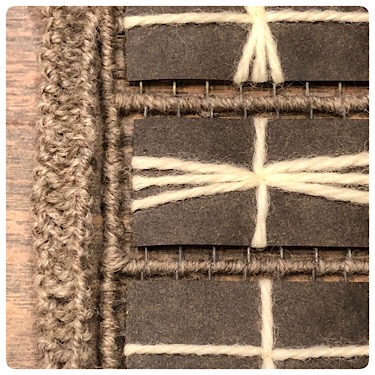
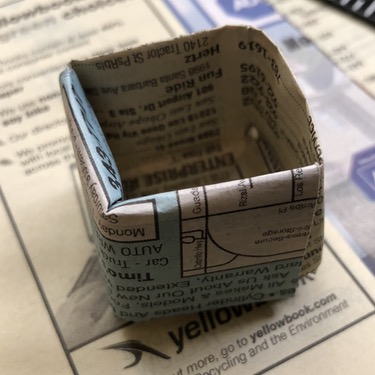
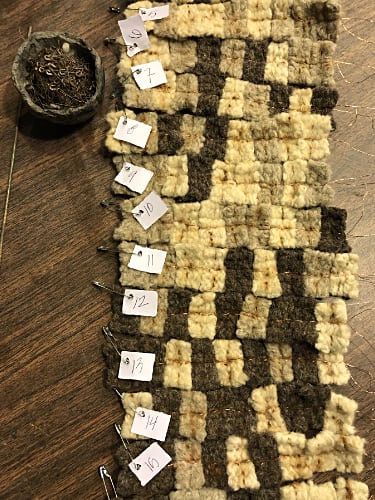
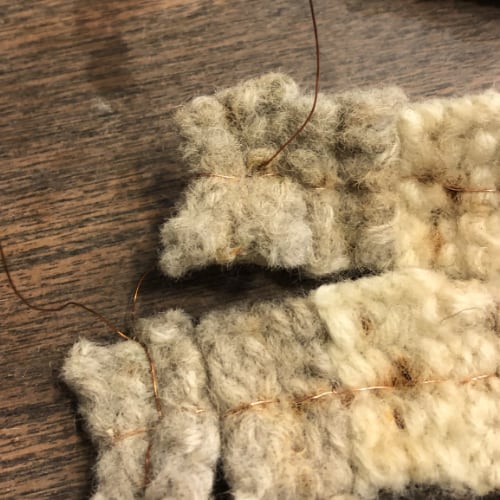
I assembled the blocks of each row with a twining technique. Cut a length of wire a longer than double the width of the piece. Folded the wire in half. Slipped the first wool block of the row into the folded wire, with the fold on the left side. One half of the wire was on the back of the wool block, the other half on the front. The wire was inserted through the middle of the block, back through to the front, front through to the back, then given a twist on the right side of the block.

Who Is Left

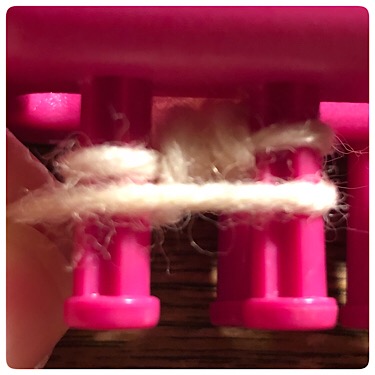
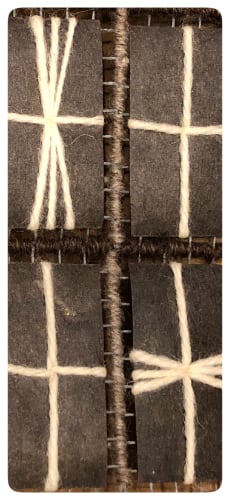
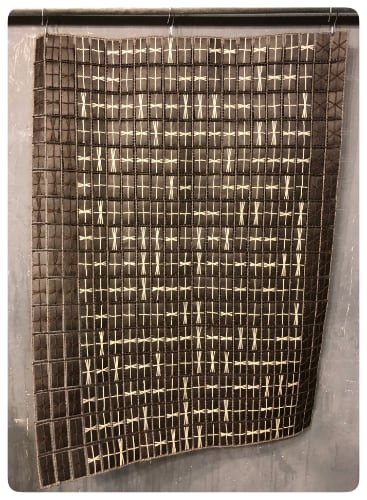
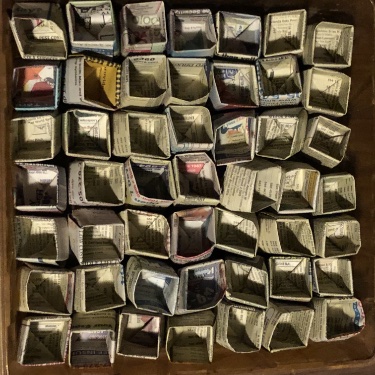
The process was repeated for the remaining 8 blocks in the row, and for the other 15 rows.

Who Is Left

Next I will twine together the verticals. I suspect that task will be a tad challenging. Then patina.

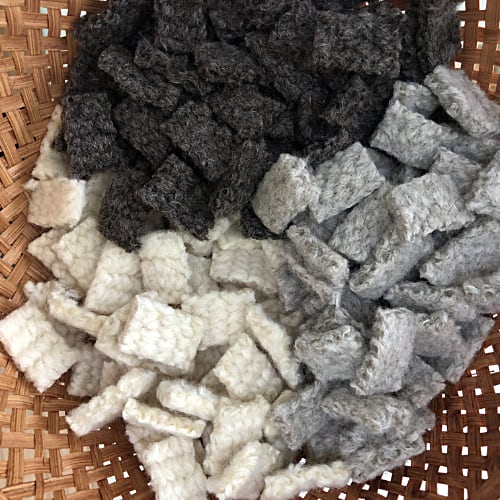
So what about the existing rust staining on the wool blocks?

Who Is Left

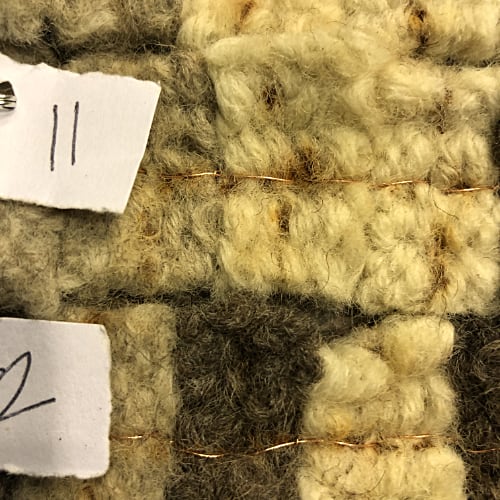
If, as I hope, the blue-green patina stains and weeps, the rust staining will add another layer of age to the piece.

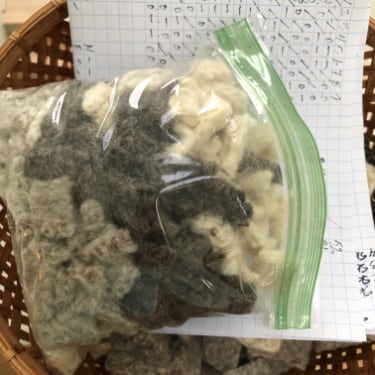
The used safety pins will be used for a future project.

Who Is Left


Progress 04/26/19

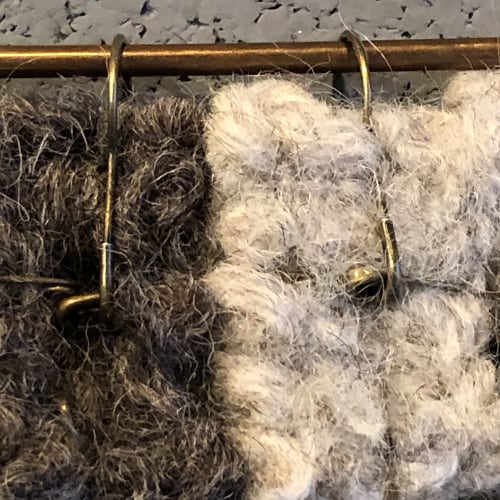
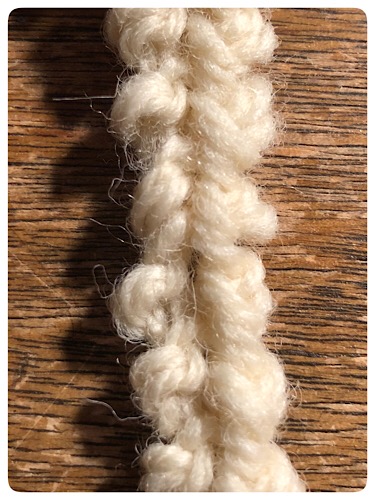
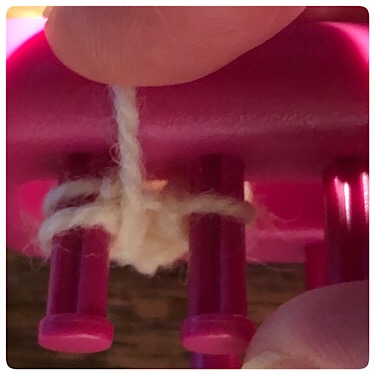
The back wire comes through the center of the wool block to the front.

Who Is Left

The back wire comes through the center of the block to the front; the front wire goes through the front of the wool block to the back.

Who Is Left

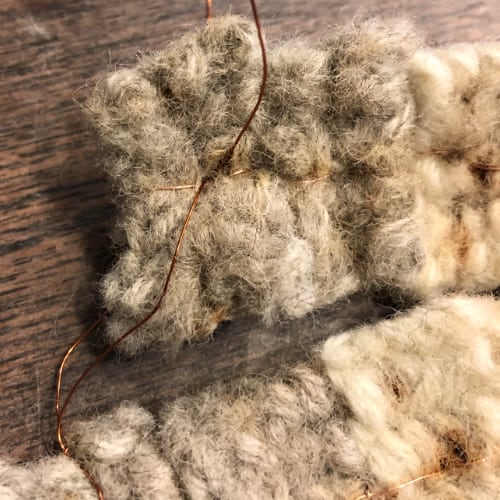
All safety pins removed and replaced with two thicknesses of coppoer wire.
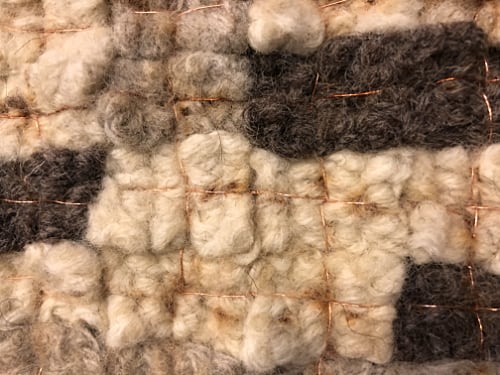
Who Is Left

Who Is Left

Next comes patina.


Who is left to connect me… Patina

I decided to assemble Who Is Left… and then patina the bronze safety pins and welding rod. I am hoping for the addition of a weeping green, but the wool limits what I can use.

The patina is a solution of dissolved kosher salt in white vinegar.

I folded and rolled the piece in the solution. Then hung it to drip dry.

Who Is Left Vinegar and Salt Patina

Who Is Left Vinegar and Salt Patina

Who Is Left Vinegar and Salt Patina

Who Is Left Vinegar and Salt Patina

Bronze Dagger, Vinegar and Salt Patina Used on Upper Portion


This is a fun little piece that has been on the wall of my studio for several years. It is part of my Cleanse Your Palate series.

Soap Cup

The series is based on negative words and the punishment of washing out your mouth with soap.

I made cups of dried plant materials and fiber. Made silicone molds of the cups.

A clove glycerin soap cup was pulled from each mold.

The wood used for the shelf is from an old garden swing. I carried the wood around for a decade before it found a home in the cup series. The oxidized wire was found in my dad’s shop. Perhaps I learned to save everything, just in case, for some day, from my dad.

A few pieces from the series can be seen on my website, Girl Artist.


Who Is Left to Connect Me… In Progress

Who Is Left

Safety Pins Used–263 small, 9 gourd. The knitted brown pieces are much thinner than the cream and tan pieces. Next time I should use the same stitch for all.

Who Is Left

Cut a length of bronze welding rod for hanging the piece inside box. Current Dimensions–10″ x 20″.

Next–Patina the metal and build a cedar box.

Who Is Left

As stated in a previous post, the quote is from Henning Mankell’s, Firewall.


Who Is Left to Connect Me to My Earlier Life?

The quote is from Firewall, part of the Wallander series written by Henning Mankell.

Tomorrow is the anniversary of my mother’s ischemic stroke. An event that changed everything.

Last year was a challenging year. My younger sister survived her third surgery for oral cancer, but while in recovery had an ischemic stroke. She did not survive.

Two months later my mother had an ischemic stroke. For a few weeks the prognosis was positive-negative, hopeful-no hope. Before summer I lost the two most important women in my life. The women who knew me when I was a child. We grew and changed together.

I am working on a memorial series. Typically I my series have 11 pieces. Several pieces are in progress but not quite completed. Partly the delay in completing work is the result of recovering from hand surgery. Still do not have my fine motor skill and manual dexterity in my dominant hand.

I using fiber to embroider on hardware cloth for my code blocks. Holding a needle for extended periods of time still causes hand and finger pain. Needed to figure out alternative ways for making things. Since I can loom knit, decided to give that a go. This will also be the first piece in a long time that does not have hardware cloth. It is a good thing to break a dependence on a material.

Who is Left…, will still have a metal component. The plan is to use safety pins to assemble the blocks. The safety pins will also add the possibility of green patina running down the piece.

Blocks
There are three colors of wool blocks: 41 tan for dashes, 51 dark brown for dots, and 52 cream for spacers. The 144 blocks will be laid out on a 9 x 16 grid.

Layout

Knit Pattern–Dash 41 Tan Wool Blocks

Cast On E-wrap
Knit E-wrap

R1 Skip, K5, Flat Knit
R2 Skip, K, S, K, S, K, Flat Knit
R3 Skip, K5, Flat Knit
R4 Skip, S, K, S, K, S, Flat Knit

Pattern rolls.

Knit Pattern–Dot 51 Dark Brown Wool Blocks

Cast On E-wrap
Knit E-wrap

R1 Skip, K, P, K, P, K, Flat Knit
R2 Skip, P, K, P, K, K, Flat Knit
R3 Skip, P, K, P, K, K, Flat Knit
R4 Skip, K, P, K, P, K, Flat Knit

Knit Pattern–Spacers 52 Cream Wool Blocks

Cast On E-wrap
Knit E-wrap
Only Knit Purl Stitches
R1 Skip, K, P, K, P, K, Flat Knit
R2 Skip, P, K, P, K, K, Flat Knit
R3 Skip, K, P, K, P, K, Flat Knit
R4 Skip, P, K, P, K, K, Flat Knit

Swatches

Knitted Swatches with Cotton Cord Separating Blocks After First Fulling

Blocks

Blocks for Code

Scraps

The scraps are random sizes, might be fun to stitch together to make letters in a different code piece.
Been thinking about learning to use my mother’s sewing machine.

Scraps

The blocks were fulled, not felted. Loops for pegs still visible.

Safety Pins
I ordered two types of bronze 3/4″ safety pins from amazon:

Household Mall 3/4-Inch Safety Pins, Bronze (1440 Pieces)

Firefly Bronze Metal Gourd Pin (1000 Pieces)

Received the Household Bronze pins. They are beautiful!

Safety Pins

Safety Pin Detail

Waiting to assemble the piece until I see the Bronze Gourd Pins.

10 April They Arrived…

Gourd Pin

Gourd Pin

The extra space in the curve of the pin might work better with the thickness of the wool blocks.

The safety pins would be lovely for use in the i-cord bowl series I am planning to make. The title is Collected Memories. Got the idea when going through my parents’ collections found in random drawers.

A few years ago I dinked around with the idea of i-cord bowls. Wasn’t the time to develop the work. Maybe I was waiting for bronze safety pins.

Brown Bowl with Safety Pins

Cream Bowl with Safety Pins

According to the email I received from amazon, I may not receive the gourd safety pins until April 12th. So, I patiently wait for the order to arrive.


I-cord for New Project

I-cord

Loom Knit I-cord Front

I-cord

Loom Knit I-cord Back

Loom

Cast on Double Knot on Two Pegs with a Single Strand of Wool Yarn

Wrap for Purl

Wrap Peg, Two Wraps on Peg

Wrap for Purl

Place Third Loop/Wrap Below Previous Wraps

Purl

Pull Lower Loop Through Top Loops
Pull Lot Off of Peg and Replace Loop on Peg

Flat Knit

Flat Knit from Right to Left
Place Yarn Above Existing Loop
Lift Bottom Loop Over Top Leaving One Loop on Peg


Bitterest Tears Work in Progress

Decided to change the orientation of the blocks from horizontal to vertical.
Moved the brown border with the code (Loss and Regret) to the left side and the 2 columns of star stitched brown blocks to the right side.

Bitterest Tears

In the process of stitching 3 columns together to make a strip, which will result in 7 strips. When the task is completed, I will stitch the 7 strips together. Four strips done, 3 to complete.

Working with batches of 3 is easier and more manageable than stitching the entire piece together 1 column to the next.

Bitterest Tears Tan Yarn

It took approximately 18″ of beige yarn to stitch the blocks together. Or roughly 1″ of yarn for each square of each block.

Should be able to start stitching the strips together later this week.

Need to decide how best to attach tree wrap to back of the piece. Leaning toward using a tie technique similar to the one my grandmother used when she made quilts.

The piece will have three layers of material: the stitched roofing felt, hardware cloth, and tree wrap, so reference to quilting.

October 17 Progress
Completed stitching together 7 strips of 3 columns.

Bitterest Tears

October 23 Progress
Piece completely stitched together and wrapped the edge with tan yarn.

Bitterest Tears

October 24 Progress, the Border
Originally thought I would loom knit an i-cord for the border, but after several attempts I didn’t like the results. The two that follow are the best of the rejected results.

Border

Cream Border
R1 KKP, R2 KPP, R3 KKP, R4 K

Border

Tan Border
R1 E Wrap Knit, R2 Flat Knit

The loom knitted borders are too bulky and fussy. I suspect the solution will be to use a strand of wire and wrap it with tan yarn.

While I am thinking about the border, thought I would attempt using a sewing machine to stitch together strips of tree wrap. The tree wrap will be tied to the back of the piece, similar to how quilt layers are tied together. Rather than having the knot on the front of the piece, the knots will be on back, the tree wrap side. The result should be a simple and clean cross stitch at each block connection.

Wait, what did I just write? A knot at each block connection. How many knots will I tie? There will be 15 for each column, 20 for each row, or 300 for the body of the piece. There will also be 17 for each side and 20 for top, 20 for the bottom, or 74 to tie the border.

That is all before I get to the really fun part of apply a salt solution with the hope of adding crystals to the pieces.


Moth and Roadrunner Henderson, NV

Sphynx Moth

Sphynx Moth in Henderson, NV garden last night.

I was using the flashlight on my phone to locate the moth and then used the flash. The moth was bopping around from plant to plant. At one point it flew into my ankle.

Road Runner

Roadrunner above Henderson, NV garden this morning.

The roadrunner was rather far away and in the shade. I did a quick (HDR Scrape), not great edit in Snapseed. Need to dink around with the HDR Scrape to find best way to use it.

Roadrunner

There are two young Jack Rabbits in the garden that I have been unable to photograph. Too much fun to watch them, forget to take a photo.


Spring Planting and Folded Paper Pots for Seed Starting

I recently read through all of the seed planting recommendations for plants that I plan to add to my gardens.

Most of the seed will be planted in Plantel Plant Trays from Peaceful Valley Farm Supply.

Plantel Plant Trays

It is recommended that some of the seed be planted in biodegradable pots, to prevent disturbing the roots of the seedlings.

Rather than purchasing peat or coconut fiber pots, I decided to use the Yellow Pages that have been piling up in my studio. Does anyone actually use printed paper phone books?

I viewed several, how to fold paper pot tutorials. DIY: Newspaper Pots for Seed Starting/Cuttings on Youtube is the best tutorial I found. The instructions are clear and easy peasy. Before beginning to fold a sheet from the Yellow Pages, I removed a strip from the side to alter the proportions.

Tadpole

The pages were torn to 4.25″ x 8.5″

The strips will saved for use when working in clay.

Folded Paper Pot

The finished folded pot is 1″x1″x1″.

Whenever I learn a new skill or technique, I always think about how it can be used in the studio.

I have made loads of boxes in the past, but rarely a square. This is a square box, roughly 3.5″, that I never quite completed. It is tree wrap with some dried plant bits and twine.

Not Quite Completed

Paper Pots

49 Paper Pots Ready to Use