Sticks and Stones in Progress–Application of No Wax Floor Shield Test

Before I trim off the extra nettle and hemp I need to seal it to prevent the possibility of the knots coming undone. Not likely that could happen, but sometimes even when sticks should be dry they can still dry more. The drying can cause shrinkage and even if the knot is intact the binding might be too lose for the bundle. Using a sealant of sorts can help to keep things in place.

When I am using fiber without the addition of stones I often use liquid starch. I like that the starch does not seems to cause a problem if I add other materials–wax, stain, shellac…

I read about using the no wax floor shield several years back in Carol Huber Cypher’s book, Hand Felted Jewelry and Beads: 25 Artful Designs.

Sticks and Stones Detail

Detail of a portion of Sticks and Stones.

Application of No Wax Floor Shield

Sample piece with the application of no wax floor shield. It should not change the color of the nettle and hemp while adding a little shine to the sticks and stones. Now I wait.


Sticks and Stones In Progress Content

The work started with my continued interest in words and language.

Most kids are taught the Sticks and Stones nursery rhyme.

Sticks and stones may break my bones but words will never hurt me?

I added a question mark. Words are used every day to hurt people.

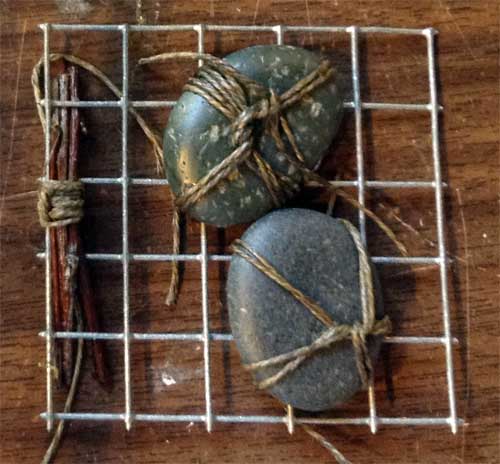
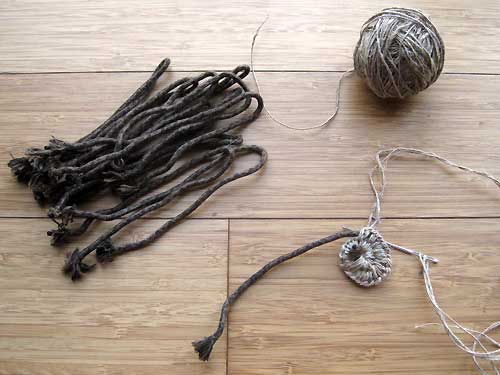
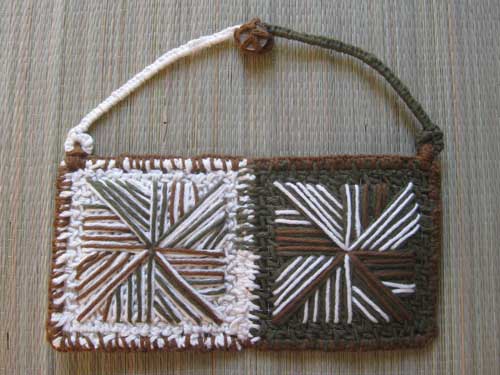
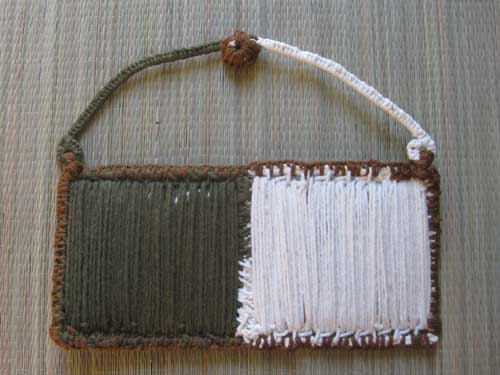
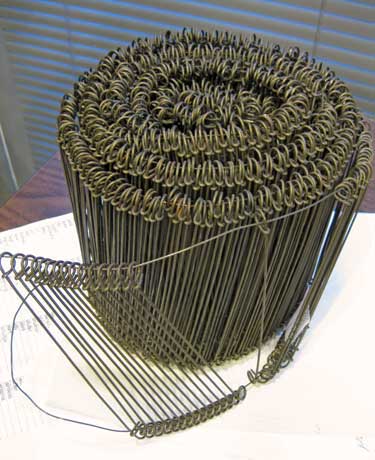
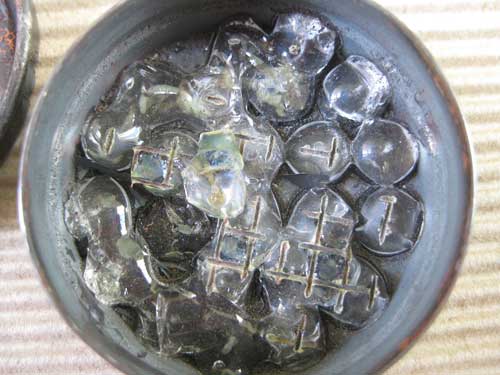
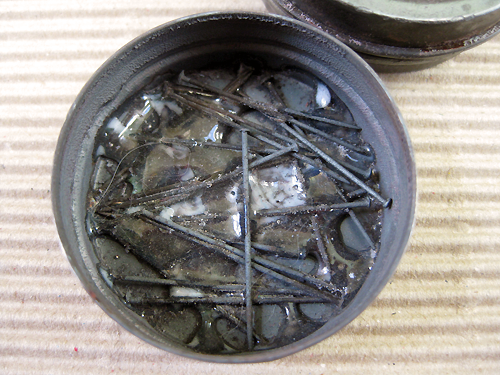
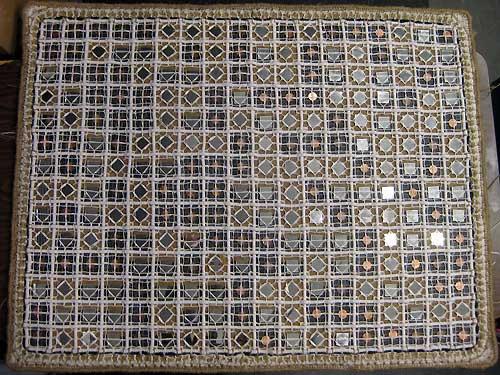
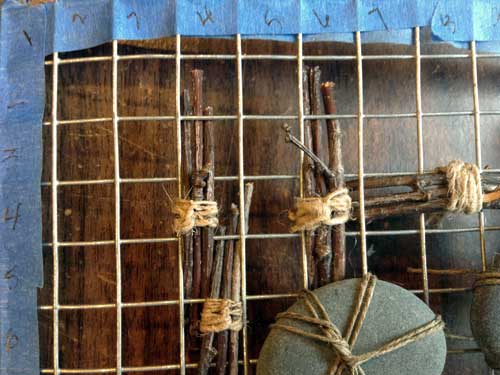
The nursery rhyme is in Morse Code with the substitution of a bundle of sticks for each dot and dash. Each bundle has three sticks and is bound with nettle. A vertical orientation is a dot, horizontal is a dash.

Code in Flash

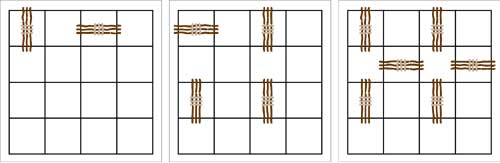
Code for A, B, and the Question Mark.
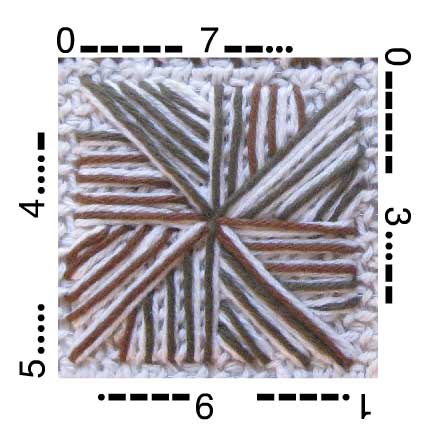
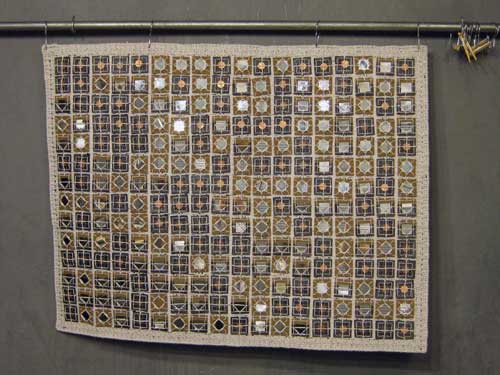
Each letter spans 4 squares by 4 squares. I often use Flash for layout. Make a symbol for each code component, with easy peasy replace. It is a quick way to see potential problems before making a paper and pencil sketch.


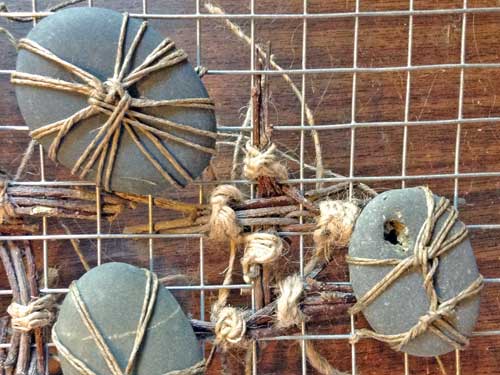
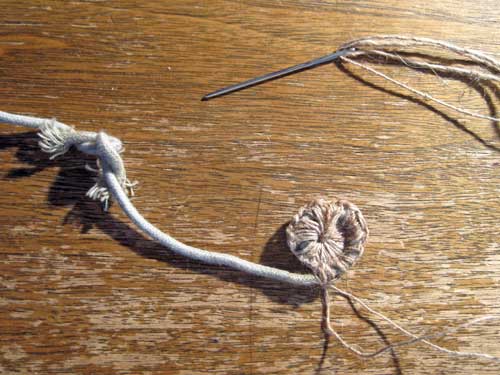
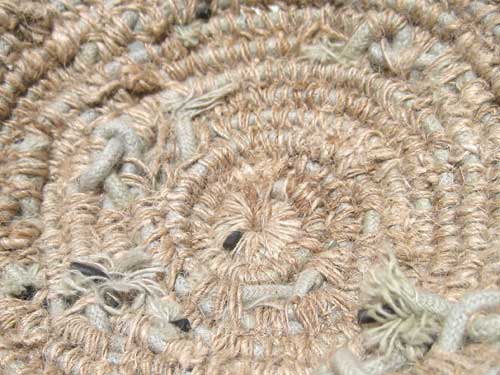
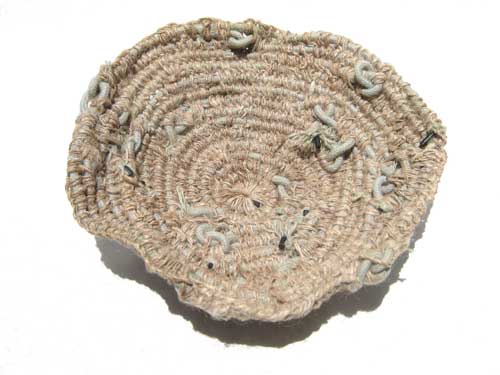
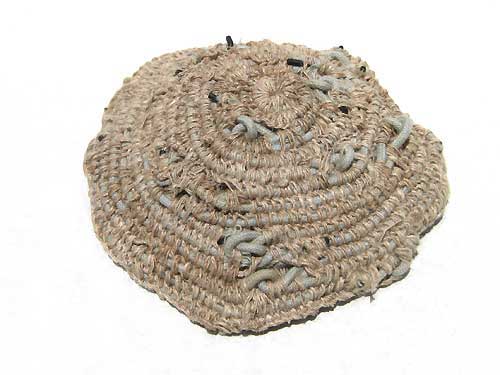
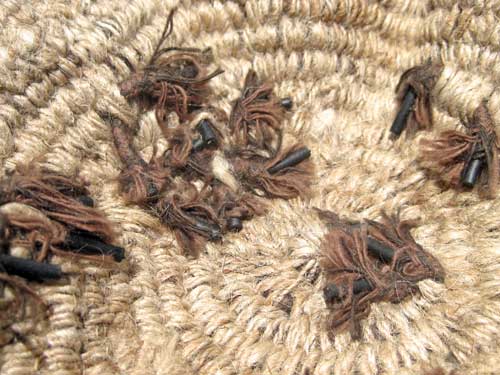
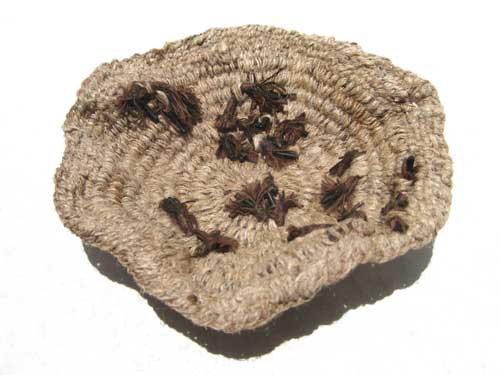
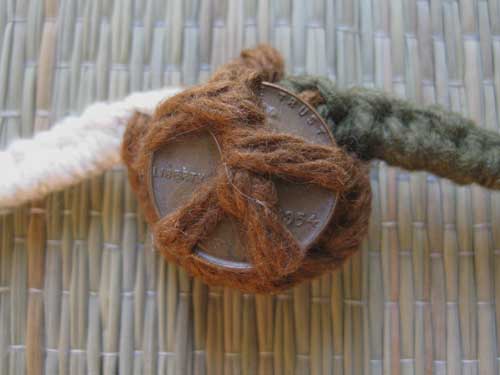
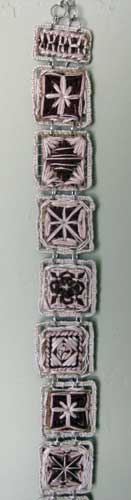
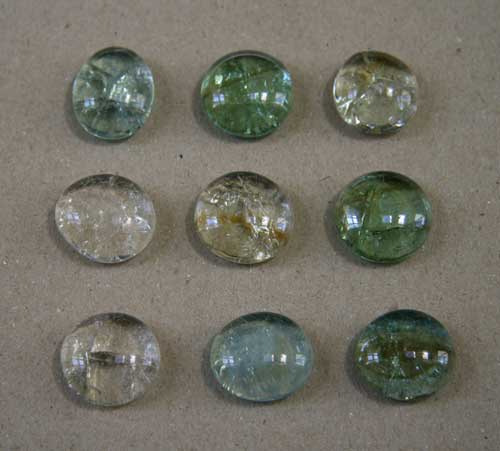
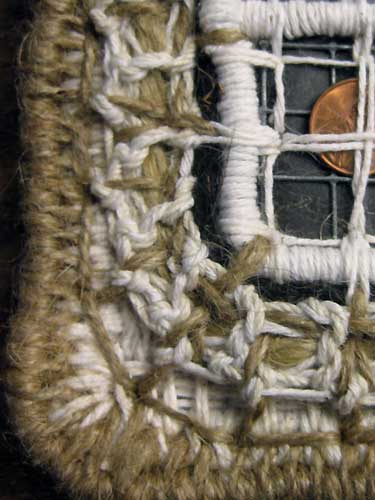
In addition to the bundles for the code in each 4×4 section, there will also be a stone bound with hemp. This is a detail of some of the completed work. I wait until I am finished with all of the binding before addressing any long strings on the back.

Stones Detail

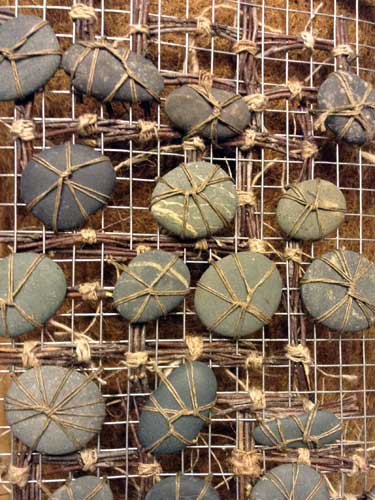
The size of the stone will be dictated by the code. Letters can have 1, 2, 3, or 4 dots/dashes. Fewer code bundles allow for larger stones. The question mark has 6 bundles for the code.


Sketch in Use

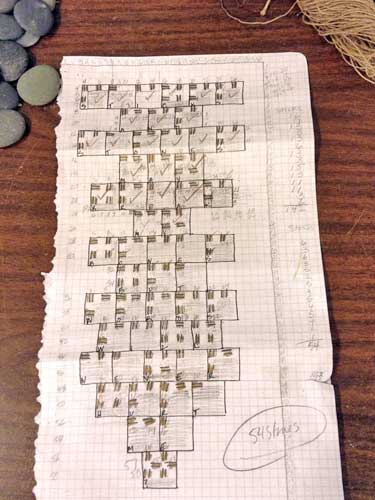
Sketch in Use. I always use paper and pencil for my working sketch. I can write on it. Mark off bits when completed.


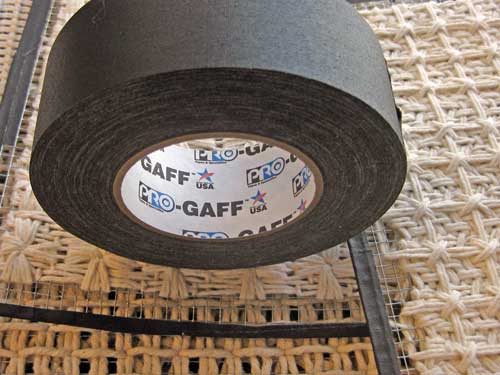
The sketch has each square numbered. I taped and numbered the edge of the metal mesh. It makes work easier with fewer mistakes. Depending on the binding, tearing out a mistake can take longer than the actual binding time. The tape is also good for preventing possible cuts. The metal mesh can be quite sharp.


Numbered Tape


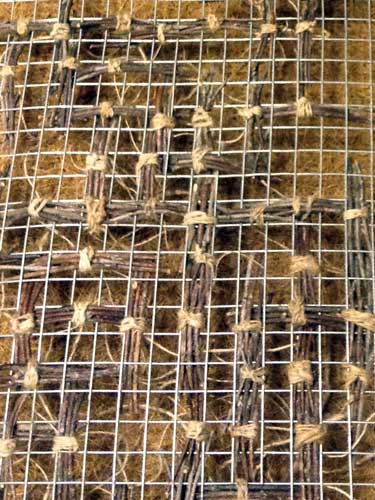
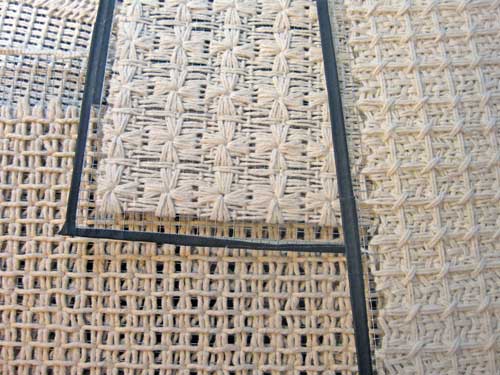
The piece will be fairly heavy. The plan is to sandwich a piece of coco fiber blanket between the code piece and an additional piece of metal mesh. Rather like the three layers of a typical quilt. If I stitched through all three layers or hand tied them together, it would be even closer to quilt making. I always wanted to make a quilt, but not keen on cutting little bits of flat fabric and then stitching them together.

Piece on Coco Fiber


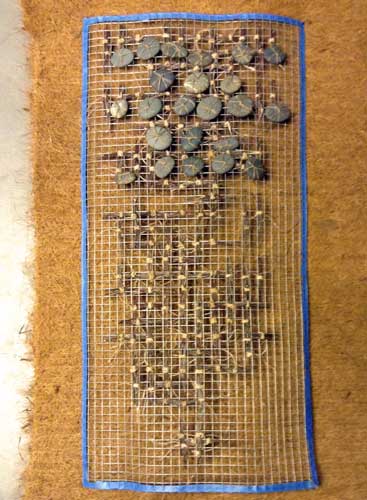
Things to do–Thinking about filling some of the open space of the mesh, weaving in nettle or hemp. It probably would feel more like a piece of fabric. Still want to see the coco fiber, especially the raw edges.

There are 3 squares allotted for the border. Haven’t planned what type of binding or embroidery to use. Need to see the sticks and stones bound in before making that decision.


Sticks and Stones Work in Progress

Sketch

Layout for Sticks and Stones.

Sticks and Stones Detail 2

Before addition of stones.

Sticks and Stones Detail 1

Sticks bound with nettle, stones bound with hemp.
Placed on layer of coco fiber.
An additional layer of metal mesh will be attached to the back to support the weight of the stones.

Elliot selecting stones.

Elliot, my studio assistant selecting stones.

Coco fiber roll purchased from the Kinsman Company.


Trolley Needle

I was researching embroidery techniques and ran across reference to a Trolley Needle. Appeared quite useful, so I ordered one.

Trolley Needle

The tool is used for keeping thread flat and in order when doing needlework. I will not be able to use it for a few weeks because I sustained a repetitive stress injury of my hand and wrist.

Another item that I keep in my tool chest is gaffer tape. I wrap it around the edge of hardware cloth to prevent snags and frays of fiber and my hands. I like that it sticks nicely but does not leave a sticky residue.

Gaffer Tape

These are a few panels in progress that may be part of a triptych.

Needlework In Progress


Trolley Needle

Gaffer Tape

Mayo Clinic Repetitive Stress Injury

Baylor Health Repetitive Stress Injury


Vintage Wavers As Potential Art Material

While cleaning and clearing out stuff in my studio I ran across a small bag of vintage wavers. They were a gift from my grandmother in the late 70s. I had always thought that she had naturally wavey hair.

I can’t remember the number of times that I packed and unpacked that little bag of wavers. Always saving them because they were a gift. Rather than taking a photo and discarding them, I decided to use them in my work.

Here’s what happened—had just read a blog post about making rope vessels on The Red Thread. Then I was looking through my stash of fiber and there was some beautiful nettle.

Wavers, Rope Vessels, Nettle.

Made loops on either end of the first batch of wavers and attached them loop into loop and a twist. Started binding and stitching the wavers together leaving the frayed ends exposed.

Process

Gray Detail

 Gray Inside

Gray Outside

There were enough wavers to make three small pieces, one with gray wavers and two with brown.

The wavers were wrapped and bound with nettle fiber, while leaving the ends for interest. The technique is similar to looping.

Brown 1 Process

Brown 1 Detail

Brown 1 Interior

Brown 1 Exterior

A box will be built for the two similar pieces and the third which is more cup-like will most likely be attached to a base to become a goblet.

Brown 2 Outside

Brown 2 Inside

Hemp was substituted for nettle in the cup piece. The hemp has been unused in my stash for several years because it always seemed too stiff to use in previous pieces. It was softened a bit by running a length a couple of times over the edge of my work table.


0703 Piece in Progress

This is a birthday celebration piece. The cream side contains the originally date of birth. The green side is the day with the current year. Morse Code is used with green cord substituted for dashes and rust cord for dots.

20130703 Birthday Front

The date begins in the upper left and works around clockwise.

Morse Code Layout

Pre-Wax
Planning to wax the entire piece to add some age and to keep everything in its proper place.

I have been dinking around with various ways to finish off the backs of pieces. The back is needed to complete the piece. Even if you cannot see the back it does exist. And I don’t want the wall showing through if there is open stitch work.

Recently I have been using starched burlap because I can stitch in title, date of piece, and my name in code.

20130703 Birthday Back

This is the first time adding strands of cord to the back with the intent of using the piece rather like a loom. Still deciding if I want to give that a try.

Since the waxing should only take a couple of hours I have plenty of time before my July 3rd deadline to make the decision.

20130703 Birthday Detail

Materials
Hardware Cloth, Cotton Fiber, Metal, 1954 Penny, Rebar Ties

Scale
9.5″ x 8.5″ x .75″
Depth may change if I decide to build a frame/box as part of the piece.

Rebar ties make for a nice hanger. I bought the bundle years ago thinking they would be a great art material. Tried using them several ways, but they haven’t revealed themselves to me as of yet. So, I have been using them for hangers for some small pieces.

Rebar Ties


Celebration–A Mixed Media Piece

I am in the process of completing a personal project to celebrate the 40th birthday of a family member. I saw an image of nautical flags used for code and liked the idea of each flag representing a letter of the alphabet. I decided to make my own alphabet of stitched pieces for each letter of the alphabet, numbers from 0 to 9, and two types of spacers. I have included images of the actual stitched blocks that I used for this project. The blocks are composed of a piece of 1/4″ hardware cloth, a piece of starched burlap, and cotton embroidery floss.

I attached the blocks vertically together with jump rings just to get a notion of how they would look. Each block is approximately 1.5″ x 1.75″ and the spacers are .75″ and .5″ in height which makes the pieces if stitched together approximately 1.5″ wide and 63″ in height.

Detail

While the jump rings are a visual distraction, I do like the the vertical arrangement. When I decide for sure, I will build a narrow cedar box/frame to house the blocks. Currently the plan is to wax the blocks and attach them to the inside of the box with brads.

Block 0

Block Number 0

Block 1

Block Number 1

Block 2

Block Number 2

Block 3

Block Number 3

Block 4

Block Number 4

Block 7

Block Number 7

Block 9

Block Number 9

Block A

Block Letter A

Block B

Block Letter B

Block C

Block Letter C

Block D

Block Letter D

Block E

Block Letter E

Block H

Block Letter H

Block I

Block Letter I

Block L

Block Letter L

Block O

Block Letter O

Block R

Block Letter R

Block S

Block Letter S

Block T

Block Letter T

Spacer 1

Spacer 1

Spacer 2

Spacer 2


Unexpected Connections To The Past

Tim and I went to grad school at WSU in Pullman. Friday He rang me to say he was on his way to Pullman. One of his former students was having their thesis show. We caught up and reminisced. I can’t believe that it has been 20 years since I had my thesis show.

On Saturday I received a letter and the following newspaper clipping from Mark, my friend from my days at Ohio State. He saw the article and remembered how excited I would get whenever I opened a kiln to see what the kiln gods gave me.

Soda-Fired Article

Hearing from Tim, reading Mark’s letter, and seeing Dustin Harris’ soda-fired piece brought back memories of my own past firing experiences and my year as a research assistant working for Ann Christenson on her vapor glazing project.

Phone call and letter, coincidence and connections. I am fortunate to have such thoughtful friends.


Ann’s Work

More of Ann’s work can be viewed on her website.


Tim’s Work

An image from Tim’s Figures in Landscape series. You can see more on his website.


Dustin Harris Piece

More of Dustin Harris’ work can be seen here.


Cracked and Melted Glass

I subscribe to several craft blogs so that I am never short of ideas for craft projects while visiting my niece and nephew. Occasionally, I will read about a technique or material that might be reworked for a project that I might want to make. A few days ago I read a post about cracked glass stones on the Dollar Store Crafts blog. The instructions were simple–oven temperature 425º for 20 minutes and then an ice bath.

I liked the idea of it, heating glass stones and then immersing them in ice water for a rapid cooling. This is not all that different from raku firing, remove work from a hot kiln, then cooling it quickly in a bucket of water. Quenching after raku firing is more dramatic, but a similar notion.

I thought that I would give it a try. Picked up a bag of glass stones at the local Dollar Tree. Surprised to find 100 stones in the bag.

Glass Stones Before

I lined the baking sheet with paper and spaced the stones a finger width apart.

Glass Stones After

The paper liner came in handy to lift and pour the hot stones into the ice bath.

Glass Stones in Ice Bath

Stones in the ice bath.

Glass Stones Cracked

The result is some nice and at times subtle fractures.

What are my plans? I was thinking about the possibility of using fractured glass bits as part of code in some of my work. I could use the color of the stones or the method for binding them to act as an aesthetic element which is also code.

I got to thinking about some tests that I did in a kiln firing with metal tins and glass beads. I had a bunch of beads left from some craft projects and thought might be able to somehow use them.

Glass Beads Fired in Kiln

Glass beads with a bit of metal mesh in tin fired to approximately cone 015.

Glass Beads and Pins Fired in Kiln

Glass beads and straight pins in tin fired to approximately cone 015.

I was hoping for some slumping of the glass over the metal bits. That didn’t happen, but there is always something positive with every test. Something to use in a different way or to build on. Sometimes I may not integrate the results into a project for several years. It is important to keep records. It saves a lot of time and testing in the future.