BWHeader

Grass Piece

Cut Grass

Cut Grass

Cut Grass Prepared for Piece

Prepared Grass for Piece

The grass is similar to velcro. It sticks to itself, to fingers, to clothing, and to the bamboo crochet thread that I am using.

Grass Piece in Progress

The first grass was bound to the bottom of the hardware cloth covering 5 rows.

Grass Piece in Progress

Next, five rows of grass were bound horizontally from right to left.

Grass Piece in Progress

The piece in progress.

Grass Piece in Progress

The cut grass project has 150 bound pieces:
75 (5 bound pieces over 15 columns) and 75 (3 bound pieces over 25 rows).

Grass Piece in Progress

Cut Grass Piece Detail

This is what the grass looks like in the garden today. Unfortunately, the grass that I used does not seem to be changing to the gorgeous colors like the grass left to dry naturally in the garden.
Grass in Garden


Work in Progress–Accustomed to Being Invisible

Have you ever been standing in a shop looking at what is on the shelf a few feet away, suddenly someone walks in front of you, and in between you and the shelf? You step back, out of their way, because you were not seen. Have you ever walked up to an automatic door and found yourself standing there waiting for the door to open? Your presence was not recognized by a sensor. How many times have you touched your iPad screen to open an app and nothing happened? Could you be invisible?

Got to thinking about, well being invisible. And since most of the time I don’t really care if I am noticed, I started thinking about things of substance in nature that are hidden or invisible. Things that have an important function, but remain hidden to the casual viewer.

I am in the process of using plant parts that are typically hidden in my invisible series. The parts are beautiful, often with patterns imprinted on them as the result of their function in the life-cycle of the plants.

Interior Bits

These are the interior bits of Pandorea jasminoides. I collected some pods that I thought would be fun to use. When I opened the pods and removed the seeds, I found these beautiful shields.

I recently purchased a Pandorea jasminoides, specifically to harvest the pods, seeds, and other interior bits. This is the first harvested pod.

Pandorea jasminoides pod

Glycerin Mixture

The Pandorea jasminoides bits were soaked in a glycerin solution to make them more pliable and easier to stitch.

Invisible Code

Code to be used on Pandorea jasminoides bits.

Invisible Stitched

The Pandorea jasminoides bits were stitched with Alpaca Lace yarn. Each piece was stitched with a letter of the quote–accustomed to being invisible.

The current plan is to make a page with the coded pieces on one side and a bound small round mirror of the other side. I seriously thought about making knitted and fulled pages, but I am not pleased with the results, yet.

Decided to try using some embroidered pieces for the pages.

Front Page

The right side has–take notice in code. Not sure that I like it.

Back Page

Each embroidered piece is 45 squares (11.25″) wide and 58 squares (14.5″) high. The openness of the stitches is one of the reasons for using the roofing felt in between. I love roofing felt–the way it feels, smells, and looks. I started using roofing felt when I was investment casting. Some of the roofing felt that had been used in the casting process had lovely plaster stains. I liked the used roofing felt so much I used it in my Headbox series.


Books and the Book Series

Books have always been a part of my life. When we were children, my mother would take us to the library. When I was in college I would spend part of a day each week wandering through the stacks. After grad school, I started my library. I have nearly 1,500 books. There are books on art, artists, film, graphic design, gardening, horticulture, novels, children’s books, textbooks, and miscellaneous books on random topics.

I love reading, the way books feel in my hands, turning the pages, the fragrance of paper and ink. I was taught to respect books, but then something happened. I found that I really liked underlining. That grew to writing in the margins and using any white space to record ideas for possible work. Then I started folding corners and pages.

Books

When I open one of my books to locate a quote or some notes that I have made, it is quite enjoyable to revisit the story, to read a few pages or several chapters. To remember the first time that I read the book.


I resisted reading e-books. My iPad is thin, slippery, and has a bit of glare. How would I dog-ear pages, write in the margins, underline…

I tried reading a few books on my iPad and in doing so found that I could customize the text. I could make the text large enough that I no longer needed to wear glasses. I also found that I quite like reading light text on a black background. And I could read in the dark.

Then I found how easy it was to highlight, bookmark, and make notes. I could download the lot from amazon. A few adjustments to the downloaded file and I could import the text into my database of quotes and phrases. Yep, I have a database of words, phrases, quotes.


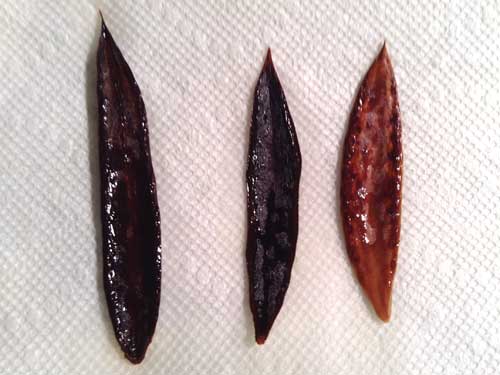
I have thought about making books, but one thing always stopped me. What will be on the pages? The thought of an empty book, seemed incomplete. I actually attempted constructing a few books over the years.

Twig Books

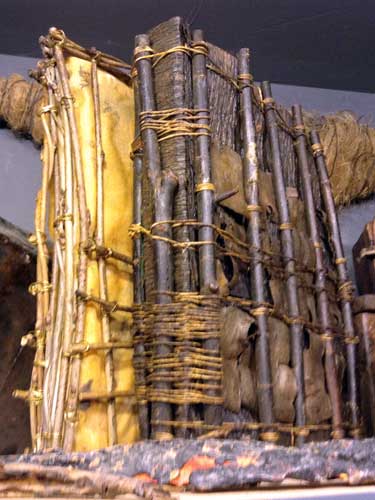
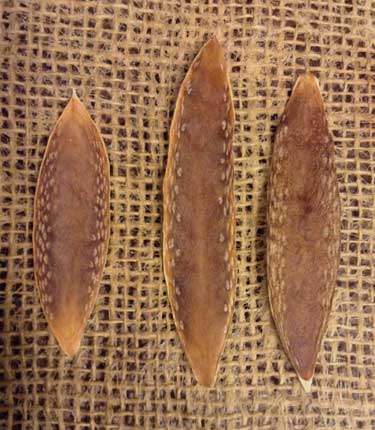
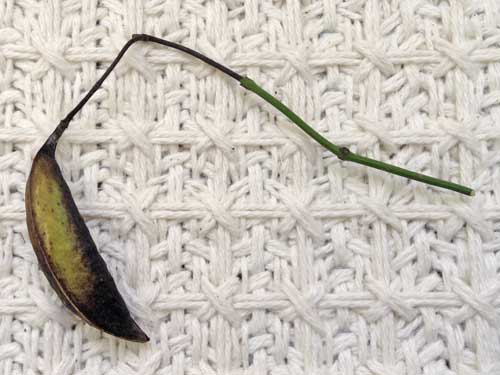
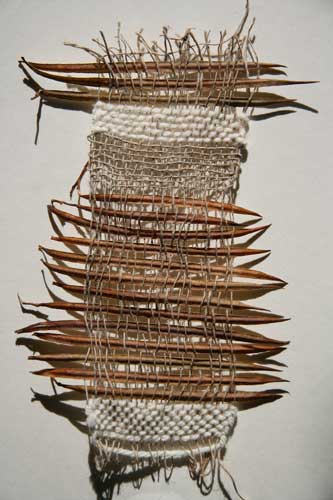
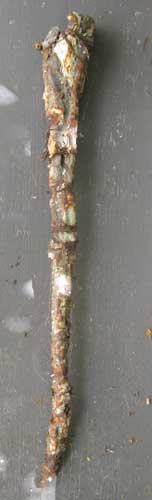
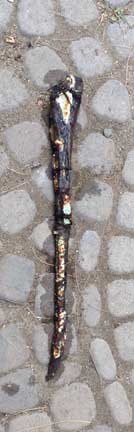
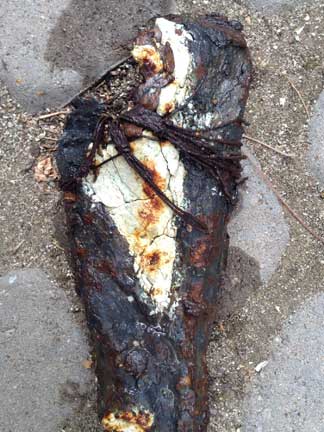
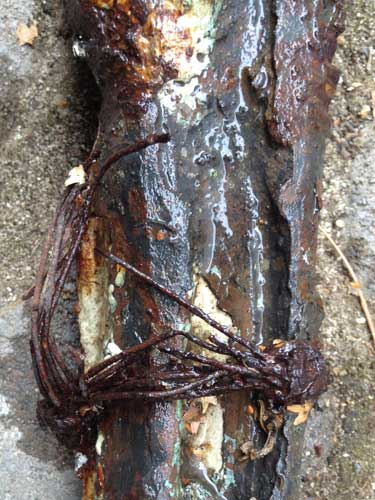
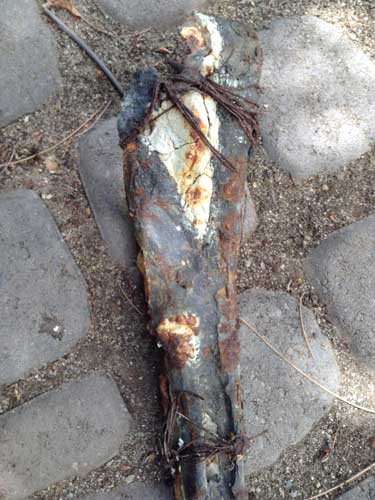
A couple of books constructed of materials collected from nature, fabric, paper, copper wire, and waxed linen cord. I saved a couple to remind myself why they did not work.

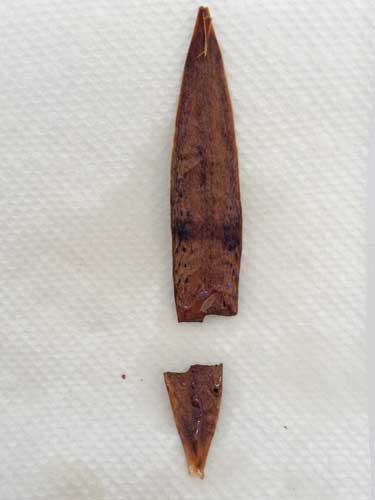
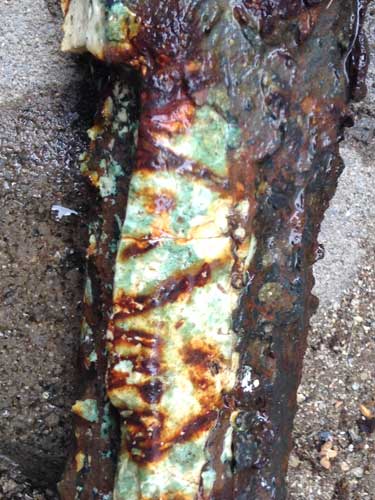
I also made a series of small books constructed of hardware cloth covers coated with Egyptian Paste. The covers were fired to cone 016. Hot enough for the clay to mature, but not hot enough to melt the hardware cloth. I cut copper and aluminum flashing for the pages. I bound the pages and covers together and fired the lot.

Egyptian Paste Book

Egyptian Paste Book Open

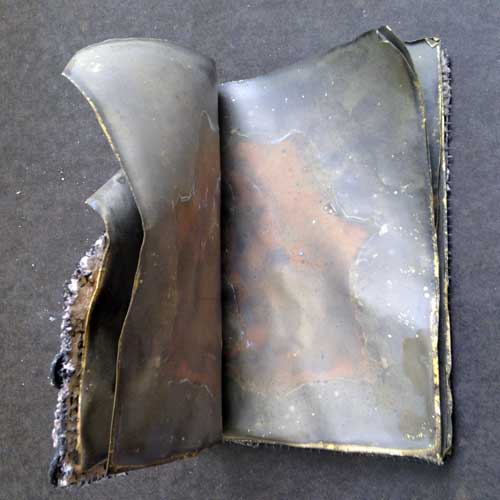
The pages have a lovely surface, but they are still empty.


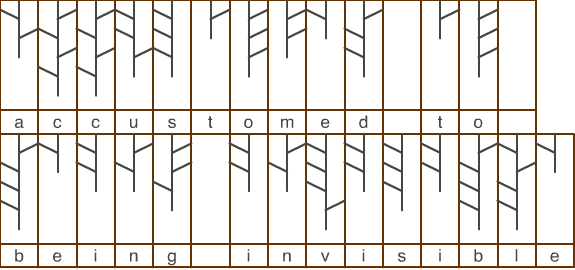
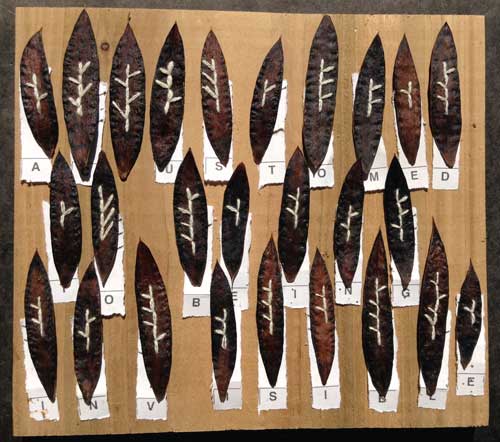
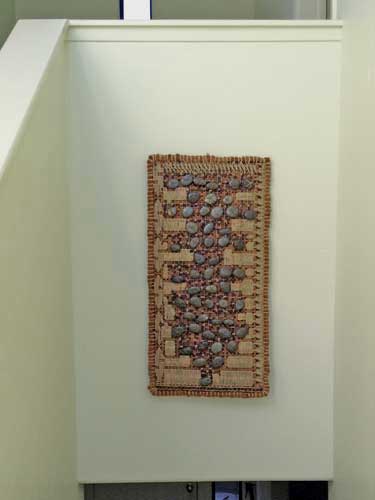
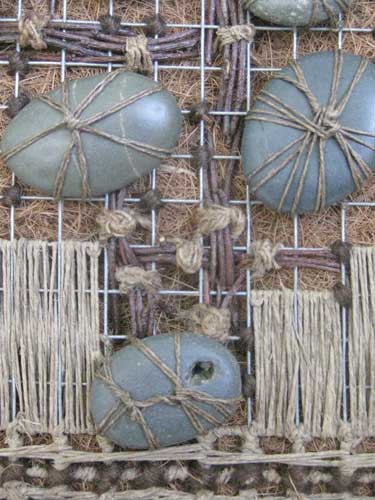
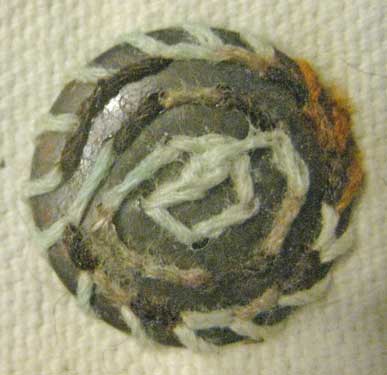
The past several years I have used coded messages in my work. It is quite enjoyable to figure out ways to put text in my work that cannot actually be read as text but is seen as pattern. Well, the text could be read if the code is deciphered. And since I am not a cryptographer, it isn’t too difficult to figure out.

Dont Detail

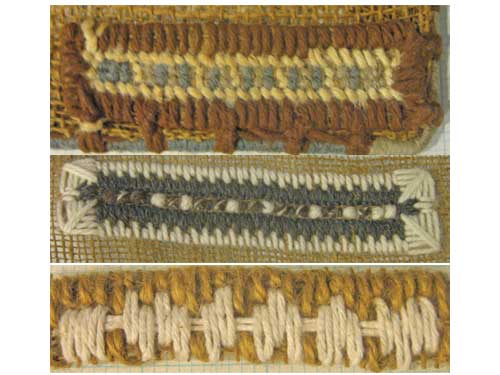
This is a detail of code in a work that I have since completed. I used Morse code with rust yarn for the dots, gray yarn for the dashes, and cream yarn for the spacers. The bottom left corner has gray, rust, gray which is dash-dot-dash or a k.


I have decided to revisit books again with the idea of including coded text. Each book will have a theme: connection, grief/loss, invisible/visible, kindness, memory, nature, perception/seeing, power, reflection, self, truth…

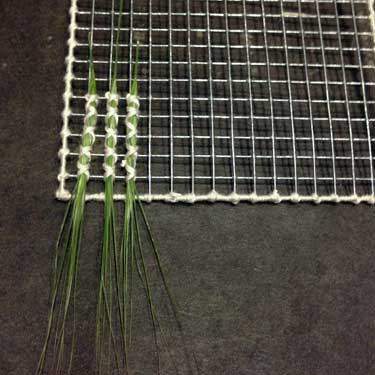
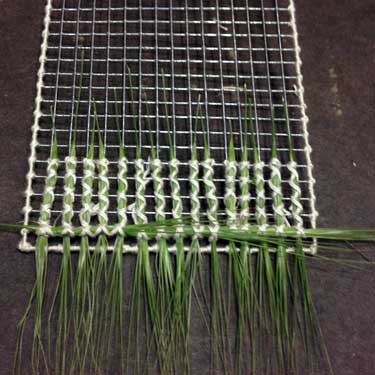
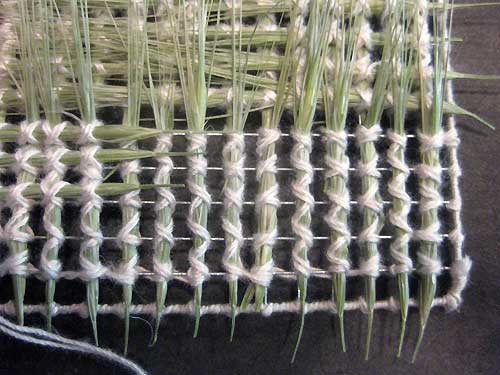
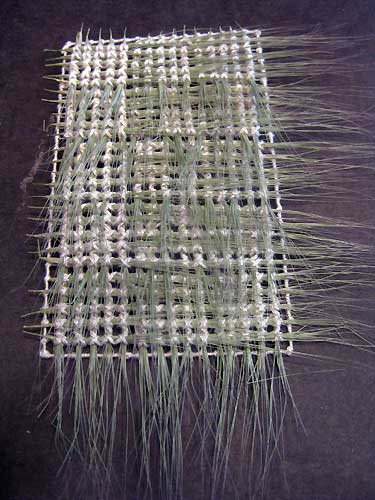
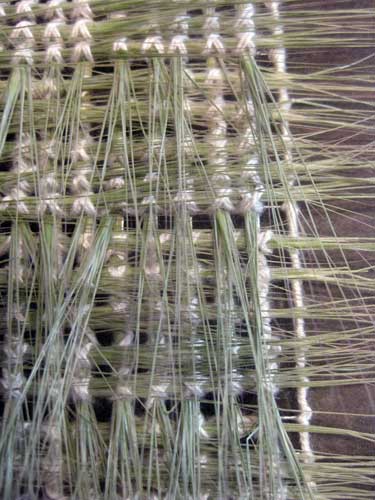
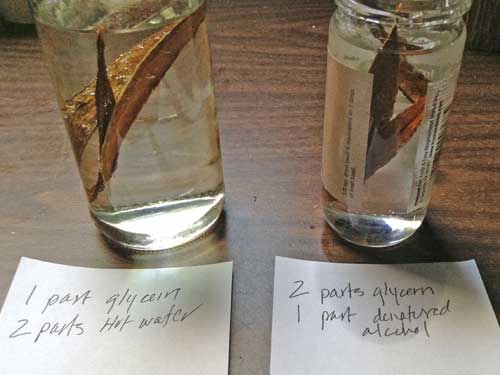
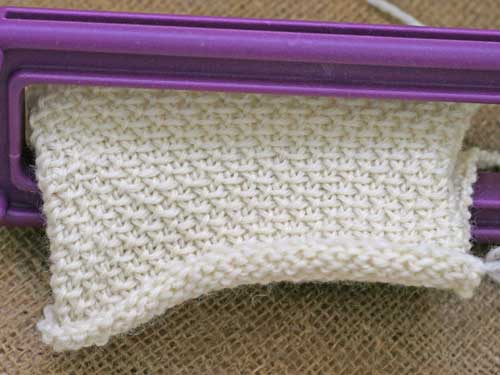
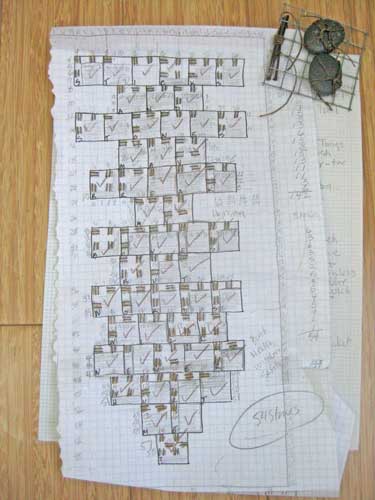
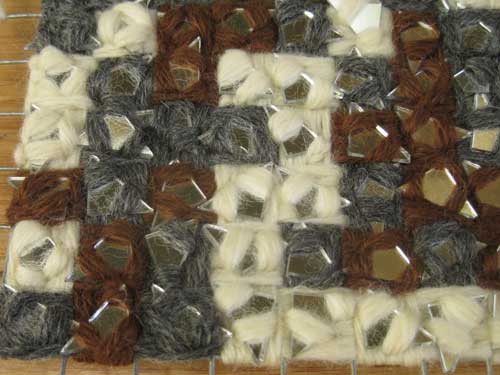
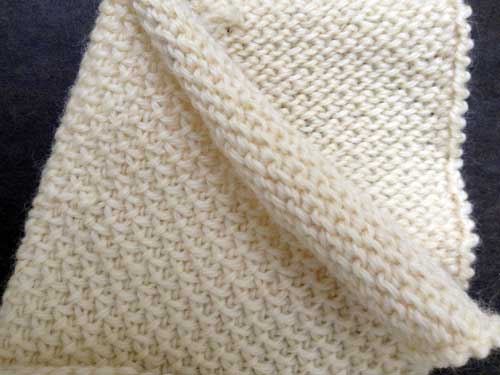
My plan was to make wool knitted and fulled pages, with stitched coded messages, and dried and stitched plant bits. I knitted all sorts of stitch patterns to see which stitches would work best.

Then something unexpected happened. I had a dream, an epiphany. In the dream rather than making books I was making pages and framing them as artifact. Framed fragments of pages would be more compatible with my body of work. Was my creative self giving me a message or was the dream a mash up of a bunch of things that I had been thinking about throughout the day? No matter, I like the idea.

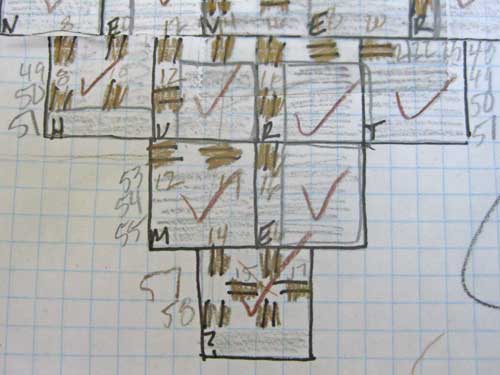
I began to approach knitting differently. Rather than knitting rectangles for book pages, I wanted the pieces to be odd shaped.

E wrap Purl Cable

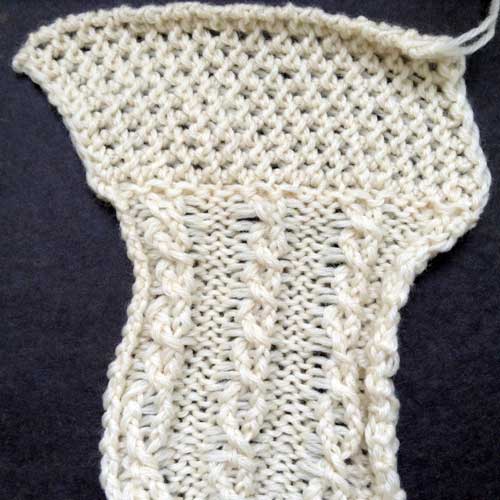
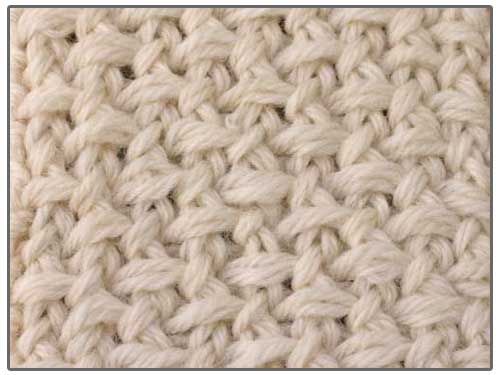
The top portion was knitted. The piece was removed from the loom, rotated 45º, returned to the loom, and then the cable pattern was knitted.

Top Portion
Row 1 E-wrap (each peg twice)
Row 2 Purl (wrap)

Bottom Portion (Cable)
Row 1 Knit
Row 2 Purl
Row 3 Knit
Row 4 P,P, Twist Knit, P,P, Twist Knit…

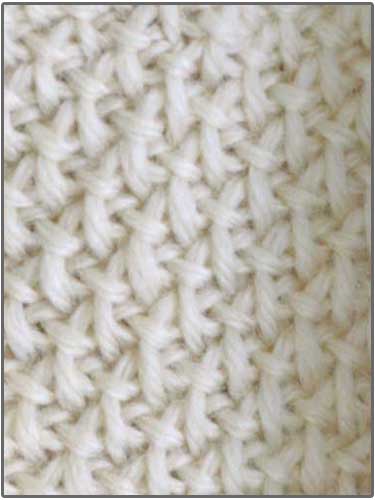
This is the back of the above piece. It is important that the back is interesting because both sides of a page can be visible.

E wrap Purl Cable


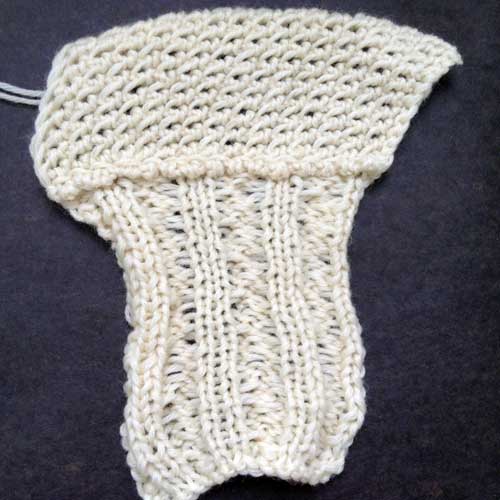
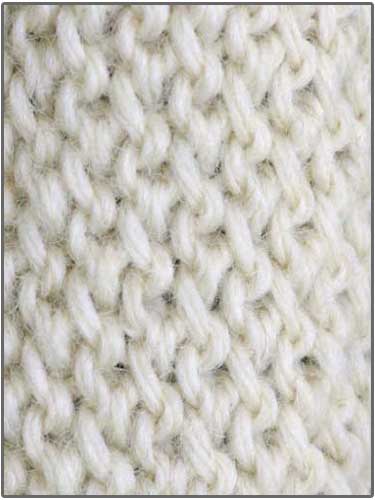
This combination of stitches is quite nice. There does seem to be some consistency in my choices. It appears that I like knot-like stitches.

Figure 8 with E-wrap

Row 1 Figure 8
Row 2 E-wrap

If after fulling, the fabric still has holes, I plan to either weave in yarn or an i-cord.


Linen Stitch

The idea was to knit a long piece, full it, and fold it in half to create a signature. Then bind several signatures together.
Row 1 K all
Row 2 K, S… K
Row 3 K all
Row 4 S, K… S

It will be fun to see how the series evolves.


Loom Knitting Pages for a Book

I am attempting to knit pages for a book on a sock loom. The yarn is Lion Brand Fishermen’s Wool. The color is natural.

Knitting on Sock Loom

Row 1 U wrap knit
Row 2 U wrap knit, Slip;… U wrap knit
Row 3 U wrap knit
Row 4 2 U wrap knit, Slip; end with Slip, and 2 U wrap knit stitches

Slip Stitch–start a purl stitch and slip the new loop over the peg, rather than pulling the existing loop off of the peg and replacing with the new loop.

Sock Loom Knit Front

Sock Loom Knit Front

Sock Loom Knit Back

Sock Loom Knit Back

A similar stitch pattern on a larger loom with two strands of LB Fishermen’s wool. I didn’t want to felt the piece because I wanted a bit of the stitch to show.

Chinese Waves Stitch

Row 1 Knit
Row 2 K, Slip…, K
Row 3 K
Row 4 K, K, Slip… S, K, K

U wrap Knit
Slip–remove loop from loom, lay working yarn on peg (to the inside of the loom), replace loop.

When fulled, the piece was too thick.

Chinese Waves Stitch Fulled


Loom Knitting Help

Knitting on the Net

Great Tuteate YouTube Loom Knitting Videos

Slat Book and the Bead Loom

Last night I was looking through some work in progress and saw a bead loom. It was a gift that I never used, but thought it might come in handy for something, some day.

Bead Loom

A bead loom is basically springs attached to a wood frame. In my limited use of springs, it makes sense that a larger spring would work when weaving thicker fiber.

Something that did occur to me when removing the piece from the loom, it would be a good idea to place a rod next to the spring and wrap the fiber around the rod before placing in the spring.

Bead Loom With Rod

After quickly trying my idea, I found that there was a need for clamps to the hold the rod in place.

Back to the weaving experiment: I strung the bead loom with some nettle and started weaving. I used cream wool, nettle, and Tecoma pods.

Bead Loom Result

The result is exciting because it might be the solution to my slat book problem. I plan to use Pandorea jasminoides parts, stitched with a letter in code.

Plant Bits

Slat books typically use regular shaped pieces for each of the slats. The Pandorea jasminoides parts are a variety of widths and lengths. I really like them because they bring to mind shields.

If I were to use a similar weaving process, I think it just might work. I plan to try using three strand of nettle on each side leaving the central section of the Pandorea jasminoides parts open for easy reading of the code. Well, maybe not actually easy reading. It will be code.

Slat Book with information about the plant materials and code posted on September 17th, 2015

Slat Book with information about glycerin and code posted on October 11th, 2015


Serendipitous events can result in great ideas.
Or, discovery makes making art so much fun.


Glycerin Test Results

I removed the plant parts from the water and glycerin solution after 4 hours.

Test Water Glycerin

The next morning after they dried, I noticed they were definitely more pliable.

Test Water Glycerin Bend

Not easy taking a photo with an iPad of your own hand while holding something.

I removed a test from the denatured alcohol and glycerin solution after 16 hours. It was inflexible and snapped.

Test Alcohol Glycerin

I suspect the alcohol solution would be better for preserving the plant parts, rather than for my purposes. The jar does not take up much space so I will check them daily for improvement.


Sticks and Stones

Yesterday I hung Sticks and Stones, but immediately realized two things: the piece is far too small for the space, and the lower right corner tends to bow out a bit.

Sticks and Stones

It is nice having something in that space. Need to start planning a larger piece.

How to fix the bow?

The piece is constructed of two pieces of hardware cloth bound together.

Sticks and Stones Back

Sticks and Stones Front

Bending should be an easy fix for the bowed out corner, but when I gave it a go, it did not change how it hung.

It really should be bent a bit toward the center, but I do not want to risk breaking the sticks that make up the code.

Sticks and Stones Code Detail

The plan is to let it hang until I figure out the bow problem.


A Nice Surprise–Bird of Paradise Seeds

I have two studio spaces: one in the house for fairly clean work, and one in the garage for messy work. I keep most of my plant cuttings in the garage.

Recently, I took some cuttings from a giant bird of paradise. I thought it would be fun to remove all of the interior bits and do some stitch work on the remaining vessel.

Bird of Paradise Cuttings

They have been drying for nearly a month. Today I found the seed pods dried, open, and gorgeous seeds were visible.

Bird of Paradise Seeds

Nature has many colorful surprises. The orange covering on the seeds feels a bit spongy.

I was curious if I could have success planting the seeds. I read several articles and it seems easy peasy. Pop the seeds in water for two to three days. Change water daily. Then drain, remove all of the orange fiber, dry, and scar the seeds. Pop them in some soil and keep moist. Maybe in a month of so there might be seedlings.

So, I removed all of the seeds and placed them in a jar.

Bird of Paradise Seeds

Empty Seed Pods

The empty seeds pods are lovely.

Seeds in Water

Seeds in water day one.


Eroded Contours

Some 20 plus years back I made a series titled, Eroded Contours. It was a process oriented series. The pieces were meant to be hung on the wall, but one of the pieces found a home in my garden.

Eroded Contours

The Process–

1. Made a plaster mold of a large philodendron leaf. Used it dry as a press mold for a mid-range stoneware body. Pulled several pieces. Fired them in a high bisque, cone 5. Broke them into pieces.

2. Used the same plaster mold wet to pull waxes.

3. Inserted some of the broken ceramic pieces into the waxes keeping in mind that the ceramic pieces could shift when the wax burns out.

4. Gated, then invested the lot.

5. Sent the investments through the burnout.

Potential problems–
1. Would there be a shift in the position of the ceramic pieces as the wax burned out?
2. What would happen to the ceramic pieces when hit with molten bronze?
3. What would happen when the bronze and ceramic pieces cool?
4. What would happen to the ceramic pieces embedded in bronze during the breakout?

Everything went quite well. Better than anticipated. Some of the fired ceramic pieces did fracture. A few bits were lost in the process.

When the fracture was more than I wanted, I mixed up a batch of Egyptian Paste to use as a filer. The plan was to glaze and fire the lot, so the addition of a cone 016 paste was compatible with the glaze temperature.

This is how the piece looked when removed from the garden. The pieces are long and quite narrow so a bit difficult to get a decent image.

Eroded Contours

The majority of the piece is bronze. The whitish areas stained with rust from the oxidized wire. I had forgotten that some of the pieces also had wire. The wire was bound on prior to the glaze fire. Firing the wire made it a bit fragile and after years in the garden, some of the wire was broken and missing.

I was curious if the rust stain was permanent, so I washed the piece with a solution of water and epsom salt.

Washed Piece

Washed Detail 1

Washed Detail 2

Some of the wire has vanished, but left its mark.

Washed Detail 3

This is how the piece looks after it dried overnight.

Dried

This is the detail of another piece in the series–

Blue Piece Detail


This bronze vessel has been moved around in my garden several times. Can’t quite figure out where to put it. It was constructed of palm cuttings and jute twine. Waxed the twine, then gated and invested the piece.

Bronze Vessel

There is always the possibility when doing a direct burn-out that some of the material will not burn-out completely or some ash will remain and prevent a good pour.

After the pour and break-out, a low-fire glaze was applied. Then the piece was fired to cone 015.


These are a few of the photos that I took the day of the Eroded Contours pour and break-out. A chain was used to pull the investments from the pit. And a fork lift was used to remove them from the foundry.

The length of the largest piece was 4.5′.

Investments

Investments

Break-out

Break-out

Break-out

Break-out


Sticks and Stones Finally Done

I spent several months deciding how to complete this piece. Attempted several borders, finally decided to make a coco fiber border. Coco fiber is pretty, but it is sharp and prickly.

Text

The piece has bundles of bound twigs used in place of Morse Code. The dots are bound to the hardware cloth vertically, and the dashes are bound horizontally. Each 4×4 square block represents one letter. And each block has a stone.

The message in the piece is: Sticks and stones may break my bones but words will never hurt me?

Yep, it does have a question mark in the code.

Sketch

The piece has two layers of hardware cloth and a layer of coco fiber between.

I have included an image of the back of the piece. Even though the back can’t be seen, it still exists. Also the back piece of hardware cloth has ready made hangers.

Text

Detail of sketch showing the code and a detail of the front of the piece.

Sketch Detail

Front Detail

The finished piece is 32.5″ x 16.75″ x 2″.
Materials List: hardware cloth, stones, coco fiber, cotton fabric, wool, hemp, stones, and starch.

I am seriously considering including the materials and code layout in a small cotton pouch attached to the back for easy access.

As for signing the piece, I will use some type of stitch work. Here are some examples of previous signatures.

Signature

I have also used stitched perforated discs. The code starts from the left and spirals in. The code is in brown and tan. The rest is spacers and fillers.

Signature

They are rather nice because they are about the size of a quarter. There are a few patterns that can be used. This attempt was to be a bit willy nilly.

Back to Sticks and Stones–I need to sign it and hang it.

Miscellaneous information–the twigs are from a birch tree. Some believe that birch represents health, wisdom, and safety.

I select materials for what they bring to the work visually, but also culturally. Sometimes a material is selected because it has a connection to my personal history.

Does anyone need to know that when viewing the work? Probably not. Will knowing all of my reasons for making a work and selecting materials change how a work is viewed? Maybe…