All of the bunches of sticks and stones are bound.
Next–Fill in some of the open spaces.
All of the bunches of sticks and stones are bound.
Next–Fill in some of the open spaces.
The work started with my continued interest in words and language.
Most kids are taught the Sticks and Stones nursery rhyme.
Sticks and stones may break my bones but words will never hurt me?
I added a question mark. Words are used every day to hurt people.
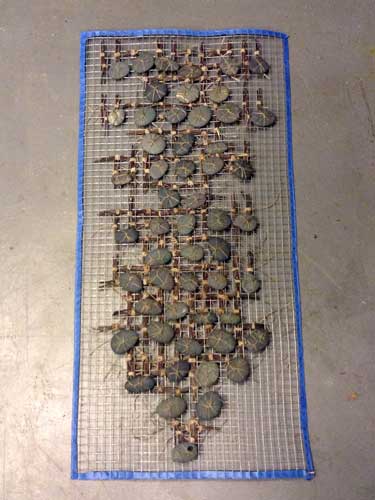
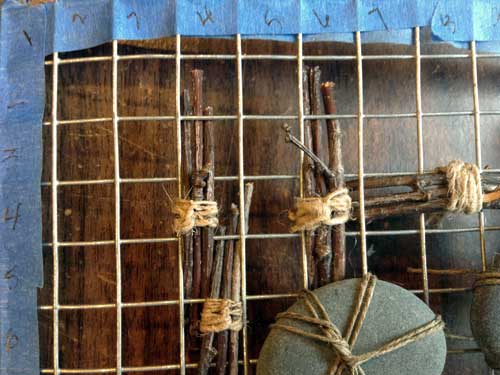
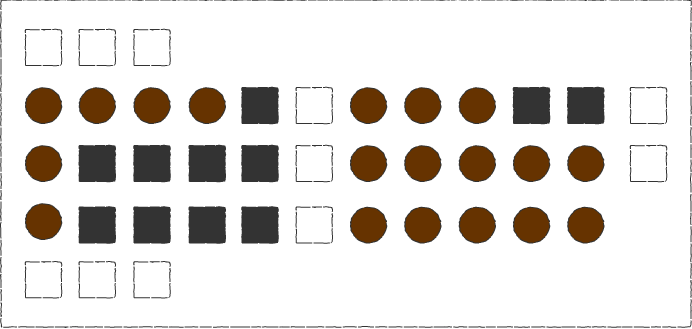
The nursery rhyme is in Morse Code with the substitution of a bundle of sticks for each dot and dash. Each bundle has three sticks and is bound with nettle. A vertical orientation is a dot, horizontal is a dash.
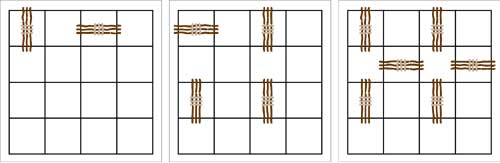
Code for A, B, and the Question Mark.
Each letter spans 4 squares by 4 squares. I often use Flash for layout. Make a symbol for each code component, with easy peasy replace. It is a quick way to see potential problems before making a paper and pencil sketch.
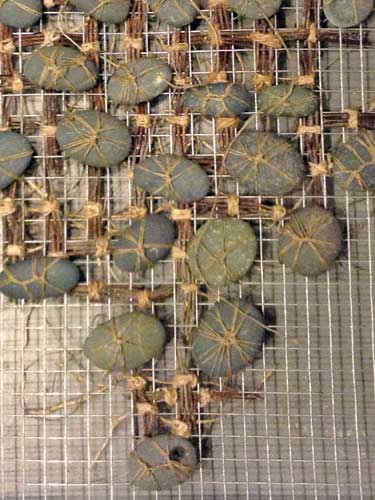
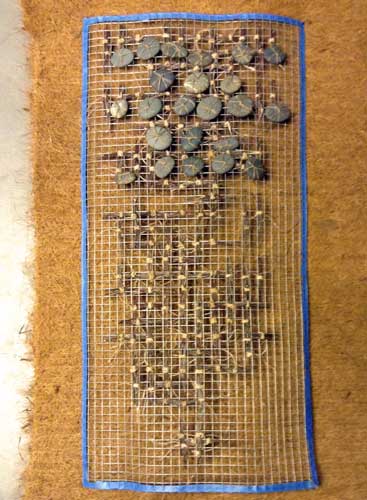
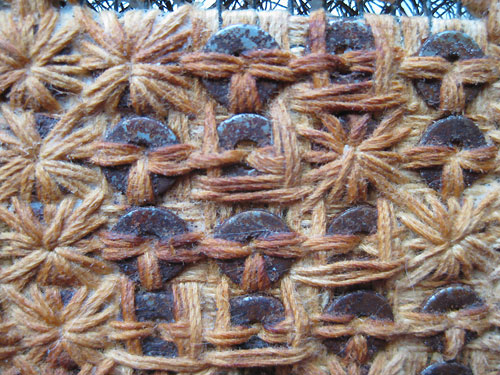
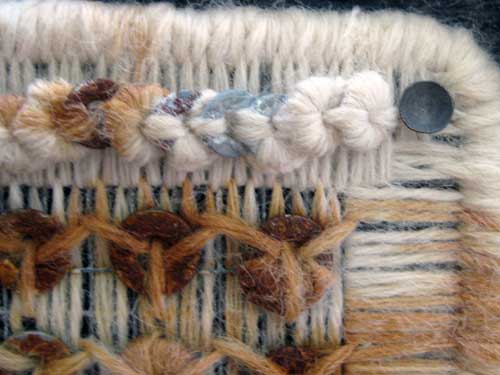
In addition to the bundles for the code in each 4×4 section, there will also be a stone bound with hemp. This is a detail of some of the completed work. I wait until I am finished with all of the binding before addressing any long strings on the back.
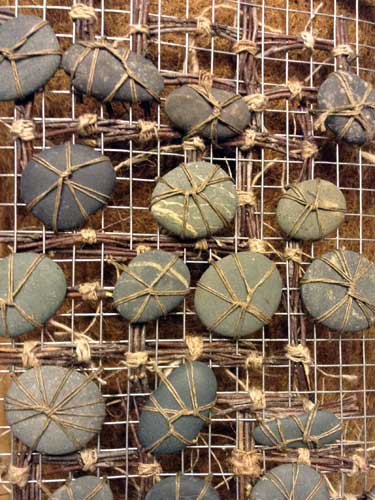
The size of the stone will be dictated by the code. Letters can have 1, 2, 3, or 4 dots/dashes. Fewer code bundles allow for larger stones. The question mark has 6 bundles for the code.
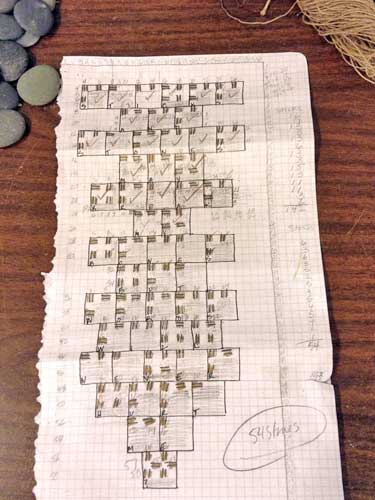
Sketch in Use. I always use paper and pencil for my working sketch. I can write on it. Mark off bits when completed.
The sketch has each square numbered. I taped and numbered the edge of the metal mesh. It makes work easier with fewer mistakes. Depending on the binding, tearing out a mistake can take longer than the actual binding time. The tape is also good for preventing possible cuts. The metal mesh can be quite sharp.
The piece will be fairly heavy. The plan is to sandwich a piece of coco fiber blanket between the code piece and an additional piece of metal mesh. Rather like the three layers of a typical quilt. If I stitched through all three layers or hand tied them together, it would be even closer to quilt making. I always wanted to make a quilt, but not keen on cutting little bits of flat fabric and then stitching them together.
Things to do–Thinking about filling some of the open space of the mesh, weaving in nettle or hemp. It probably would feel more like a piece of fabric. Still want to see the coco fiber, especially the raw edges.
There are 3 squares allotted for the border. Haven’t planned what type of binding or embroidery to use. Need to see the sticks and stones bound in before making that decision.
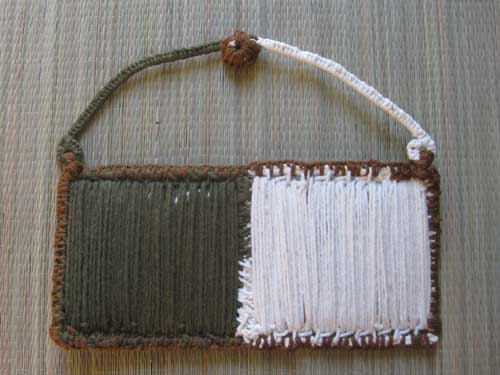
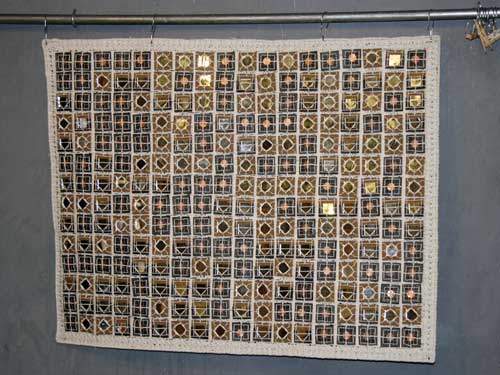
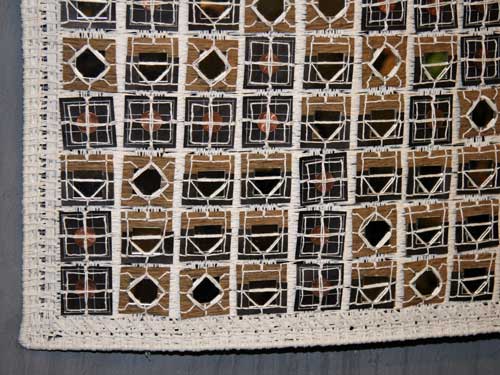
This is a birthday celebration piece. The cream side contains the originally date of birth. The green side is the day with the current year. Morse Code is used with green cord substituted for dashes and rust cord for dots.
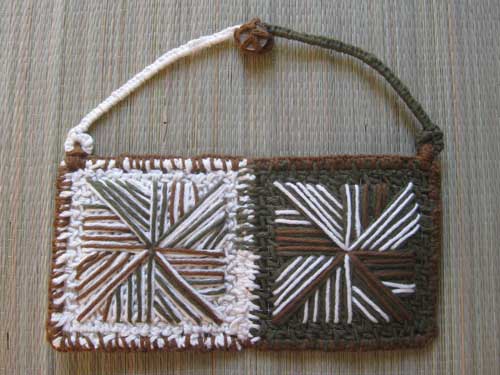
The date begins in the upper left and works around clockwise.
Pre-Wax
Planning to wax the entire piece to add some age and to keep everything in its proper place.
I have been dinking around with various ways to finish off the backs of pieces. The back is needed to complete the piece. Even if you cannot see the back it does exist. And I don’t want the wall showing through if there is open stitch work.
Recently I have been using starched burlap because I can stitch in title, date of piece, and my name in code.
This is the first time adding strands of cord to the back with the intent of using the piece rather like a loom. Still deciding if I want to give that a try.
Since the waxing should only take a couple of hours I have plenty of time before my July 3rd deadline to make the decision.
Materials
Hardware Cloth, Cotton Fiber, Metal, 1954 Penny, Rebar Ties
Scale
9.5″ x 8.5″ x .75″
Depth may change if I decide to build a frame/box as part of the piece.
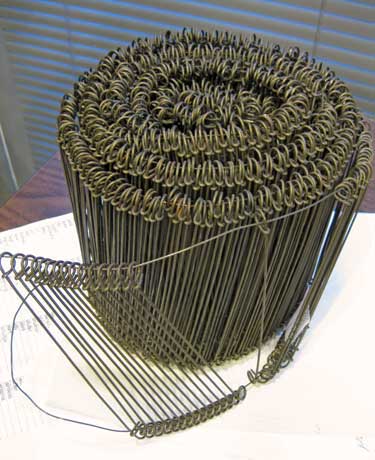
Rebar ties make for a nice hanger. I bought the bundle years ago thinking they would be a great art material. Tried using them several ways, but they haven’t revealed themselves to me as of yet. So, I have been using them for hangers for some small pieces.
Sometimes when I begin a project I make a layout in Flash. By making symbols for each letter and number I can quickly compose a layout while preventing errors in the code.

Vertical Layout 05111963

Horizontal Layout 05112013

Horizontal 2013 Over Vertical 1963

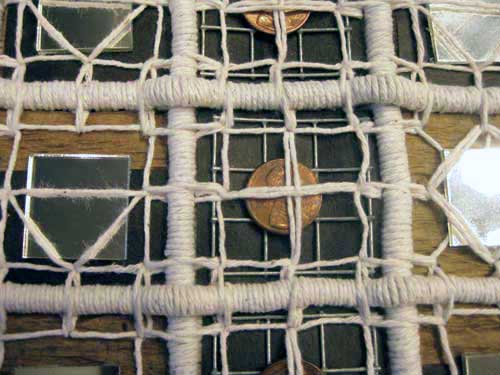
Layout With Dated Pennies
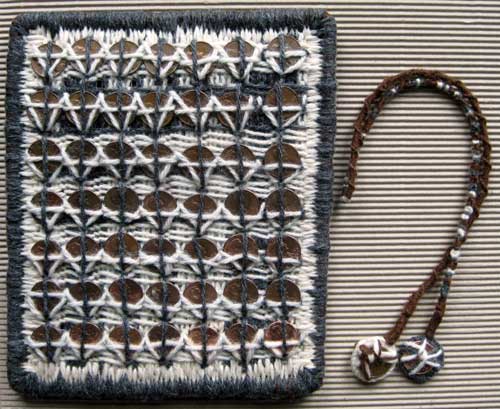
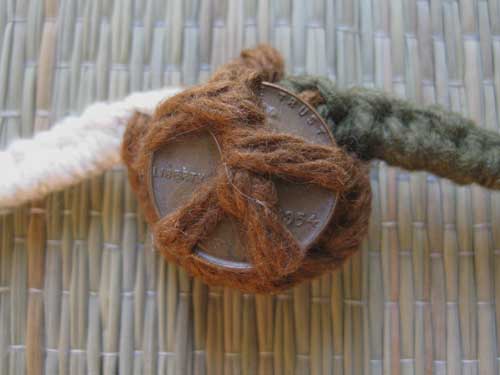
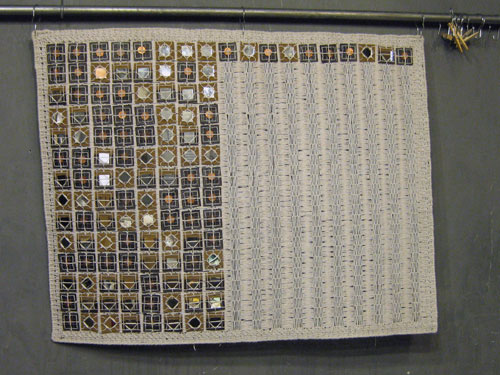
The knotted piece connects two pennies (1963 and 2013) is to be hung next to the woven piece. There is a sentiment in Morse Code substituting knots for dots, dashes, and spacers. Grey knots represent dots, cream knots represent dashes, and rust knots are used as spacers between letters of words and larger spaces between words.
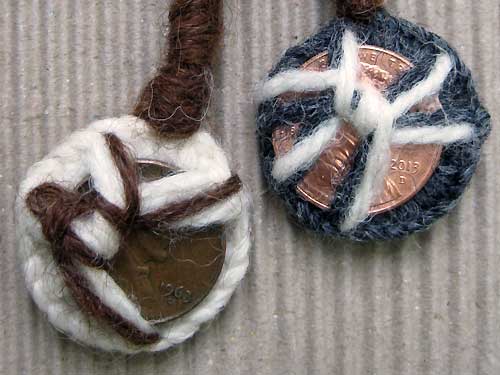
Detail of component to hang next to woven piece.
The next part of the process is to construct a cedar box/frame. The woven piece will probably be attached with brads. I haven’t decided on the hanger for the knotted component.
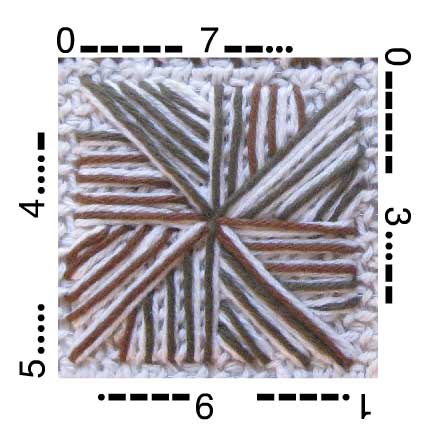
I am in the process of completing a personal project to celebrate the 40th birthday of a family member. I saw an image of nautical flags used for code and liked the idea of each flag representing a letter of the alphabet. I decided to make my own alphabet of stitched pieces for each letter of the alphabet, numbers from 0 to 9, and two types of spacers. I have included images of the actual stitched blocks that I used for this project. The blocks are composed of a piece of 1/4″ hardware cloth, a piece of starched burlap, and cotton embroidery floss.
I attached the blocks vertically together with jump rings just to get a notion of how they would look. Each block is approximately 1.5″ x 1.75″ and the spacers are .75″ and .5″ in height which makes the pieces if stitched together approximately 1.5″ wide and 63″ in height.
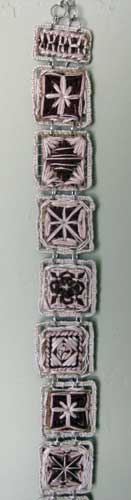
While the jump rings are a visual distraction, I do like the the vertical arrangement. When I decide for sure, I will build a narrow cedar box/frame to house the blocks. Currently the plan is to wax the blocks and attach them to the inside of the box with brads.

Block Number 0

Block Number 1

Block Number 2

Block Number 3

Block Number 4

Block Number 7

Block Number 9

Block Letter A

Block Letter B

Block Letter C

Block Letter D

Block Letter E

Block Letter H

Block Letter I

Block Letter L

Block Letter O

Block Letter R

Block Letter S

Block Letter T

Spacer 1

Spacer 2
Last night I completed the verticals and 4 horizontal rows. I have an additional 9 horizontal rows and 2 borders before I can “age” the piece.
Aging can be the most exciting part of the process because it can be somewhat destructive. It takes the “newness” edge off of the work while integrating the materials and giving the work a sense of history.
This was prior to completing the verticals and beginning the horizontals.
First Horizontals
This weekend I am planning to test patina and wax techniques. I also need to decide how to hang the piece. Box it or not. I do love boxes and have a tendency to want to box up everything.
My love for boxes started with the empty box as the piece.

Adele is part of my Avian Headbox series
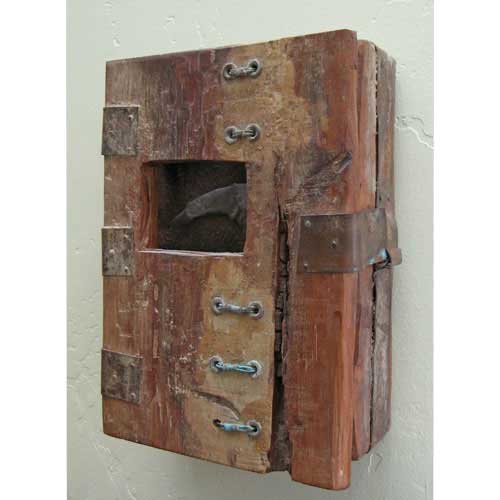
The box element of my Tools for Rent or dagger series was for protection, storage, and presentation.
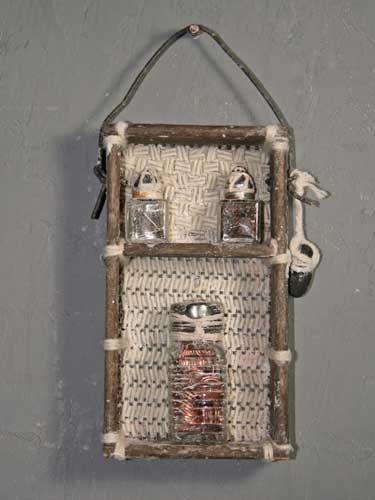
I opened up the box for Wholly Luck which is part of my Make Your Own Luck series
My website is GirlArtist.com. Nancy Scarry Girl Artist is my take on Wile E. Coyote Super Genius.
Last night I was reading through a few blogs that I subscribe to, and ran across reference to rust dyeing. I snagged loads of oxidized bits from my Dad’s shop that might work nicely.
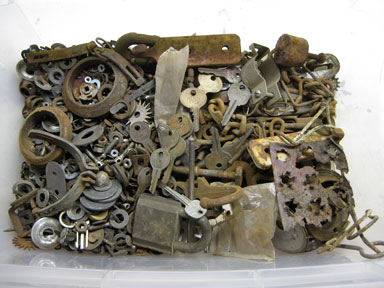
Of course I would want to place the items so the images left behind make coded messages.
It is interesting that the techniques mentioned are not all that different from some techniques used to apply patina to metal. One site suggested placing the wet fabric wrapped around metal in a plastic bag. Sounds a bit like fuming to me.
I wonder why I hadn’t thought of using patination techniques as a transfer method. I have rusted metal bits that remained in pieces. They were either rusted first or after they were bound into the piece.
Detail of a work in progress–Stained by the Past
A few highlights of what I found–
Vinegar is used straight or as a 50/50 with water, bath or in a mist bottle
Contact time can be a day to 5 days. Variables would include the color and type of the fabric used, and the type of rust applied, amount of saturation of fabric. Misted fabric would dry quicker than fabric that has been saturated and placed in a plastic bag or container to keep fabric damp.
Neutralizing the rust process requires saturating the rusted on fabric with a saline solution, and a washing. The saline solution can be as weak as 1 tablespoon to a gallon of water.
On The Natural Dye Notebook I found a technique for making a rust solution that can be applied with a brush to fabric.
Mix a small amount natural rust with water, I generally use one teaspoon rust to one cup liquid, or with soy milk…
The blocks have been tacked on. Need to let the piece rest. Then a check to make sure the code is correct
I noticed that a couple of the blocks representing dots have the binding vertical rather than horizontal.
Will need to correct that. It is important that the texture of the tree wrap and binding be horizontal for proper alignment with the blocks representing dashes and spacers.
Progress continues–starch was applied to the background, took two days to dry.
Tonight I started binding on the blocks.
The edge of hardware cloth can be sharp enough to wound. Bound on a rope to act as an edging.
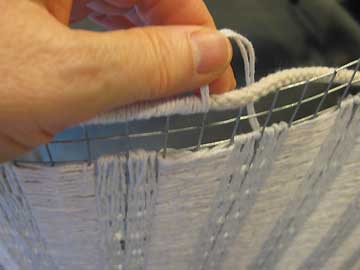
Then filled in the border with a couple of stitches.
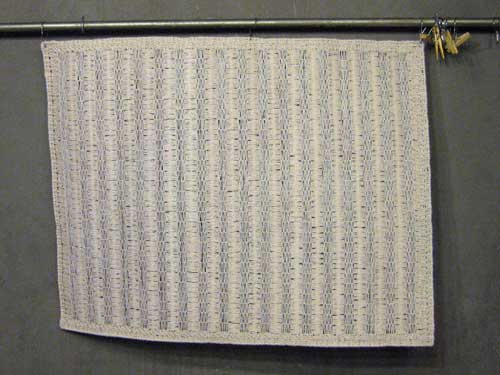
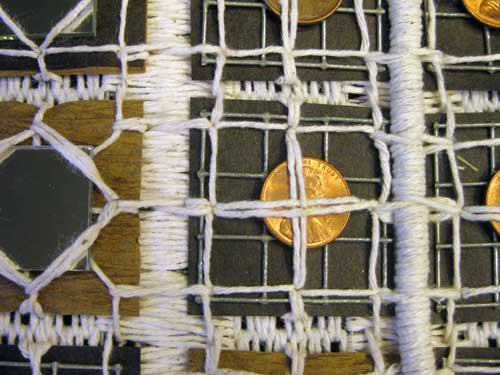
Completed Background
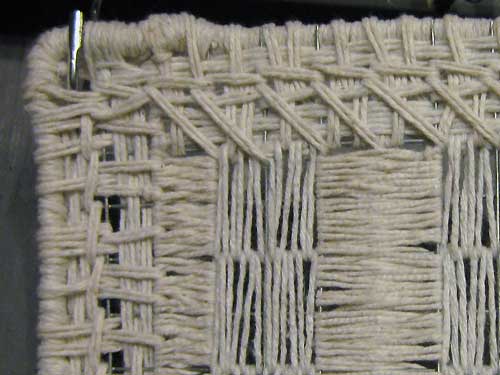
Detail of Completed Background
I am considering binding pennies onto the border with a message in Tap code. In Tap code the letters of the alphabet are laid out in a 5×5 grid.
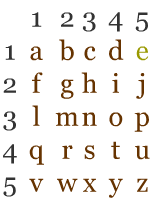
The code for E is 1,5. The code for the letter K is the same as the letter C.
Often when I refer to Tap code I actually use a grid of 11, 5 spaces for the row and 5 spaces for the column with a space between. I fill in the empty spaces with a filler component; and add three spacers at the start of words, in between words, and at the end of words. This is a quick example of how I start laying out text in code–
The word see in my altered version of Tap code.
I am pretty sure that I am going to give the background an application of liquid starch before binding the blocks to it. The starch will prevent fraying and any knots from coming undone. Usually the “fabric” will feel quite like canvas.
Or I might decide to age the hardware cloth which will alter the appearance of the fiber. The appearance of weeping stain might occur.
An example of oxidized metal that stained the fiber.