After Bath…

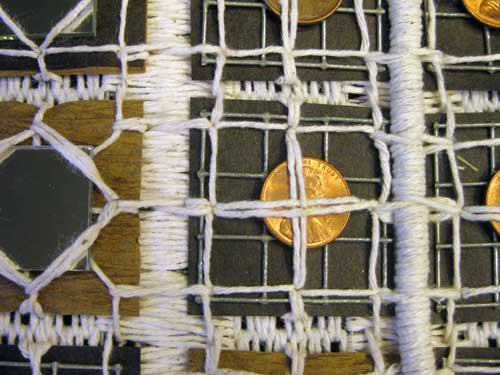
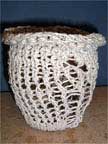
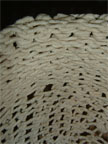
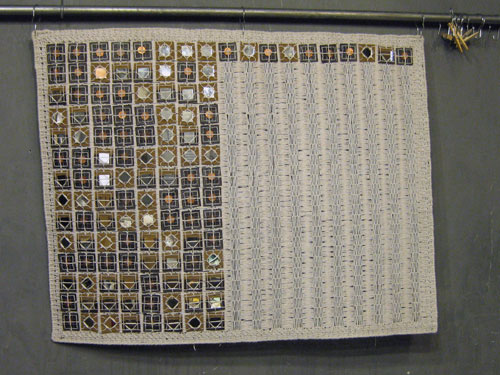
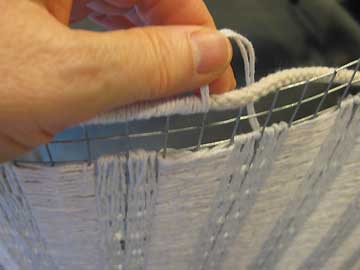
I have been trying to figure out how to age/distress wool pieces. I was pretty sure that cold wax would be the solution, but an interesting thing happened. I removed the felt that I had stitched onto the back of a piece to find casemaking moths living in a crease near the bottom.

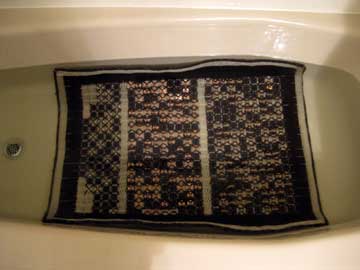
That was it, nothing left to lose. I filled the bath with water and sodium bicarb. Tossed in the piece and left it overnight.

Piece in Bath

The next morning I applied a solution of peroxide, white vinegar, and salt.

Piece After Bath

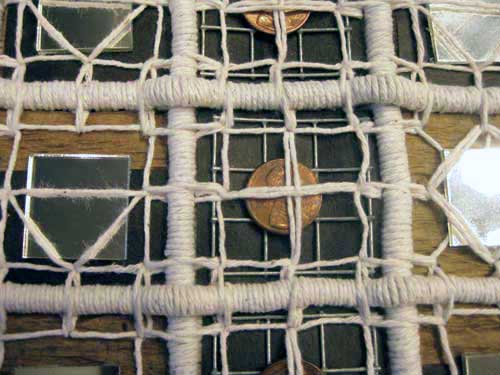
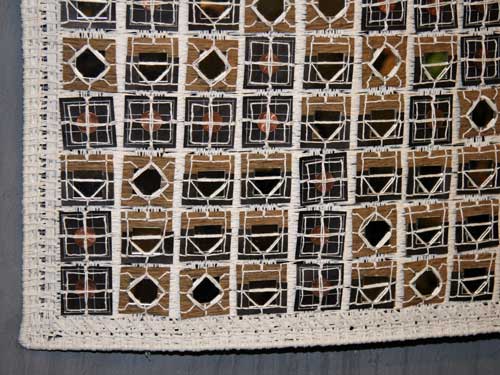
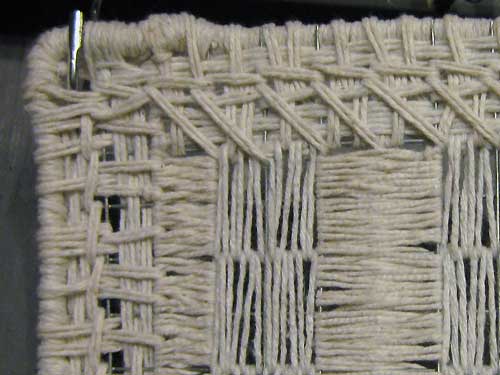
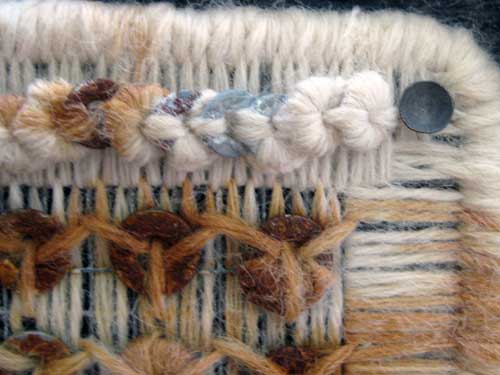
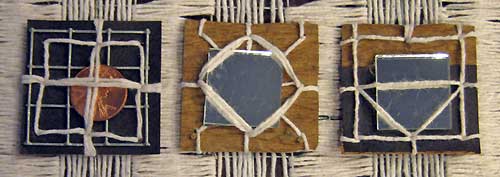
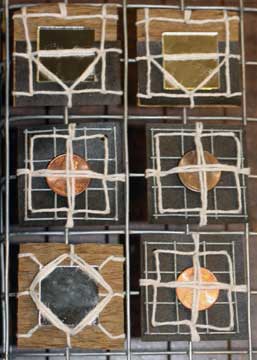
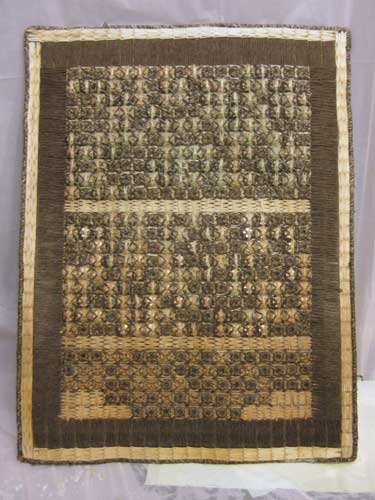
Then wrapped the piece in plastic, a bit of a brief fuming. When I unwrapped the piece sometime in the afternoon, much of the metal had oxidized. I took the piece outside and sprayed it down with the garden hose. The piece was left outside to air dry and catch some sun.

My hope is a soak overnight in salt water, saturation with a metal oxidizer, a drenching with water, and some sun would break the moth cycle.

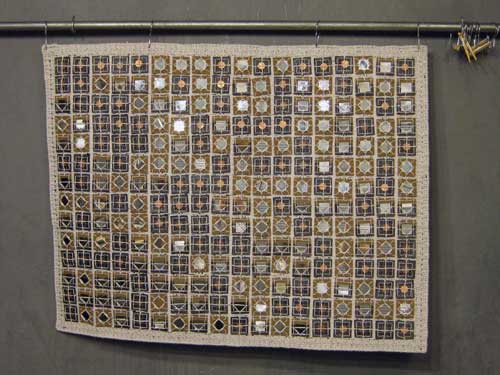
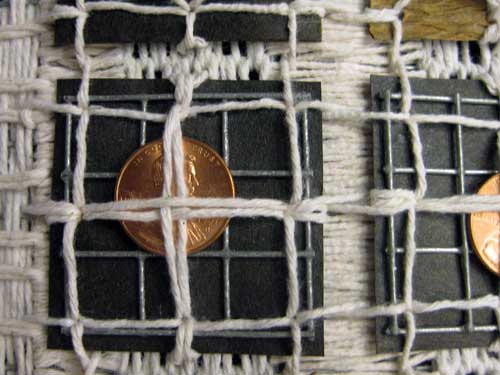
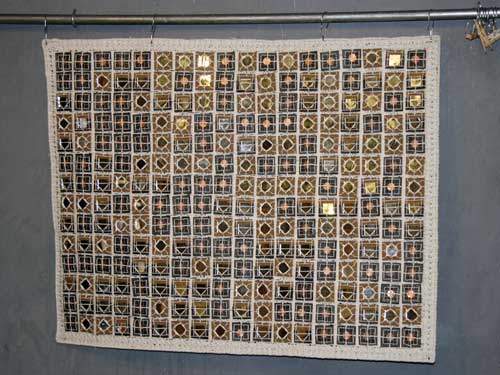
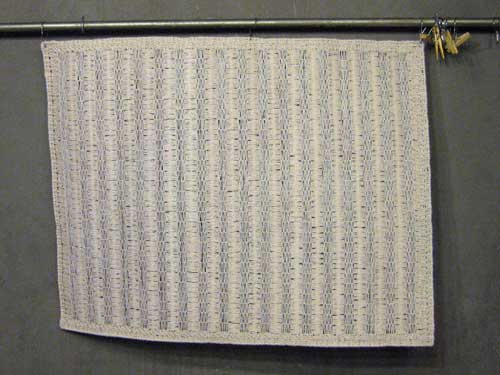
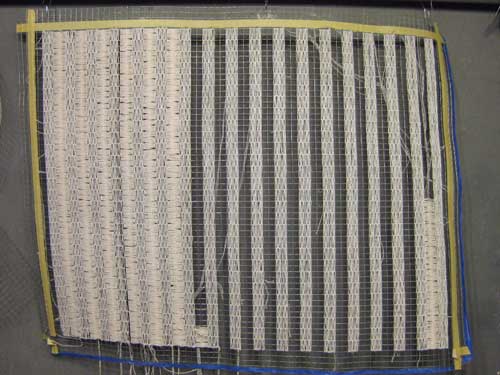
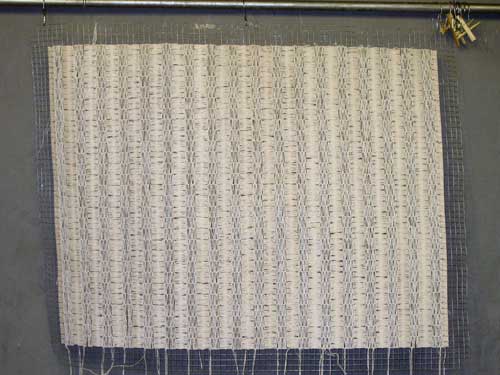
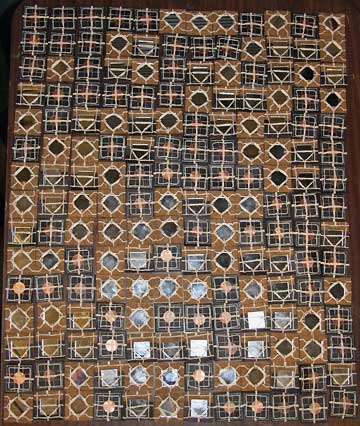
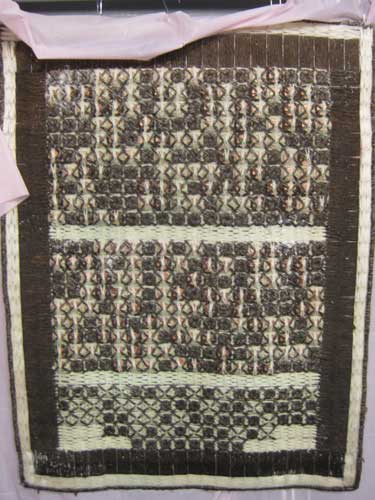
This is how the piece looks tonight.

Piece With Rust

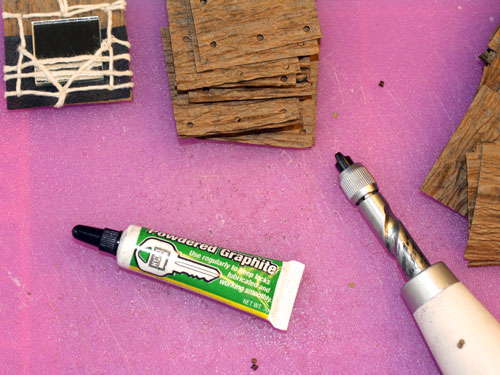
Tomorrow I plan to give the piece an application of shellac. Yep, bug goo. I have been testing some oxides mixed with denatured alcohol, then added to shellac.

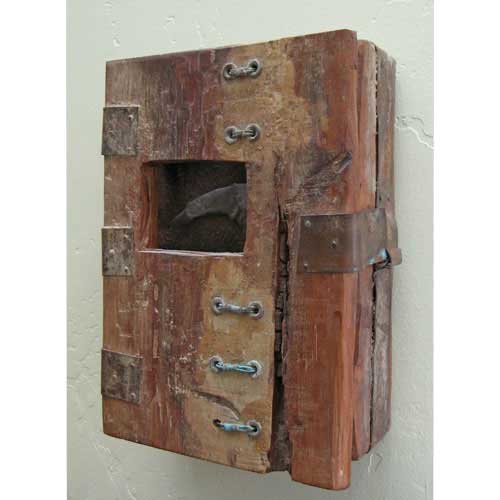
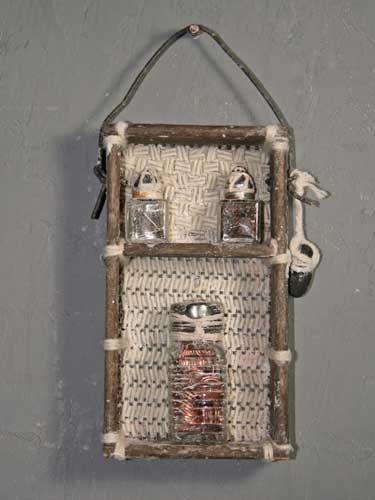
Eventually, it will be time to build a frame/box most likely out of cedar.


Penny Piece Yet Again

Last night I completed the verticals and 4 horizontal rows. I have an additional 9 horizontal rows and 2 borders before I can “age” the piece.

Aging can be the most exciting part of the process because it can be somewhat destructive. It takes the “newness” edge off of the work while integrating the materials and giving the work a sense of history.

Verticals CU

This was prior to completing the verticals and beginning the horizontals.


Horizontals

First Horizontals


This weekend I am planning to test patina and wax techniques. I also need to decide how to hang the piece. Box it or not. I do love boxes and have a tendency to want to box up everything.

My love for boxes started with the empty box as the piece.

Adele

Adele is part of my Avian Headbox series


Anzen

The box element of my Tools for Rent or dagger series was for protection, storage, and presentation.


Wholly Luck

I opened up the box for Wholly Luck which is part of my Make Your Own Luck series


My website is GirlArtist.com. Nancy Scarry Girl Artist is my take on Wile E. Coyote Super Genius.


See A Penny Continuation

Been busy making apps, so little studio time in the past couple of weeks. Finally some studio time this weekend.

When you are not able to have consistent studio time, sometimes going back to a project means reacquainting yourself with it.

Current

Decided to add wrapped rope to emphasize the grid, to cover the edges of the blocks, and to give more of a quilt-like feel.

I have found that often cotton rope has a synthetic core. I didn’t know however, that cotton Venetian Blind cord is made with a synthetic core as well. And that synthetic isn’t listed on the label. The fellow working in the store said that if it wasn’t on the label it wasn’t in the rope or cord.

I purchased two types, the Venetian Blind cord for the grid and the thicker clothesline rope for the border.

Continuation 1

I cut lengths of sash cord to use for the verticals, then removed the core.

Continuation 2

The main reason that I do not want a synthetic core is because I am planning to use a hot process on the piece. Nylon melts. The removed nylon can be cut up and used in other processes.

I wrapped the lengths of sash cord by first inserting one end of the cotton twine through the sash cord.

Continuation 3


Yep, my fingernails are a bit green. I spent a couple of hours pruning my Brugs and Datura.

Datura


Wrapping was done by simply rotating the Venetian Blind cord. When nearly wrapped, I cut the cotton cord, slipped on a needle, and inserted the tail up through and out.

Continuation 4

Before and After Wrapping

Continuation 6

I have a couple of verticals to finish before starting the horizontals, and then adding a border. The wrapped cord needs to be added to the left of the penny blocks.

Continuation 8


Penny, Penny…

There is progress, but it is taking so long to complete the project. I haven’t had loads of time for studio work. I was away because of family stuff and I have been working on several app projects. Can only manage a couple of studio hours in the evening.

The blocks are tacked in place and now I am stitching them onto the background. Pretty sure that I will not be happy with the stitching until it is more substantial. Perhaps a knot at every hole–3 on each side, would mean 12 knots for each of the 252 blocks or 3,024 knots.

Binding

I haven’t yet decided how I will “age” the piece. Currently leaning toward wax with heat or flame. I do love to torch things. I will need to make some test pieces to see how the materials behave.

There is also the possibility of using asphaltum, which is somewhat consistent with roofing felt and tree wrap. In the past when I used asphaltum I willy-nilly mixed it with shellac and applied it with a brush.

Or sugar. Sugar has been used as a stiffener for crochet work. I gave it a go several years back. Made a cotton open weave vessel.

Sugar Stiffener

6″ x 5.5″ x 6″
1 part water with 2 parts Sugar (I used a raw sugar so it did change the color of the cord)
Heated to dissolve, but didn’t boil. This takes a little time.

Sugar Stiffener Detail

I left the hot sugar in the pot and tossed in the piece to saturate the cord.
Blocked it over a jar covered with foil and placed a piece of plastic under. This is pretty drippy stuff.

The vessel has maintained its form, and has not attracted ants.


See a Penny Blocks Attached…

The blocks have been tacked on. Need to let the piece rest. Then a check to make sure the code is correct
Blocks Attached

I noticed that a couple of the blocks representing dots have the binding vertical rather than horizontal.
Detail
Will need to correct that. It is important that the texture of the tree wrap and binding be horizontal for proper alignment with the blocks representing dashes and spacers.


See A Penny Continued Again…

The edge of hardware cloth can be sharp enough to wound. Bound on a rope to act as an edging.

See Penny Edge.jpg

Then filled in the border with a couple of stitches.

Completed_Background

Completed Background

Completed_Background_Detail

Detail of Completed Background

I am considering binding pennies onto the border with a message in Tap code. In Tap code the letters of the alphabet are laid out in a 5×5 grid.

Tap Code Grid

The code for E is 1,5. The code for the letter K is the same as the letter C.

Often when I refer to Tap code I actually use a grid of 11, 5 spaces for the row and 5 spaces for the column with a space between. I fill in the empty spaces with a filler component; and add three spacers at the start of words, in between words, and at the end of words. This is a quick example of how I start laying out text in code–

See in Tap Code

The word see in my altered version of Tap code.

I am pretty sure that I am going to give the background an application of liquid starch before binding the blocks to it. The starch will prevent fraying and any knots from coming undone. Usually the “fabric” will feel quite like canvas.

Or I might decide to age the hardware cloth which will alter the appearance of the fiber. The appearance of weeping stain might occur.

Stained

An example of oxidized metal that stained the fiber.


See A Penny Continued Sunday Morning…

Pea Twine

This is why it is important to purchase more than enough twine for a project.
When you return to the store to buy more it may not be the same color.

Pea Twine Stitches

Since I am filling the background with two stitches, it made for an easy decision to make
the horizontal stitches one color and the vertical stitches the other color.

Background Sunday Morning

Background Sunday Morning

Blocks on Background

Blocks on Background
The blocks will be bound to the background and then stitched together to give the appearance that the stitching is holding them together. The tree wrap and roofing felt are not materials strong enough to support the weight of the piece. I’m pretty sure that I will use liquid starch on the background before attaching the blocks. Liquid starch is great for stiffening, to keep knots in place, and to prevent fraying. Haven’t yet decided how I will age the piece. Since I am using cotton I can use wax and fire.


Work In Progress–See A Penny…

Tonight completed all 180 “blocks” for my current Make Your Own Luck piece.

Blocks

The plan is to attach the blocks to a piece of 1″ hardware cloth to make the piece more stable and stronger for hanging. Since the “blocks” are approximately 1 3/4″ there will be space between for a reinforced stitched border.

One Inch Hardware Cloth


Graphite

All the hole punching caused the screw punch to freeze up a bit. Graphite solved the problem.